
How to Extend Your GE Radiant Surface Element Life — WB30T10130 Maintenance Guide
Always unplug the range before servicing. Glass cooktop surfaces can shatter if dropped or impacted. Support the hinged glass top securely with a 2x4 or sturdy box — never work underneath without proper support.
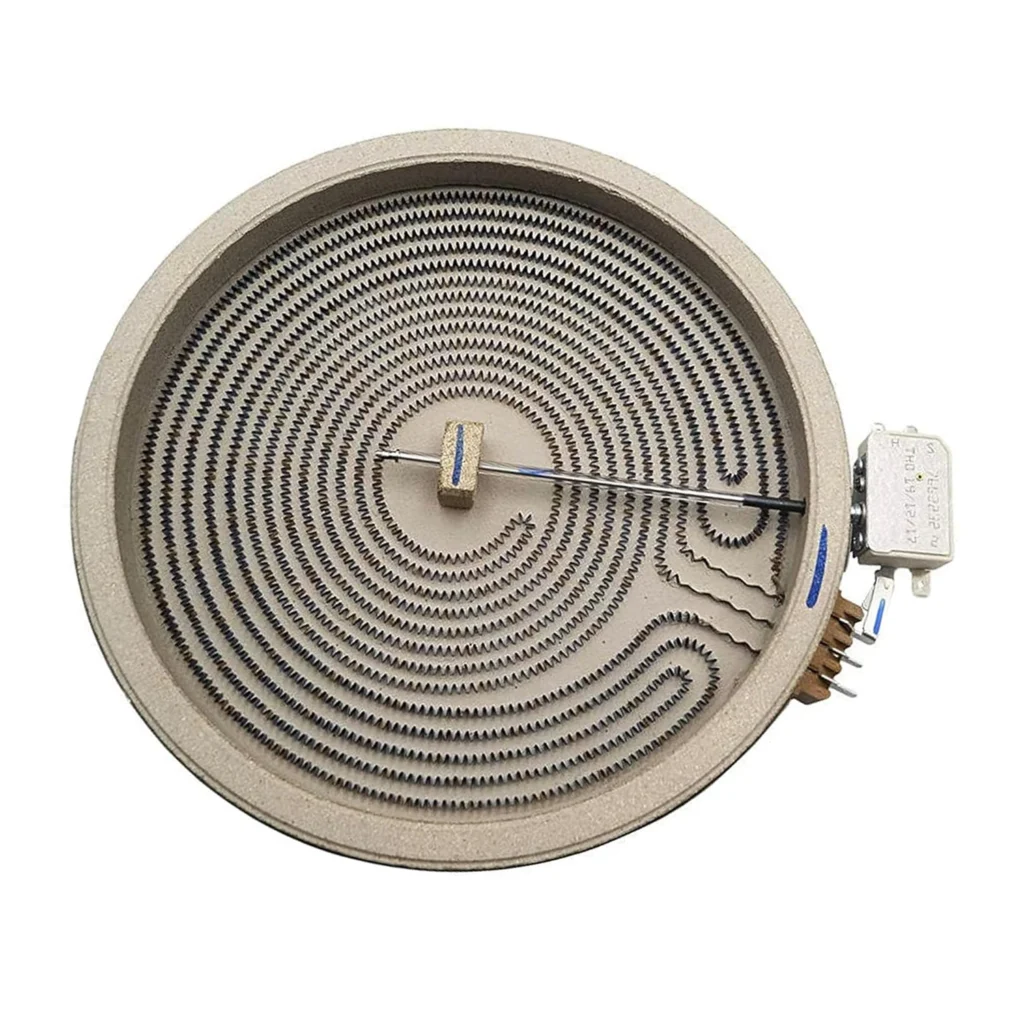
Most dual radiant elements like the WB30T10130 should last 8–12 years, but I see them failing at 4–6 years all the time. The culprit? Not the heating coils themselves — it's usually the spade connectors burning out or the clamps working loose from repeated thermal expansion. One repair tech told me he replaced three of these in one week, all with the same deteriorated heat shrink on the inner coil connectors.
You can double the lifespan of this $156 part with some basic attention. Here's what actually works.
How Long Should It Last?
Under normal conditions, a quality radiant element lasts 8–12 years. That's based on daily use at medium-high heat for 30–45 minutes. But here's the problem: most failures happen early because of connection issues, not coil burnout.
The WB30T10130 has two separate circuits — an outer ring and an inner coil. The inner coil typically fails first because its spade connector runs hotter and the heat shrink deteriorates. When that happens, you'll notice the center won't heat while the outer ring works fine.
What affects lifespan:
- Cookware contact: Warped pans create hot spots that stress the coil unevenly
- Spills and boil-overs: Sugar-based liquids corrode the ceramic and seep into connector areas
- Thermal cycling: Cranking from high to low repeatedly flexes the coil mounts
- Connector condition: Loose or oxidized spade terminals create resistance and heat
Signs It's Wearing Out
You'll know something's wrong before it completely fails. Here's what to watch for:
Center Coil Stopped Heating
This is the #1 failure mode. You turn on the dual element, the outer ring glows red, but the inner coil stays dark. One owner described it perfectly: "Inner part of element wasn't working." That's almost always a broken inner coil or a failed spade connector on the center circuit.
Pop the glass top (safely propped with a 2x4) and check the spade connector on the inner coil wire. If the heat shrink looks crispy or the metal's discolored, that connection's running too hot.
Element Stopped Heating Completely
When nothing lights up at all, you've either got a control board issue or both circuits failed simultaneously. Before you order a new element, test the connections. Use a screwdriver to gently pry up one of the clamps — if the element shifts or the spikes aren't seated in the ceramic holes, it's just loose.
I've fixed three "dead" elements that just needed the clamps reseated properly.
Uneven Heating or Slow Response
The element takes forever to heat up, or one section glows brighter than another. That's often oxidation on the spade connectors creating resistance. Pull the connectors, hit them lightly with fine sandpaper, and reconnect with fresh heat shrink rated for 400°F minimum.
Maintenance That Actually Extends Life
After Each Use
Let the element cool completely, then wipe the glass surface with a damp microfiber cloth. Don't use abrasive cleaners — they scratch the ceramic coating and create rough spots where spills stick.
For stuck-on residue, use a razor blade scraper at a 45-degree angle. Work gently. You're removing carbonized food, not scraping paint.
Monthly Check
Once a month, turn on each heating zone and verify both circuits light up evenly. For the WB30T10130, that means checking that the inner coil and outer ring both glow within 30 seconds.
If one circuit's slow or dim, unplug the range and inspect the connections underneath. That's your early warning.
Annual Inspection
Once a year, pop the top and inspect the clamps and spade connectors. You'll need to remove the two screws under the range top and hinge the glass up. Prop it securely — a 2x4 works great.
Check these specific points:
- Clamps are tight and the small spikes are seated in the element holes
- Spade connectors aren't discolored or loose
- Heat shrink isn't cracked or melted
- No visible cracks in the ceramic element surface
If the heat shrink looks bad, replace it now with high-temp tubing. That $3 fix prevents a $156 element replacement.
When to Replace vs Maintain
Replace the element if:
- You see visible cracks in the ceramic surface
- The coil is physically broken or sagging
- A spade connector broke off at the element (not the wire)
- The element glows in spots then goes dark (internal break)
Keep maintaining if:
- Connections just need cleaning or new heat shrink
- Clamps worked loose but the element's intact
- It heats evenly but slowly (usually a control issue, not the element)
One DIYer summed it up: "Watched a pregnant woman on YouTube do it, so how hard could it be?" He was right — the repair took 20 minutes with a wrench and screwdriver. But if you'd checked those connections annually, he probably wouldn't have needed the new element at all.
Frequently Asked Questions
Why does the inner coil fail more often than the outer ring?
The inner coil's spade connector sits in a hotter zone with less airflow. Heat shrink deteriorates faster, creating resistance that generates even more heat. It's a feedback loop. Check that connection first when troubleshooting.
Can I use regular heat shrink tubing on the spade connectors?
No. Standard heat shrink is rated for 200–250°F. You need high-temperature tubing rated for at least 400°F, preferably 500°F. Automotive or marine-grade works well. Hardware stores sell it in the electrical section.
How do I know if the clamps are seated correctly?
The small spikes on each clamp connector should bite into the ceramic material through pre-drilled holes in the element. If you can slide the element side-to-side more than 1/8 inch, the clamps aren't seated. Pry them up with a screwdriver, reposition the element so the spikes align with the holes, then press the clamps back down firmly.
Element showing wear?
WB30T10130 · Replace before it fully fails