
How to Replace WR49X10173 Dispenser Water Tube Heater Kit on GE Refrigerators — Step-by-Step
Always unplug the refrigerator before working with electrical components in the door. Low voltage can still cause shorts or damage control boards.
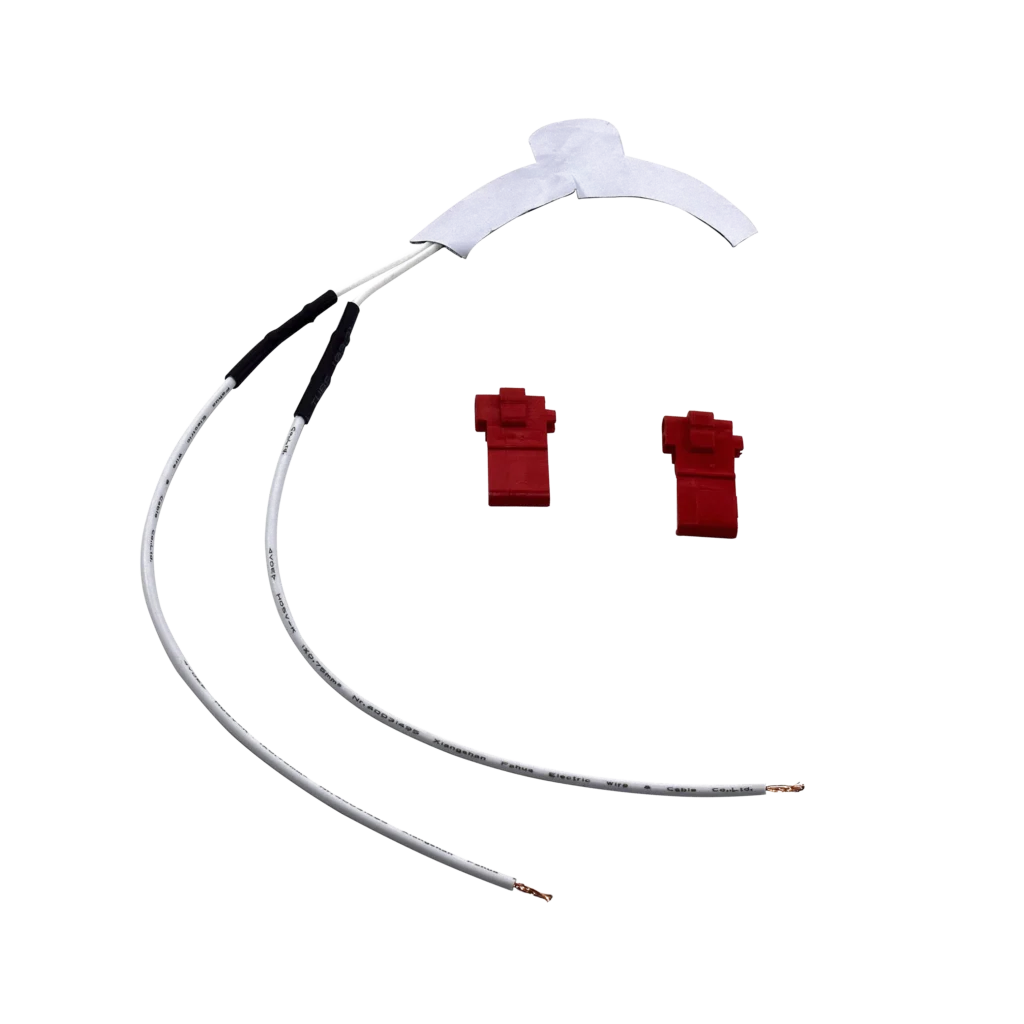
You press the water dispenser button and nothing comes out. Or maybe you get a trickle that turns into ice by the time it reaches your glass. This is the classic sign your dispenser water tube heater has failed — the part that keeps water flowing even when your kitchen drops below freezing. The WR49X10173 heater kit wraps around the water line inside your refrigerator door, preventing freeze-ups that stop water flow completely.
This repair works on dozens of GE, Hotpoint, and Kenmore side-by-side models including the GSS25JSRFSS, GSH25JSDBSS, PSS26MSWASS, and GSC21KGRW. The heater kit includes the heating element, adhesive backing, and wire connectors you'll need.
What You Need Before Starting
- Phillips head screwdriver
- Flathead screwdriver or putty knife
- Needle-nose pliers
- Electrical tape
- Towel (for any water drips)
Estimated Time: 30-45 minutes
Difficulty: Moderate — Requires removing door panels and working with electrical connections
Safety First
Unplug your refrigerator completely before starting this repair. You'll be working with electrical components inside the door, and even though the voltage is low, you don't want any surprises. If you can't reach the plug, flip the breaker. Keep a towel handy — there's usually residual water in the dispenser lines that'll drip when you access the heater.
Step 1: Remove the Dispenser Control Panel
Open your freezer door and locate the screws at the top of the dispenser control panel. Most GE models have 2-3 Phillips screws hidden behind the ice bin or in the top corners. Remove these screws, then gently pull the control panel forward. You'll see wire harnesses connected to the back — don't disconnect these yet. Just let the panel hang forward to expose the interior door frame.
Step 2: Access the Water Tube Inside the Door
The water tube runs vertically inside your refrigerator door from the bottom hinge area up to the dispenser. Look for a white or clear plastic tube with a heating wire wrapped around it — that's your old WR49X10173 heater. On some models, you'll need to remove additional screws securing the inner door liner. Use your flathead screwdriver to carefully pry off any plastic clips holding insulation or covers in place. Take photos as you go so reassembly is easier.
Step 3: Disconnect the Old Heater
Trace the heating wire to its electrical connector, usually located near the bottom of the door or at the dispenser housing. Disconnect the wire harness by pressing the release tab and pulling straight out. Now peel the old heater strip away from the water tube. It's held on with adhesive that gets stubborn over time. Work slowly to avoid damaging the water tube itself. If adhesive residue remains, clean it off with rubbing alcohol.
Step 4: Install the New WR49X10173 Heater Kit
Your new heater kit has a peel-and-stick backing. Start at the bottom of the water tube and spiral the heater upward, keeping the wire snug against the tube but not stretched tight. The heating element should cover the entire length of exposed tubing — typically 18-24 inches depending on your model. Once wrapped, connect the wire harness to the electrical connector. You should hear a click when it's properly seated. Secure any loose wiring with electrical tape to prevent it from rattling.
Step 5: Reassemble and Test
Replace the inner door liner if you removed it, making sure the water tube isn't pinched or kinked. Reattach any insulation covers and clips. Position the dispenser control panel back into place and secure with the original screws. Plug the refrigerator back in and wait 5 minutes for the system to initialize. Press the water dispenser paddle and listen — you should hear the water valve click and water should flow freely within 10-15 seconds.
Testing After Installation
Dispense a full glass of water to clear any air from the lines. Check for leaks around the dispenser housing and inside the door where you worked. Let the refrigerator run for 24 hours, then test the dispenser again. If your kitchen tends to be cold, pay attention during winter months — the water should flow consistently without freezing, which confirms your new heater is doing its job.
Frequently Asked Questions
How do I know if the heater is actually working?
After installation, feel the water tube through the door panel after the fridge has been running for an hour. It should feel slightly warm to the touch — not hot, but noticeably warmer than the surrounding door. If the tube feels ice-cold and you're in a cold environment, the heater may not be properly connected or could be defective.
Will this heater fix slow water flow from my dispenser?
It depends. If slow flow happens only in cold weather or after the fridge sits unused, yes — a failed heater lets the water line freeze partially. But if flow is always slow regardless of temperature, you might have a clogged water filter or low water pressure from your home's supply line. Replace the filter first before assuming it's the heater.
Can I use this heater on other refrigerator brands?
The WR49X10173 is specifically designed for GE, Hotpoint, RCA, and Kenmore models that originally used this part. It replaces AP4318572 and PS1766223. While the physical heater might fit other brands, the electrical connector and wattage specifications are matched to GE systems. Using it on a Samsung or Whirlpool fridge could cause electrical issues or void warranties.
Take photos as you disassemble the door panels — GE models use different clip positions and screw locations that are easy to forget during reassembly.
Need the part for this repair?
WR49X10173 · In Stock · Ships next business day