
How to Replace WR30X10093 Ice Maker Assembly on GE Refrigerator — Step-by-Step
Unplug refrigerator or turn off circuit breaker before starting repair. Water line will drip when disconnected.
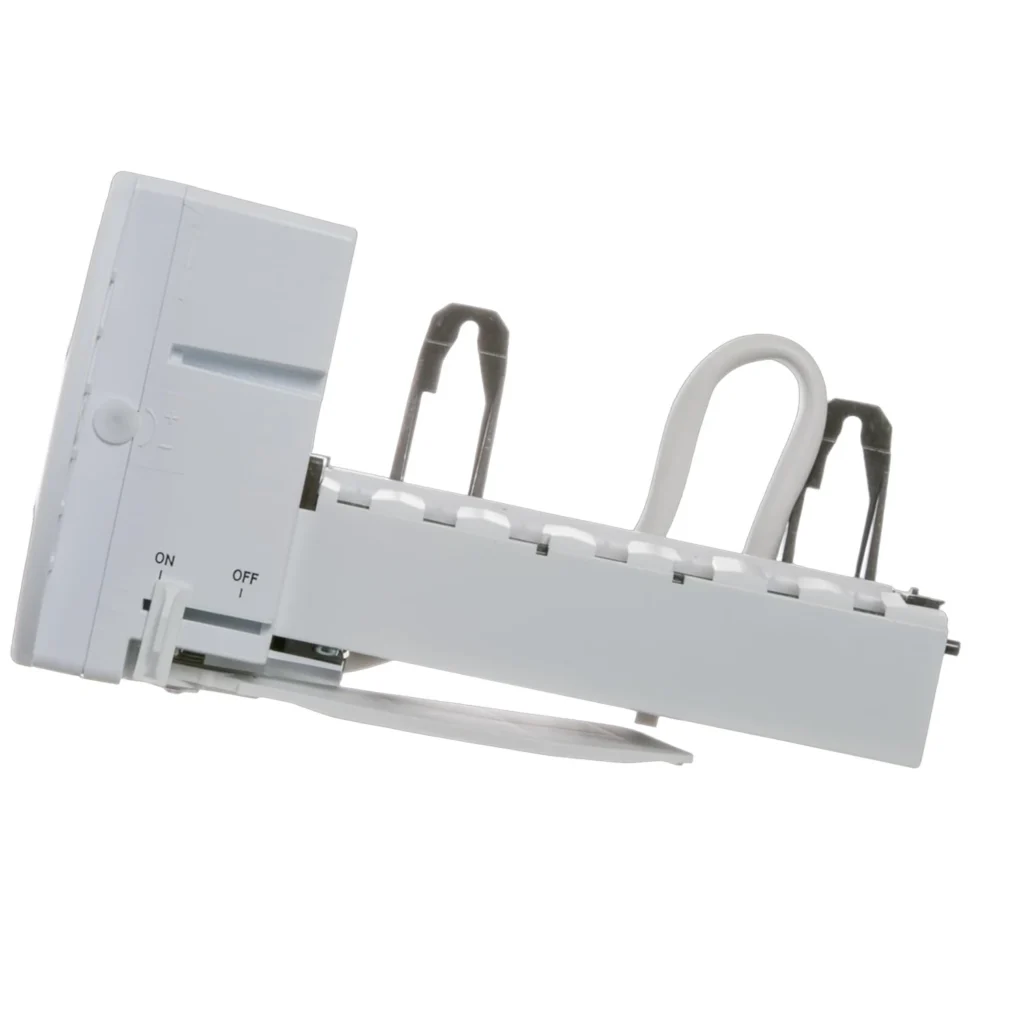
You open the freezer for ice and hear nothing. Your GE refrigerator's ice maker sits there completely silent—no clicking, no water filling, nothing. Or maybe it's making ice, but only a pathetic trickle that leaves you waiting days for a full bin. The WR30X10093 ice maker assembly is the complete replacement unit that fixes these problems on GE, Hotpoint, and Kenmore side-by-side models like the GSS25JFMDWW and PSS26SGRB.
What You Need Before Starting
- Phillips head screwdriver
- Flathead screwdriver
- 1/4-inch nut driver
- Towel (for catching water)
- Container to catch ice
Repair Time: 25-35 minutes
Difficulty: Moderate — You'll need to disconnect a water line and work in a tight freezer space
Safety First
Unplug your refrigerator before starting this repair. If you can't reach the outlet, turn off the circuit breaker. Working with 120V while reaching into a metal-lined freezer compartment is asking for trouble. Keep a towel handy because the water line will drip when you disconnect it—totally normal, but it'll save your floor.
Step 1: Remove the Ice Bin and Locate the Mounting Screws
Pull out the ice storage bin completely and set it aside. You'll see the ice maker mounted on the left side of the freezer. Look for two or three screws holding it to the freezer wall—these are typically located at the top and bottom of the unit. On models like the GSE25GSHPCSS, there's also a wire harness bracket secured with a single screw.
Step 2: Disconnect the Wiring Harness and Water Line
Find the white wire harness plug that connects the ice maker to the refrigerator. Press the release tab and pull straight out—don't yank on the wires themselves. Next comes the water line, which connects at the back of the ice maker. Use your flathead screwdriver to gently pry the retaining clip while pulling the line free. Have your towel ready because a little water will spill out.
Step 3: Remove the Old Ice Maker Assembly
With the electrical and water disconnected, remove those mounting screws you located earlier. Support the ice maker with one hand while removing the last screw—it's heavier than you'd think, about 3 pounds. Tilt the unit slightly forward and lift it off the mounting brackets. If it feels stuck, there's usually a tab at the bottom that needs to be lifted up and out.
Step 4: Install the New WR30X10093 Assembly
Your new WR30X10093 comes as a complete assembly ready to install. Position it on the mounting brackets at the same angle you removed the old one—bottom tab first, then pivot it back against the wall. Thread in the mounting screws but don't fully tighten them yet. Connect the water line first (you'll hear it click), then plug in the wire harness. Now tighten all screws firmly.
Step 5: Prime the Water System
Here's the part most people skip and then wonder why their new ice maker isn't working. Plug the refrigerator back in and locate the test button on the ice maker—it's usually a small rectangular button on the front edge. Press and hold it for 3 seconds until you hear the motor start to cycle. This flushes air from the water line. Let it complete one full cycle, which takes about 6 minutes. You should see water filling the mold.
Testing After Installation
Replace the ice bin and listen for normal operation sounds. Within 90 minutes, you should hear the ice maker cycling—a combination of water filling and the motor turning the ejector blades. Your first batch of ice (8-12 cubes) appears in about 2 hours. If you're hearing excessive noise or the ice maker is leaking, double-check that water line connection. The most common mistake is not pushing it in far enough to engage the locking clip.
Frequently Asked Questions
Will this fix my ice maker that's only making small amounts of ice?
Yes, if the problem is with the ice maker itself. The WR30X10093 includes a new fill valve, mold heater, and control module—all the components that regulate ice production. However, if you're only getting a few cubes per cycle due to low water pressure, you'll need to check your home's water supply line first. Normal ice production is 80-130 cubes per day.
Why is my new ice maker noisy compared to the old one?
New ice makers sound louder because their motor hasn't broken in yet. You're hearing the ejector mechanism working at full strength. Give it a week of operation—the sound will decrease as parts seat together. If you hear grinding or clicking that doesn't stop, the mounting screws might be too tight, preventing the unit from sitting flush against the freezer wall.
Do I need to replace the fill tube or water valve too?
Not usually. The WR30X10093 is a complete ice maker assembly that connects to your existing fill tube and water inlet valve. Only replace those components if they're visibly damaged or you've confirmed they're faulty through testing. Most "no ice" problems on GE models like the GSH25JSTASS and HSS25GFPDWW trace back to the ice maker assembly itself, not the water supply components.
Always press the test button to prime the water system after installation. This flushes air from the line and prevents first-cycle failures.
Need the part for this repair?
WR30X10093 · In Stock · Ships next business day