
How to Replace WH13X10053 Triple Water Inlet Valve on GE Washer — Step-by-Step
Always unplug the washer and shut off water supply before beginning. Be extremely careful when removing the hard plastic internal hoses from the valve — they can crack if forced.
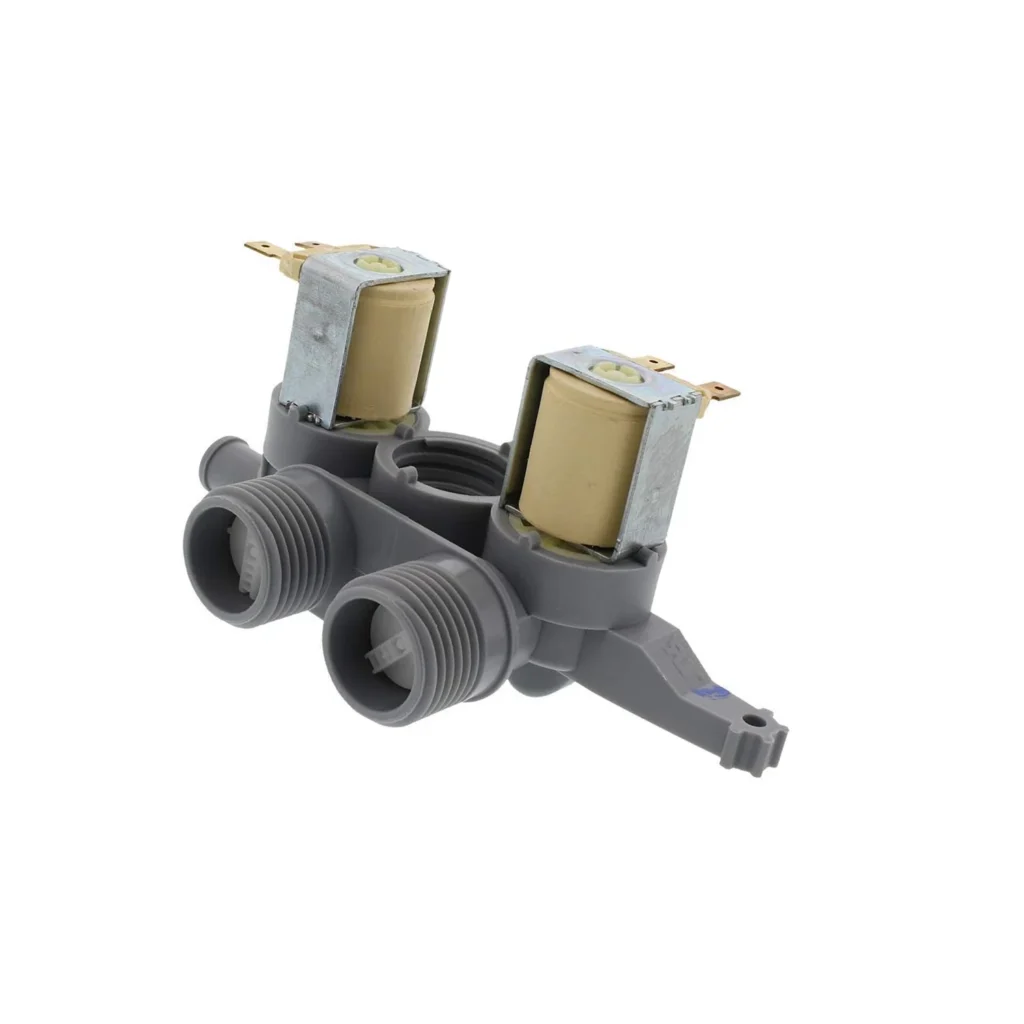
You start a hot water wash, but the tub fills with ice-cold water instead. Or worse — your GE washer keeps dripping long after the cycle ends, slowly flooding your laundry room floor. That's the triple water inlet valve failing, and it's one of the most common culprits behind temperature control issues on models like the GTWN4250D0WS, GTWN5650F2WS, and dozens of other GE top-loaders.
The good news? This repair is surprisingly straightforward. As one DIYer put it: "The simplicity of this repair surprised me. Finding the correct part on this site using the washer model number was easy and quick. From start to finish the whole process took less than half an hour." You don't even need to pull the washer away from the wall on most models.
What You Need Before Starting
This is genuinely an easy repair. The WH13X10053 inlet valve sits right behind the control panel, accessible from the front on most GE washers. Here's what you'll need:
- 1/4" nut driver or socket
- Flat-head screwdriver
- Needle-nose pliers
- Towel (for residual water)
- Small bucket or pan
Estimated time: 15-30 minutes | Difficulty: EASY
Safety First
Unplug your washer completely before starting. Turn off both hot and cold water supply lines at the wall, then disconnect the fill hoses from the back of the machine. Keep that towel handy — there's always residual water in the lines and valve assembly. Work with good lighting, and if your washer has been dripping, check the floor around it for standing water before you kneel down to work.
Step 1: Access the Control Panel
Locate the three 1/4" hex-head screws securing the control panel — they're typically along the top edge or just behind the console. Remove these screws, then gently tilt the control panel forward. You'll see metal tabs on the back that release when you angle it. Don't yank — there are still wires connected. One tech noted: "I did not have to move machine. Was able to access everything from front of machine; however, I did need to reach behind control panel to disconnect water lines."
Step 2: Remove the Old Valve Assembly
The triple valve is held by two more 1/4" screws. Remove these, but don't pull the valve out yet. First, disconnect the three electrical connectors — they should pull straight off with gentle pressure. Now here's the critical part: remove the internal water hoses. These hard plastic hoses connect to the valve with spring clamps. Squeeze the clamp tabs with pliers and slide them back. Then comes the warning from installation notes: "BE CAREFUL when removing the hard plastic hose from the Triple Valve as you remove the hose clamp." These hoses can be brittle, especially on older washers. Twist gently as you pull to avoid cracking them.
Step 3: Install the New WH13X10053 Valve
Position your new triple valve in the mounting bracket. The inlet ports face the back, the outlet connections face inward toward the tub. Secure it with the two mounting screws — snug but not overtightened. Reconnect those internal hoses, sliding each one onto its corresponding outlet port. Push the spring clamp back into position until it clicks. Make sure each hose is seated fully — a loose connection here means leaks later.
Step 4: Reconnect Electrical and Test Position
Plug the three electrical connectors back onto the new valve. They're different sizes, so they only fit one way. Give each one a gentle tug to confirm it's seated. Before you button everything up, double-check that no wires are pinched and the valve sits flush against the mounting surface. One DIYer completed this entire process in just 10 minutes by staying organized: "The project took about 10 minutes with removing water hoses, carefully removing 3 - 1/4" hex drive screws from back of control panel, leaning control panel forwards when metal tabs on rear panel were released."
Step 5: Reassemble and Reconnect Water Supply
Tilt the control panel back into position. Make sure those rear tabs engage properly, then reinstall the three console screws. Go around back and reconnect your hot and cold water supply hoses to the valve inlet ports — hot on the left port (usually marked), cold on the right. Hand-tighten, then snug with pliers. Turn the water supply back on slowly and watch for leaks at both the wall connections and where the internal hoses attach. Plug the washer back in.
Testing After Installation
Run a small hot water cycle and actually feel the incoming water temperature after about 30 seconds. It should be noticeably warm. If your issue was constant dripping, watch the valve for several minutes after the washer fills — it should shut off completely with no seepage. Run a complete cycle and check again after it finishes. If you previously had the "washer only fills with cold water" symptom, try a warm or hot setting specifically to verify the hot water solenoid is now functioning.
Frequently Asked Questions
Why does my GE washer only fill with cold water even on hot settings?
The hot water solenoid in your triple inlet valve has failed. The WH13X10053 valve contains three separate solenoids — one for hot, one for cold, and one for the spray rinse. When the hot water solenoid dies, the washer defaults to cold-only fills. This is the most common failure mode for this part, especially after 5-7 years of use.
Can I repair just one solenoid instead of replacing the whole valve?
No, the solenoids are sealed units molded into the valve body. The WH13X10053 is sold only as a complete assembly. Attempting to disassemble it will damage the housing. At $38.99 for a factory OEM replacement, it's not worth the hassle of trying to jury-rig a repair that won't last.
Do I really need to move my washer to replace this valve?
Usually not. As multiple users confirmed, you can do this entire repair from the front if you can reach behind the control panel. The valve is mounted on the back of the control assembly, but it's accessible once you tilt the panel forward. You only need to reach around back briefly to disconnect the external water hoses and grab the mounting screws.
If you can easily access the back of your washer, the actual repair takes less than 15 minutes. Use your phone's flashlight to see connector positions before removal.
Need the part for this repair?
WH13X10053 · In Stock · Ships next business day