
How to Replace WD12X24058 Detergent Dispenser on GE Dishwasher — Step-by-Step
Disconnect power to your dishwasher at the breaker or wall outlet before removing the door panel to prevent electrical shock.
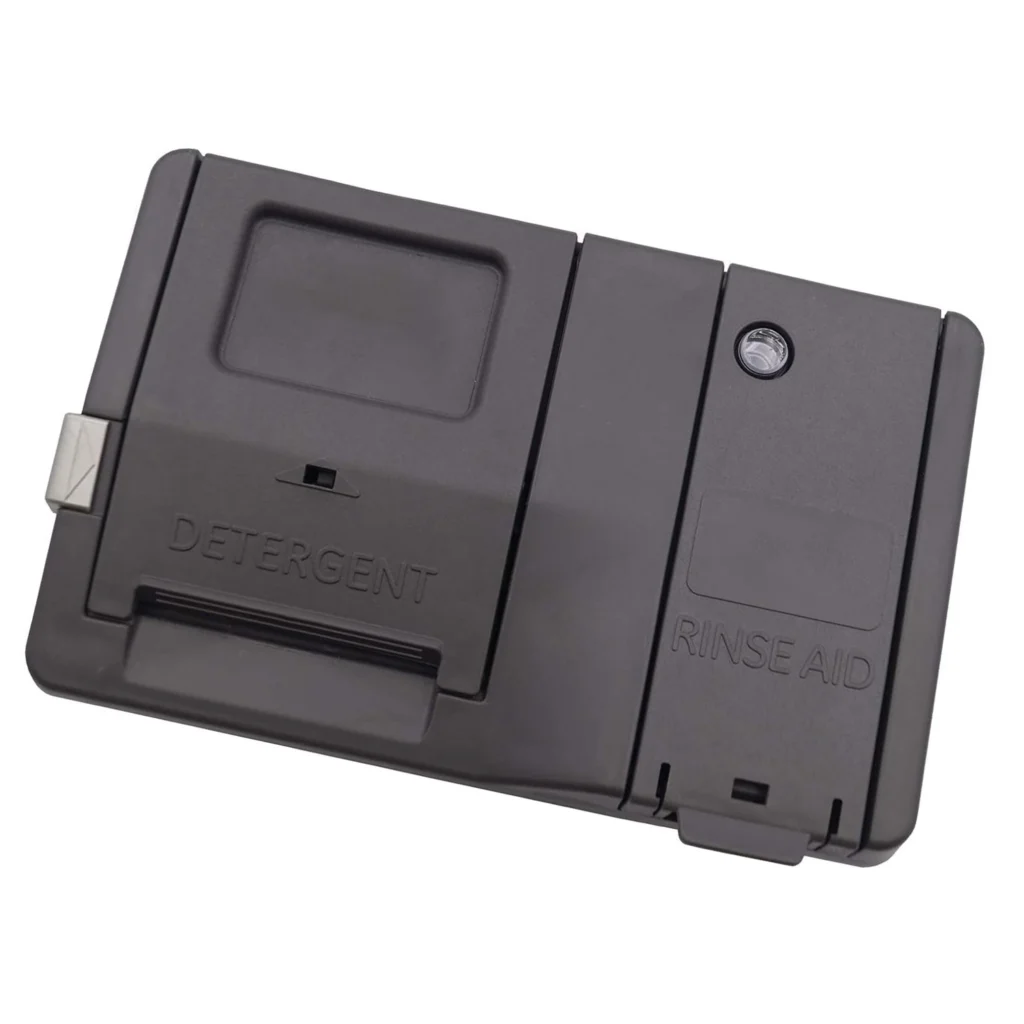
Your GE dishwasher finishes its cycle, but the dishes come out crusty and the detergent pod is still sitting there, unopened. You pop open the dispenser door manually and it won't latch anymore. That clicking sound it used to make? Gone. This is the classic sign your WD12X24058 detergent dispenser has failed, and it's one of those repairs that'll save you a service call if you've got 30 minutes and a screwdriver.
What You Need Before Starting
This isn't a complicated repair, but you'll want these items within arm's reach:
- Phillips head screwdriver (#2)
- Flathead screwdriver or putty knife
- Towel or small container for water catchment
- Your replacement WD12X24058 dispenser
Repair Time: 25-35 minutes
Difficulty: Easy — Great first DIY dishwasher repair
Safety First
Disconnect power to your dishwasher before you start. Either unplug it from the wall socket under the sink or flip the breaker labeled for your dishwasher. Water should be turned off too, though you're not disconnecting any water lines for this repair. You'll be working with the dishwasher door, so make sure you've got enough clearance to open it fully and kneel comfortably in front of it.
Step 1: Access the Inner Door Panel
Open your dishwasher door fully so it's horizontal. You'll see screws along the top edge of the door and down the sides where the inner panel meets the outer door. Remove these screws completely — there are typically 8-10 of them on models like the ADT521PGF series. Keep them in a container because they're small and love to disappear into sink drains.
Step 2: Separate the Inner Door Panel
With the screws out, carefully lift the inner door panel up and forward. It should separate from the outer door shell, but it's still connected by wires, so don't yank it. You only need to prop it up about 45 degrees to access the dispenser assembly. Some people use a stack of towels to support the panel while they work.
Step 3: Disconnect and Remove the Old Dispenser
The detergent dispenser is mounted on the inner door panel. You'll see a wire harness connector attached to it — press the release tab and pull it straight off. Now locate the mounting clips or screws holding the dispenser in place. On most GE models using this part, there are two clips at the top and bottom. Squeeze them inward while pushing the dispenser out from the front side of the door. The old WD12X24058 should pop right out.
Step 4: Install the New WD12X24058 Dispenser
Line up your new dispenser with the mounting holes in the door panel. Push it in from the front until you hear or feel the clips snap into place. Give it a gentle tug to make sure it's secure — it shouldn't move at all. Reconnect the wire harness by pushing it onto the connector until it clicks. Open and close the dispenser door a few times to verify it latches properly and springs open smoothly.
Step 5: Reassemble the Door
Lower the inner door panel back into position, making sure all the edges align with the outer door shell. Thread all those screws back in, but don't overtighten them — you're going into plastic, and you can crack the door liner if you're too aggressive. Tighten them snug in a criss-cross pattern to distribute pressure evenly.
Testing After Installation
Restore power to your dishwasher and run a short rinse cycle without dishes. Drop a dishwasher pod into the new dispenser and close it. About 15-20 minutes into the cycle, open the door and check — the dispenser should be open and the pod should be gone or dissolving. If it's still closed, you may have a wiring issue or the latch mechanism isn't aligned correctly. Double-check that wire harness connection.
Frequently Asked Questions
Will this WD12X24058 fit my specific GE dishwasher model?
This dispenser works with a huge range of GE, Hotpoint, and RCA dishwashers. It's confirmed compatible with models like ADT521PGF0BS, CDT800P2N0S1, GDT655SSJ0SS, PDT785SSN0SS, and dozens more. Check your model number on the sticker inside the door frame — if it starts with ADT, CDT, GDT, or PDT from the last 10 years, you're probably good. It replaces part numbers WD12X28238, WD12X23539, and WD12X22515.
Why does the dispenser door need to latch before the cycle starts?
The latch holds the door closed until the dishwasher's control board sends an electrical signal to release it at the right time during the wash cycle. If the latch is broken, the door either won't stay closed (detergent dumps out immediately) or won't open at all (detergent never enters the wash). Either way, your dishes don't get clean.
Can I just replace the latch instead of the whole dispenser assembly?
GE doesn't sell the latch separately for this dispenser design. You're buying the complete assembly, which actually works in your favor because the spring mechanism and rinse aid reservoir often wear out along with the latch. Replacing everything at once means you won't be back in there six months from now fixing something else.
Support the inner door panel with a stack of towels while working to prevent strain on the wire harnesses and make the repair easier on your back.
Need the part for this repair?
WD12X24058 · In Stock · Ships next business day