
How to Replace W11434044 Dishwasher Water Inlet Valve on Whirlpool & KitchenAid — Step-by-Step
Shut off both electrical power at the breaker and water supply before starting. Water will drip when disconnecting supply lines — have towels ready.
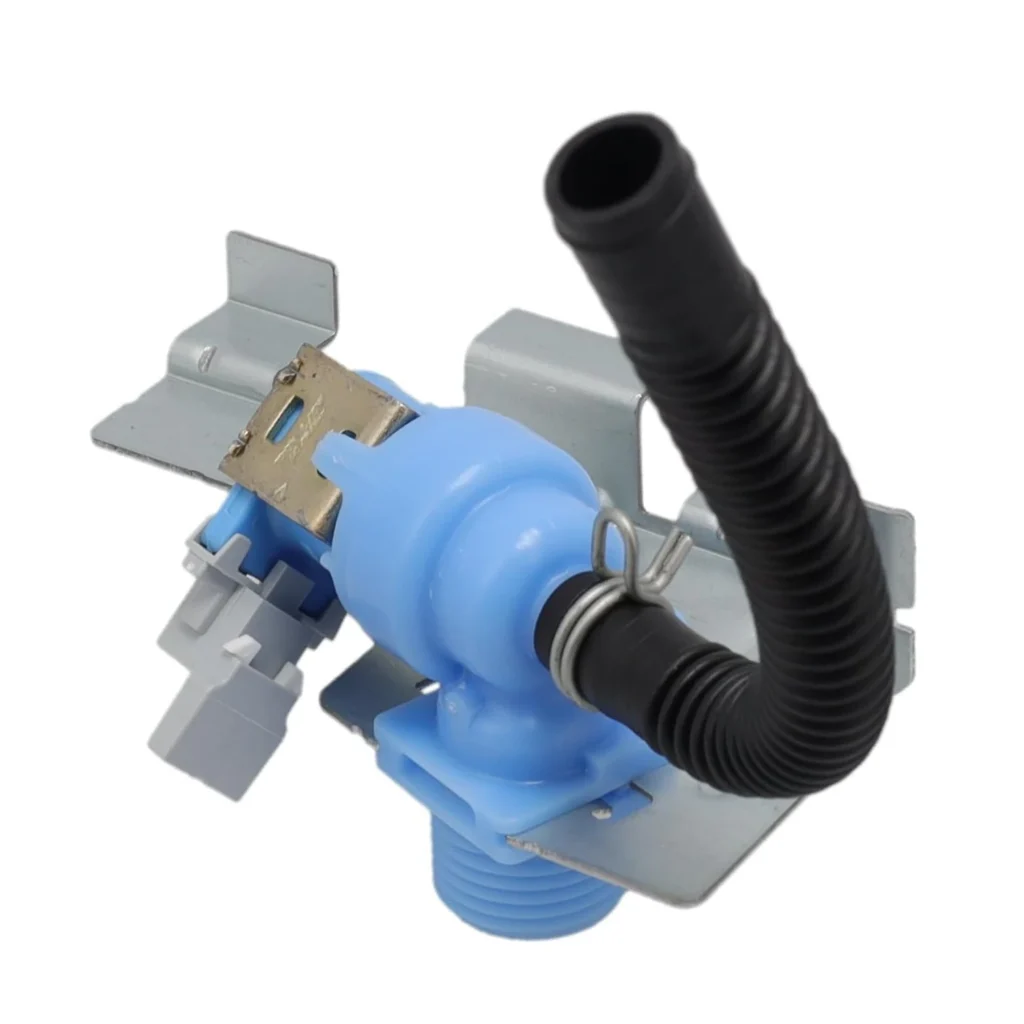
Your Whirlpool WDTA50SAKZ0 dishwasher clicks when you start a cycle, but no water enters the tub. The dishes just sit there, dry, while the timer counts down. That clicking sound? It's your dishwasher's control board trying to tell the water inlet valve to open — but the valve's solenoid coil has failed. This is one of the most common failures in Whirlpool, KitchenAid, Maytag, and Jenn-Air dishwashers, and the W11434044 inlet valve fixes it.
What You Need Before Starting
This repair takes about 30-45 minutes and requires basic hand tools. You'll need:
- 1/4" nut driver
- Needle-nose pliers
- Adjustable wrench
- Towels for water cleanup
- Small bowl or bucket
- Flashlight
Difficulty: Moderate — You'll be working with water supply lines and electrical connections.
Time Required: 30-45 minutes
Safety First
Shut off power to the dishwasher at the circuit breaker — not just the door switch. Water and electricity don't mix. You'll also need to turn off the water supply valve under your sink. If you can't find a dedicated shutoff valve for the dishwasher, you may need to shut off the main water supply temporarily. Place towels under the valve area because residual water will drip when you disconnect the supply line.
Step 1: Access the Water Inlet Valve
Remove the lower front access panel by unscrewing the screws along the bottom edge. On models like the KitchenAid KDFE104KPS series, this panel just lifts off after the screws are out. The water inlet valve is located at the bottom left of the dishwasher tub, where the water supply line enters. You'll see it immediately — it's a rectangular component with two wires connected to solenoid coils and a threaded water inlet on one end.
Step 2: Disconnect Water Supply and Electrical
Use an adjustable wrench to disconnect the water supply line from the inlet valve's threaded fitting. Water will drip out, so have your bowl ready. Next, pull the wire harness connectors off the valve's solenoid terminals — they just pull straight off, no tools needed. Take a photo before disconnecting so you remember the wire orientation.
Step 3: Remove the Mounting Bracket
The inlet valve is held in place by a metal bracket secured with one or two screws. Use your 1/4" nut driver to remove these screws. On Maytag MDB4949SKZ and MDB8959SKZ models, there's a single screw at the top of the bracket. Once the bracket is loose, the valve will slide out of its mounting position.
Step 4: Disconnect the Internal Hose
The outlet side of the valve connects to a rubber hose that feeds water into the dishwasher tub. Use needle-nose pliers to squeeze the spring clamp holding this hose, then slide the clamp back about an inch. Pull the hose straight off the valve outlet. More water will drain out here — completely normal.
Step 5: Install the New W11434044 Valve
Push the rubber hose onto the outlet port of your new valve until it's fully seated. Slide the spring clamp back into position over the hose connection. Position the valve in its mounting location and reinstall the bracket with the screws you removed earlier. Reconnect the wire harness — it only fits one way. Hand-tighten the water supply line onto the inlet threads, then give it a quarter turn with your wrench. Don't overtighten or you'll crack the plastic threads.
Testing After Installation
Turn the water supply back on and check for leaks at the inlet connection. If you see drips, tighten the fitting slightly. Restore power at the breaker, then run a short rinse cycle. You should hear water flowing into the tub within 30 seconds of starting the cycle. If the dishwasher fills normally and you don't hear that clicking sound anymore, you're done. Reinstall the lower access panel and you're back in business.
Frequently Asked Questions
Will this valve work on my KitchenAid KDFE204KWH model?
Yes, the W11434044 replaces multiple part numbers including W11025972, W11025970, and W11187724. It's compatible with dozens of Whirlpool Corporation dishwasher models across Whirlpool, KitchenAid, Maytag, and Jenn-Air brands from recent years. Check the compatible models list to verify your specific model number.
Why did my inlet valve fail in the first place?
Inlet valves fail for two main reasons: mineral buildup from hard water that prevents the valve from opening fully, or electrical failure in the solenoid coils. If you have hard water, the valve might physically stick closed. If it's electrical, the coils burn out over time from repeated cycling. Either way, the valve can't be repaired — replacement is the only fix.
Do I need to replace any other parts while I'm in there?
Check the condition of the rubber supply hose that connects to the valve outlet. If it's cracked, brittle, or swollen, replace it at the same time. Also inspect the screen filter inside the valve inlet — if your old valve has heavy mineral deposits on this screen, your new valve will likely clog quickly unless you address your water hardness issue. Consider installing a water softener or inline filter.
Take a photo of the wire connections before disconnecting anything. The valve solenoids are polarity-specific, and reconnecting them wrong will prevent proper operation.
Need the part for this repair?
W11434044 · In Stock · Ships next business day