
How to Replace W10920631 Spark Ignition Module on Whirlpool Gas Range — Step-by-Step
Turn off circuit breaker and gas supply before starting. The spark ignition system carries household voltage that can shock you.
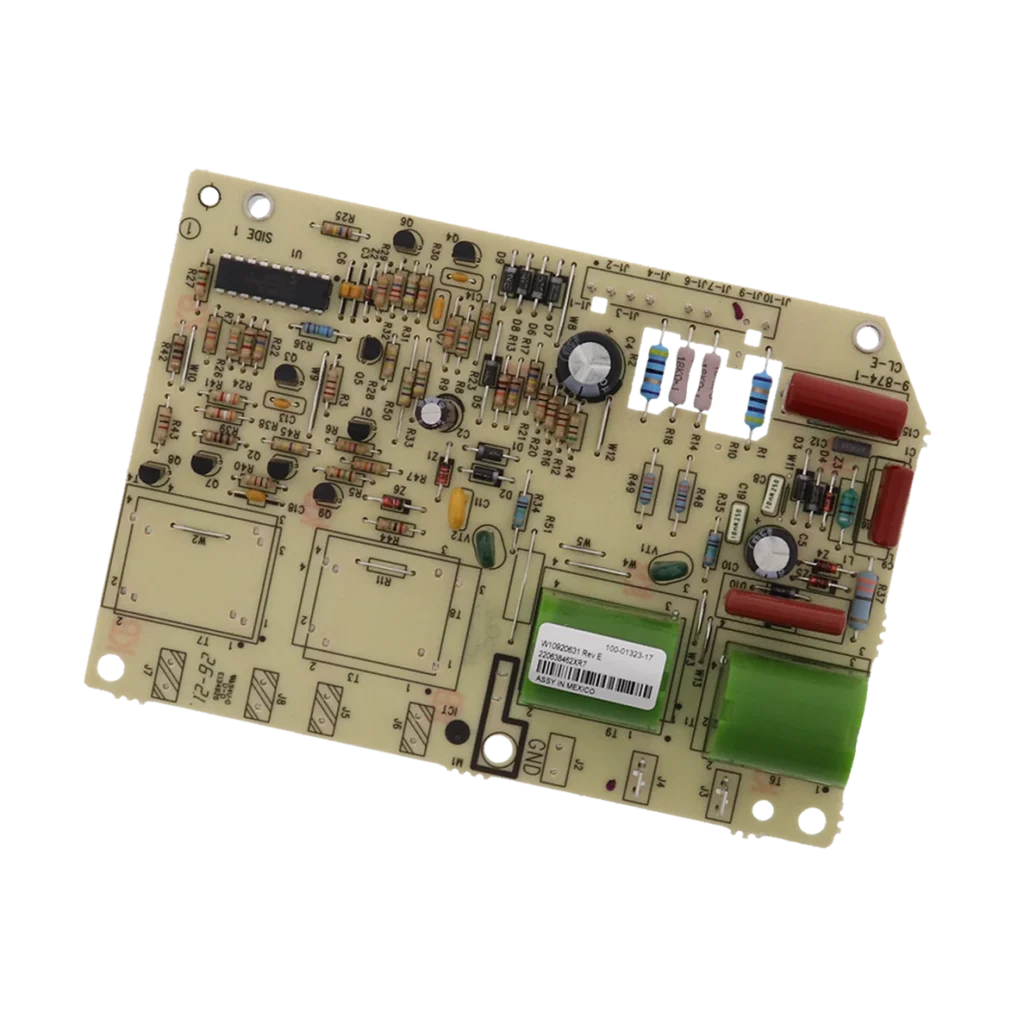
Your Whirlpool gas range clicks but won't light. Or maybe it lights one burner but not the others. Sometimes you hear rapid clicking even when the knobs are off. That constant ticking sound? It's your spark ignition module failing — and on models like the WFG525S0HB0 or WFG510S0HS0, the W10920631 module is the component controlling the spark electrodes that ignite your burners.
This module sends electrical pulses to the spark electrodes at each burner. When it fails, you'll get inconsistent ignition, continuous clicking, or burners that won't light at all. The good news? This is one of the more straightforward gas range repairs once you access the control panel area.
What You Need Before Starting
- 1/4-inch nut driver or socket wrench
- Phillips head screwdriver
- Flathead screwdriver (for wire connectors)
- Needle-nose pliers
- Work gloves (metal edges can be sharp)
- Flashlight or headlamp
- Replacement W10920631 spark ignition module
Estimated Time: 30-45 minutes
Difficulty: Moderate
Safety First
Warning: Turn off the circuit breaker to your range before starting this repair. Even though this is a gas appliance, the ignition system runs on household electricity. Unplug the range if accessible, or shut off the dedicated breaker. Also turn off the gas supply valve behind or beneath the range as an extra precaution — you won't be disconnecting gas lines, but it's safer to work with the gas off.
Step 1: Remove the Burner Grates and Cooktop
Lift off all burner grates and set them aside. Remove the burner caps and burner heads from each position — they simply lift up. Now you'll see screws around the perimeter of the cooktop. On most Whirlpool models like the WFG525S0HV0, there are typically four to six screws securing the cooktop frame. Remove these screws completely and keep them together.
Carefully lift the entire cooktop assembly up from the front. It'll hinge at the back, similar to opening a car hood. Prop it open safely — some techs use a wooden block, but the cooktop should stay up on its own once past the balance point.
Step 2: Locate the Spark Ignition Module
With the cooktop raised, look at the right side of the range cavity. The W10920631 spark module is a rectangular electronic component, usually mounted to the side panel or front-right corner. You'll see multiple wires connected to it — these run to each burner's spark electrode. On models like the WFG525S0HT1, it's typically a black or white plastic housing about 3 inches long with six to eight wire terminals.
Take a photo with your phone before disconnecting anything. Trust me — you'll want this reference when reconnecting the wires.
Step 3: Disconnect the Wire Harnesses
The module has multiple wire connections: usually one main power connector and individual wires to each burner electrode. Start with the main harness connector — squeeze the locking tab and pull straight out. Don't yank on the wires themselves.
For the individual electrode wires, note their positions. Some are spade connectors that slide off; others might be push-on connectors. Each wire typically goes to a specific burner, and while they might physically fit in the wrong spot, you want them back in their original positions for proper spark timing.
If your module has a ground wire (usually green or bare copper), disconnect that too. Remove any mounting screws holding the module to the frame — typically two screws through metal brackets.
Step 4: Install the New W10920631 Module
Position your new module in the same location and orientation as the old one. Secure it with the mounting screws first — this keeps it stable while you reconnect wires. Don't overtighten; these sheet metal screws can strip easily.
Reconnect the wires in reverse order, referencing your photo. Start with individual electrode wires, pushing each connector firmly onto its terminal until you feel it seat completely. Then connect the main power harness — it should click into place. Finally, attach the ground wire if present.
Give each connection a gentle tug to verify it's secure. A loose connection on a spark module causes intermittent operation and that annoying random clicking.
Step 5: Reassemble and Test
Lower the cooktop back into position and reinstall all the perimeter screws. Replace the burner heads, caps, and grates in their correct positions. Turn the gas supply back on if you shut it off, then restore electrical power at the breaker.
Now comes the moment of truth: turn one burner knob to the "lite" position. You should hear the characteristic tick-tick-tick of the spark, and the burner should ignite within 3-4 seconds. Test all burners to confirm each one lights properly and the clicking stops once the flame establishes.
Testing After Installation
Check for proper operation on all burners, including the simmer burner if your range has one. The clicking should be rapid and consistent when you turn a knob to ignite, then stop completely once the burner lights. If clicking continues after ignition, you might have a grounding issue or a wet burner head — let everything dry completely and retest.
Also verify there's no clicking when all knobs are in the "off" position. If you still get random clicking with everything off, double-check that all wire connections are fully seated and the module is properly grounded to the range chassis.
Frequently Asked Questions
Will this module work on my KitchenAid or Maytag gas range?
Yes, the W10920631 is used across Whirlpool Corporation brands including KitchenAid and Maytag. It replaces part numbers WPW10920631, W11162730, and AP6284506. However, always verify your model number against the compatibility list — while it fits dozens of models like the WFG525S0HB1 and WFG510S0HW0, not every Whirlpool range uses this exact module.
Why does my range click continuously even with the new module?
Continuous clicking after module replacement usually means moisture in a burner assembly or a damaged spark electrode. Remove each burner head and check for water or food debris. Let everything dry completely — even a tiny bit of moisture can create a ground path that keeps the spark going. If one electrode is cracked or the porcelain insulator is damaged, that electrode needs replacement too.
Can I replace just one electrode wire instead of the whole module?
If only one burner won't light and the module isn't clicking for that burner, the issue might be a broken wire or failed electrode rather than the module itself. However, if multiple burners have ignition problems, or the clicking is erratic across all burners, the module is the likely culprit. The W10920631 controls all burner electrodes simultaneously, so widespread ignition issues point to module failure rather than individual electrode problems.
Take a photo of all wire connections before disconnecting anything — it's much easier to reconnect the electrode wires when you have a reference image.
Need the part for this repair?
W10920631 · In Stock · Ships next business day