
How to Replace W10779716 Bake Element on Whirlpool, Maytag & KitchenAid Ovens — Step-by-Step
ALWAYS unplug the oven before starting. Never use a multi-meter with the stove plugged in — this can damage the meter or cause electrical shock.
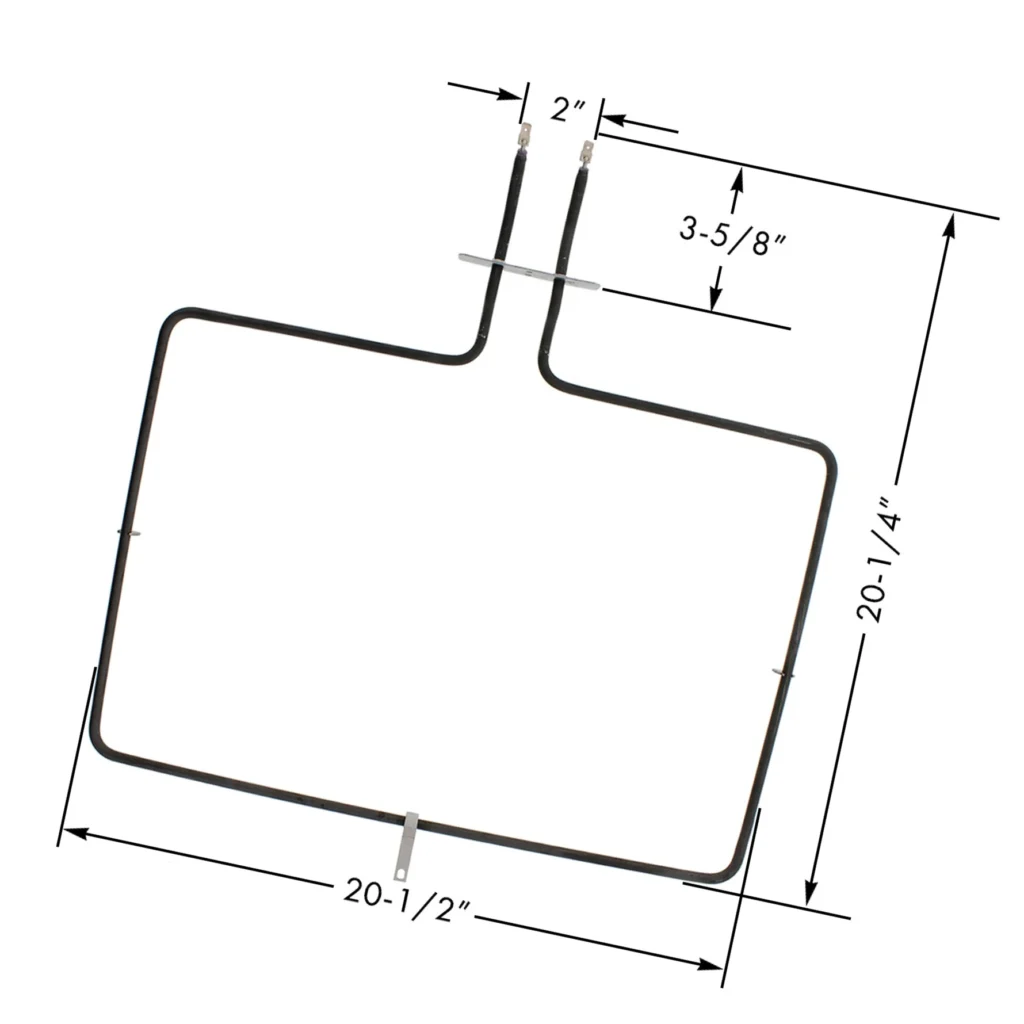
Your oven won't get past 325 degrees. You're trying to bake cookies and after 20 minutes the dough's still sitting there, barely warm. One user found their heating element burned through at the back left corner — visible damage you could actually see once they pulled it out. That's the classic sign your bake element's toast.
The W10779716 bake element is the workhorse heating component in Whirlpool, Maytag, KitchenAid, and Jenn-Air ovens. When it fails, you'll notice uneven baking, longer preheat times, or the oven simply won't reach temperature. I've seen plenty of these elements fail after just four years — way sooner than the ten-year lifespan older models used to get. The good news? This is one of the easiest oven repairs you'll tackle, even if you've never worked on appliances before.
What You Need Before Starting
This repair doesn't require a full toolbox. Here's everything you'll need:
- #2 Phillips screwdriver (the only tool most people actually use)
- Multi-meter (optional, for testing the old element)
- Oven thermometer (to verify repair success)
- Spare wire with stripped ends (if testing the temperature sensor)
Repair Time: 15-30 minutes (45 minutes if you're deep cleaning while you're in there)
Difficulty: Easy — Perfect first repair if you've never fixed an appliance
Safety First
UNPLUG THE OVEN. I'm putting this in all caps because it's that important. Don't just turn off the breaker — actually unplug the unit from the wall outlet. If you're testing with a multi-meter, never probe connections with the stove plugged in. That's straight from the multi-meter manual and a good way to ruin your day (or worse). Work on a cool oven — let it sit unplugged for at least 30 minutes after last use.
Step 1: Remove Oven Racks and Access Panel
Pull out all your oven racks and set them aside. At the bottom of the oven cavity, you'll see a metal cover plate over the bake element. Two screws hold this plate in place — usually at the front corners. Remove both screws with your Phillips screwdriver and lift the plate out. Now you can see the element itself, held by three screws (sometimes two, depending on your exact model like WFE540H0AB0 or WEE750H0HW0).
Step 2: Disconnect the Element from Inside
Remove the three screws securing the element to the oven floor. Don't lose these — you'll reuse them. Gently wiggle and pull the element forward. You'll feel resistance because the two prongs on the back are still inserted through the rear oven wall into the terminal block. That's normal. Pull it forward about 2-3 inches so the prongs are accessible from the back of the oven, but don't force it completely out yet.
Step 3: Access the Terminal Block (Back of Oven)
Walk around to the back of your range. You'll see a rectangular cover plate — this is the terminal block cover where the element wires connect. Remove the two screws holding this cover, then gently squeeze the sides together and lift it from its slots. Inside, you'll see two wire connectors attached to the element prongs. Pull these connectors straight off — no twisting needed. If you want to test the old element, this is the time: a working element should read around 1080 ohms at room temperature. No continuity? That's your problem right there.
Step 4: Install the New W10779716 Element
Head back to the front of the oven. Take your new element and gently push the prongs through the holes in the back wall. Don't install any mounting screws yet. Go back to the rear of the oven and connect the two wires to the element prongs — doesn't matter which wire goes to which prong. Replace the terminal block cover. Now return to the front and wiggle the element until it seats properly in the mounting holes. Install the three mounting screws, then replace the cover plate with its two screws.
Step 5: Testing After Installation
Plug the oven back in. Set it to 450°F and use an oven thermometer to verify actual temperature. A properly working bake element should preheat to 450°F in 12-15 minutes. One user reported their oven now preheats to 400°F in under 13 minutes after replacing a burned-out element. If you removed your oven door to make access easier (not required, but helpful), reattach it at about a 60-degree angle — this trips people up more than the actual repair.
Pro Tips from Real Repairs
The new W10779716 element might look slightly different than your original — specifically, some old elements have small metal supports that the new one lacks. Don't worry about transferring these. The new element works perfectly without them. While you've got everything apart, this is the perfect time to clean under the oven floor. Multiple people mentioned spending more time cleaning than actually doing the repair. That 30-year buildup of spills isn't going to clean itself.
Frequently Asked Questions
How do I know if it's the bake element or the temperature sensor?
Test the sensor first if you have a multi-meter. The sensor is located at the top left of the oven cavity (looking in) behind a small panel. It should show continuity when tested. If you don't have a meter with small enough probes, strip both ends of a spare wire piece, insert it into the sensor plug, then test for continuity through the wire. If the sensor tests good but your oven still won't heat, it's almost certainly the bake element — especially if you see visible damage or burnout spots.
Will this element work in my specific Whirlpool model?
The W10779716 replaces AP5970727, W10289097, W10774342, and PS11703285. It fits dozens of Whirlpool, Maytag, KitchenAid, and Jenn-Air models including WEC530H0DB0, WEE750H0HW0, WFE540H0AB1, and many others. Check your model number against the compatibility list or measure your old element — if the mounting holes and prong positions match, you're good to go.
Can I do this repair without removing the oven door?
Absolutely. Removing the door just gives you better access and makes it easier to clean while you're in there. If you do remove it, remember to reattach at approximately 60 degrees and make sure the door stops are properly set. One person spent more time figuring out door reattachment than doing the actual element replacement because they didn't note the angle before removal.
While the oven is apart, clean underneath the element area. Most people spend more time cleaning than actually replacing the element, but you'll be glad you did.
Need the part for this repair?
W10779716 · In Stock · Ships next business day