
How to Replace W10189703 Refrigerator Evaporator Fan Motor on Whirlpool, Maytag & KitchenAid — Step-by-Step
Always unplug refrigerator before repair. Evaporator fan connects to 120V power and creates shock hazard if unit remains plugged in.
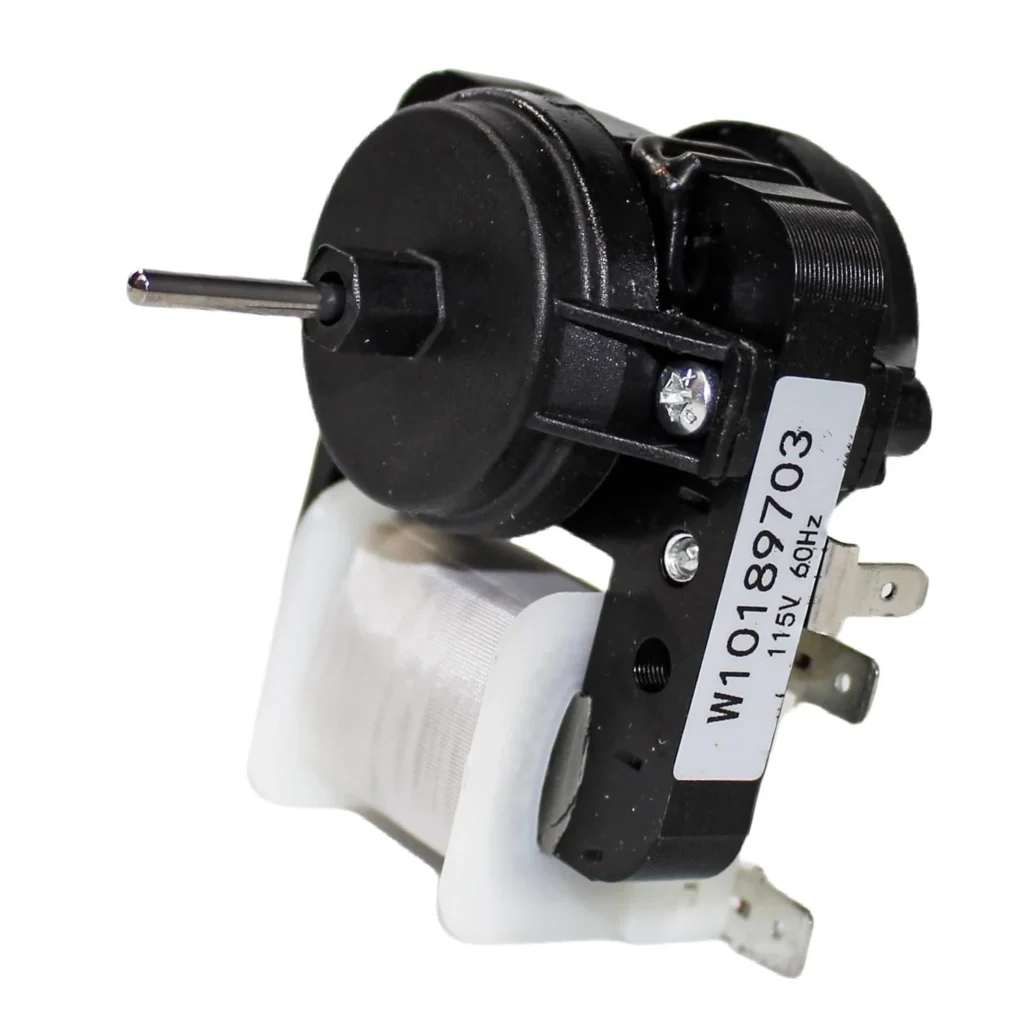
Your freezer's at 20°F but the fridge side is reading 48°F. You can hear the compressor running, but there's no air movement in the back of the freezer compartment. That's the classic sign your evaporator fan motor has failed — it's not circulating cold air from the freezer to the fresh food section.
The W10189703 evaporator fan motor is one of the most commonly replaced parts in Whirlpool, Maytag, and KitchenAid side-by-side and French door refrigerators. When it fails, you'll notice warm temperatures in both compartments, unusual noises from behind the freezer wall, or complete silence where you should hear a gentle fan hum.
What You Need Before Starting
This is a straightforward repair that most homeowners can handle with basic tools. Here's what you'll need:
- 1/4" nut driver or socket
- Phillips head screwdriver
- Flat blade screwdriver
- Work gloves (the evaporator area gets extremely cold)
- Towels (to catch any frost melt)
- Cooler with ice (to store perishables during repair)
Estimated Time: 45-60 minutes
Difficulty: Moderate
The main challenge isn't mechanical complexity — it's accessing the fan motor behind the evaporator cover panel. You'll need to remove several shelves and the back panel inside your freezer compartment.
Safety First
Warning: Always unplug your refrigerator before starting any repair. The evaporator fan motor connects directly to the main control board with 120V power. Working on electrical components while the unit is plugged in creates serious shock hazards. Additionally, you'll be working in the freezer compartment — wear gloves to protect your hands from frozen metal surfaces and sharp evaporator fins.
Step 1: Empty the Freezer and Remove Shelving
Unplug the refrigerator from the wall outlet. Transfer all frozen items to a cooler. Remove all freezer shelves, baskets, and the ice bucket assembly if your model has one. You need complete access to the back wall of the freezer. On models like the MFI2569VEM1 and G2IXEFMWS02, there's also a light assembly near the top — disconnect the wire harness and set it aside.
Step 2: Remove the Evaporator Cover Panel
The evaporator fan motor sits behind a large plastic panel at the back of the freezer. You'll see 4-6 screws (depending on your model) holding this panel in place — typically along the top edge and sides. Use your 1/4" nut driver to remove these screws. On some Maytag models like the MFD2561HES, there are also two clips at the bottom — gently pry these with a flat blade screwdriver. Carefully pull the panel forward and down. You might encounter some frost buildup — this is normal. Let it sit for a few minutes to soften if needed.
Step 3: Disconnect and Remove the Failed Motor
Now you can see the evaporator coils and the fan motor assembly. The motor is typically mounted on a bracket with two screws. Before removing anything, locate the wire harness connector — it's usually a white or blue plastic connector attached to the motor. Press the release tab and disconnect it. Remove the two mounting screws holding the motor bracket. On refrigerators like the 8GT2FTKXSS03, the fan blade is attached with a spring clip — slide it off the motor shaft. Some models use a set screw instead, so check which type you have before pulling.
Step 4: Install the New W10189703 Motor
Take your new W10189703 motor and compare it to the old one — the mounting bracket and wire connector should be identical. If your old motor had the fan blade attached, transfer it to the new motor shaft (unless your replacement came with a new blade). The flat side of the shaft should align with the flat section inside the blade hub. Secure it with the spring clip or set screw. Mount the motor assembly back into position with the two screws. Make sure the fan blade has clearance to spin freely — it should be centered in the opening without touching the housing. Connect the wire harness until you hear it click.
Step 5: Reassemble and Test
Replace the evaporator cover panel and secure all screws. Double-check that you didn't leave any tools inside the freezer compartment. Reinstall all shelves and baskets. Plug the refrigerator back in. Within 30 seconds, you should hear the new fan motor start up — it'll be a smooth, quiet sound. The compressor will also kick on if the temperature has risen enough. Place a thermometer in both the freezer and refrigerator sections. The freezer should reach 0°F within 4-6 hours, and the fridge should stabilize at 37°F shortly after.
Testing After Installation
Listen for the fan motor to cycle on and off as the thermostat calls for cooling. You should feel cold air flowing from the vents at the top of the fresh food section within 15-20 minutes. If you hear grinding, squealing, or the motor doesn't start at all, unplug immediately and check that the fan blade isn't hitting anything and that the wire harness is fully connected. A properly installed W10189703 motor runs nearly silent — you'll only hear gentle air movement.
Frequently Asked Questions
Why is my fridge warm but the freezer is cold?
This is the textbook symptom of evaporator fan motor failure. The freezer generates all the cold air, and the fan motor circulates it to the refrigerator section through vents. When the fan fails, the freezer stays cold (or gets colder), but the fresh food section warms up because no air is being circulated. The compressor keeps running because the thermostat in the fridge section never gets satisfied.
Can I test the old motor to confirm it's bad?
Yes. With the refrigerator unplugged and the evaporator panel removed, try spinning the fan blade by hand. It should rotate smoothly with minimal resistance. If it's stiff, grinding, or won't spin at all, the motor bearings have failed. You can also use a multimeter to check for continuity across the motor terminals — you should read between 200-300 ohms. Infinite resistance means the motor windings are burned out.
Will this repair work on French door models?
Absolutely. The W10189703 replaces the evaporator fan motor in Whirlpool French door models like the W2RXNMMWL02, side-by-side models like the G2IXEFMWS02, and even some bottom-freezer configurations. The access procedure is essentially the same — you're always removing the freezer's back panel to reach the evaporator compartment. Check your model number against the compatibility list to confirm this is the correct motor for your specific refrigerator.
If you encounter heavy frost buildup on the evaporator cover panel, let the freezer sit unplugged with the door open for 30 minutes before attempting removal. This softens the ice and prevents cracking the plastic panel.
Need the part for this repair?
W10189703 · In Stock · Ships next business day