
How to Replace W10158389 Dishwasher Water Inlet Valve on Whirlpool KitchenAid — Step-by-Step
Shut off water supply and disconnect power before starting — water and electricity create shock hazards
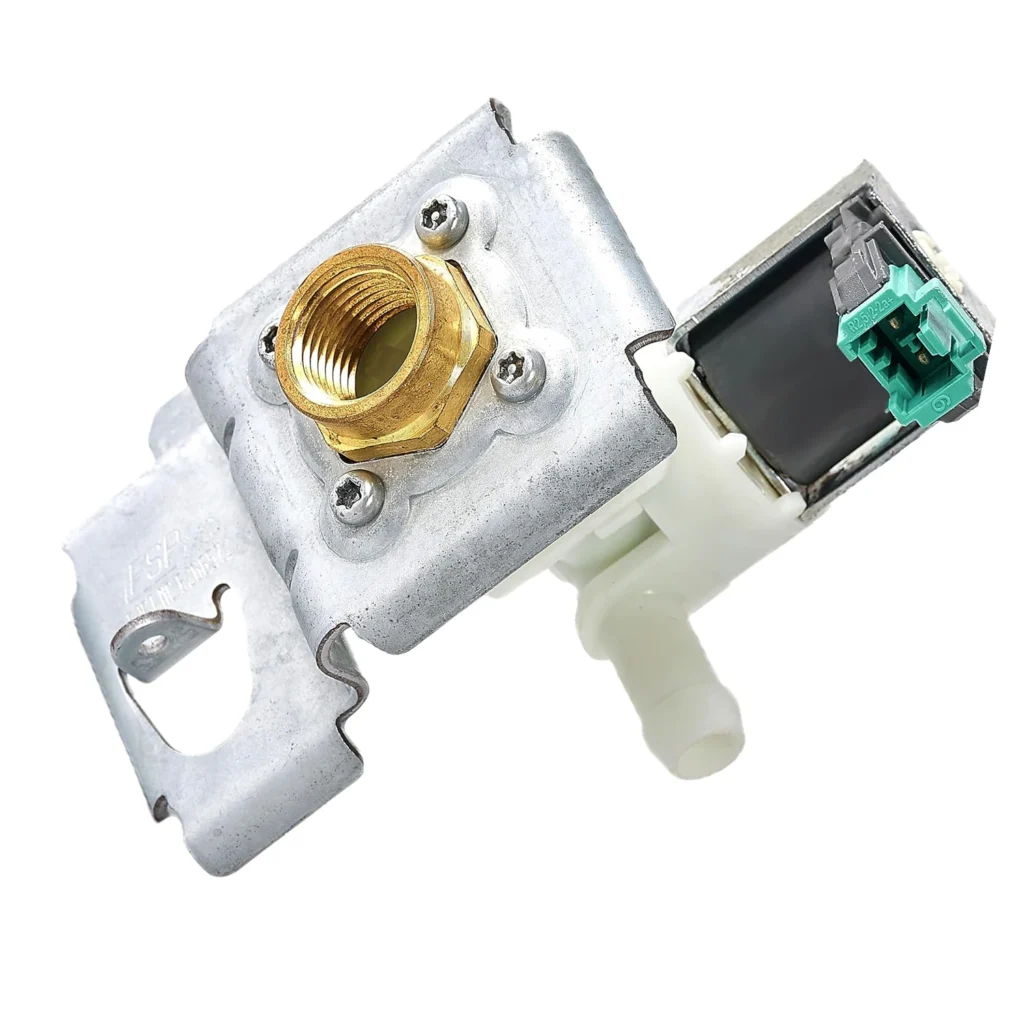
Your Whirlpool dishwasher won't fill with water, or maybe you've noticed a puddle forming under the front left corner every time you run a cycle. Nine times out of ten, that's your water inlet valve failing. The W10158389 valve controls water flow into your dishwasher — when it goes bad, you'll either get flooding, no water at all, or that annoying slow-fill that adds 20 minutes to every cycle.
This repair works for tons of Whirlpool, KitchenAid, Kenmore, and Maytag models including 7DU1100XTSQ0, 7GU2300XTVQ0, DU1048XTPQ4, and hundreds more. One user who tackled this said it was "exactly like the original, easy install" — and they're right. If you can turn a few screws and disconnect a hose clamp, you can handle this.
What You Need Before Starting
- 1/4-inch nut driver or socket wrench
- Needle-nose pliers
- Flathead screwdriver
- Towel or small bucket (you'll get some water spillage)
- Flashlight
Time required: 30-45 minutes
Difficulty: Easy
Safety First
Shut off the water supply to your dishwasher before you start — that valve is usually under your sink. Unplug the dishwasher or flip the breaker. Even though you're working with low-voltage parts, water and electricity don't mix. Have that towel ready because about a half-cup of water will drain from the old valve when you disconnect it.
Step 1: Access the Water Inlet Valve
Remove the lower kickplate at the bottom front of your dishwasher — usually held by two screws at the ends. On most Whirlpool models, you'll also need to take off the lower access panel inside the door if you can't reach the valve from below. The water inlet valve sits at the front left corner where the water supply line enters the dishwasher. You'll see a solenoid (the electrical part) attached to the valve body.
Step 2: Disconnect Water Supply and Wiring
Turn the brass compression fitting counterclockwise to disconnect the water supply line from the valve. Water will drip out — that's normal. Now disconnect the wire harness from the valve solenoid by pressing the locking tab and pulling straight off. Take a quick phone pic of how everything's oriented before you remove anything else. On models like the 7GU2455XTSQ0, there's barely three inches of clearance, so work slowly.
Step 3: Remove Internal Hose and Mounting Bracket
The rubber outlet hose connects to the valve with a spring clamp or worm-gear clamp. Use your needle-nose pliers to squeeze and slide the spring clamp back, then wiggle the hose off. The valve itself is held by one or two screws through a metal mounting bracket — remove those with your 1/4-inch driver. The entire valve assembly should now come free.
Step 4: Install the New W10158389 Valve
Position the new valve exactly where the old one sat and secure it with the mounting screws. Push the outlet hose onto the new valve barb until it seats fully, then slide the clamp back into position. It should sit about 1/4 inch from the end of the hose. Connect the wire harness to the solenoid — you'll hear it click. Thread the water supply line onto the valve and hand-tighten, then give it another quarter-turn with your wrench. Don't overtighten or you'll crack the plastic valve body.
Step 5: Reassemble and Test
Put your access panels back on. Turn the water supply back on slowly and check for leaks around the compression fitting. Plug the dishwasher back in and run a short cycle. You should hear water flowing within 30 seconds. Check underneath for any drips during the fill cycle. If it's dry and filling normally, you're done.
Testing After Installation
Run a full cycle and watch the fill behavior. Your dishwasher should fill in 2-3 minutes — if it's taking longer, you might have a partially clogged inlet screen in the valve (clean it) or low water pressure. Check under the unit after the cycle completes. No puddles means you nailed it. The valve should be completely silent during operation — any clicking or buzzing means the solenoid's getting power but the valve's stuck.
Frequently Asked Questions
Why is my dishwasher leaking from the front left corner?
That's the classic symptom of a failed inlet valve. The internal seal degrades over time, letting water seep out during the fill cycle. Sometimes the valve body itself cracks from mineral buildup and water pressure. Either way, replacement is the only fix — you can't rebuild these valves.
Can I use this valve on KitchenAid and Kenmore dishwashers?
Absolutely. The W10158389 is the exact factory part used across Whirlpool brands. It directly replaces WPW10158389, AP6015932, and several other part numbers. If your model number starts with 665 (Kenmore) or KDT (KitchenAid), this valve fits as long as it's on the compatible models list.
What if my dishwasher fills really slowly but doesn't leak?
Check the inlet screen first — unscrew the water supply line and you'll see a small mesh filter in the valve inlet. Pull it out with needle-nose pliers and rinse it clean. If that doesn't help, the valve solenoid is weak and not opening fully. Time for a new valve. Slow filling also means your dishes won't get clean because the spray arms need proper water pressure.
Take a phone pic of wire connections before disconnecting — makes reassembly foolproof
Need the part for this repair?
W10158389 · In Stock · Ships next business day