
How to Replace KW7-0 Micro Switch on Air Fryers and Microwaves — Step-by-Step
Always unplug appliances before repairs. Microwave ovens contain high-voltage capacitors that remain charged even when unplugged — do not attempt microwave repairs without proper training.
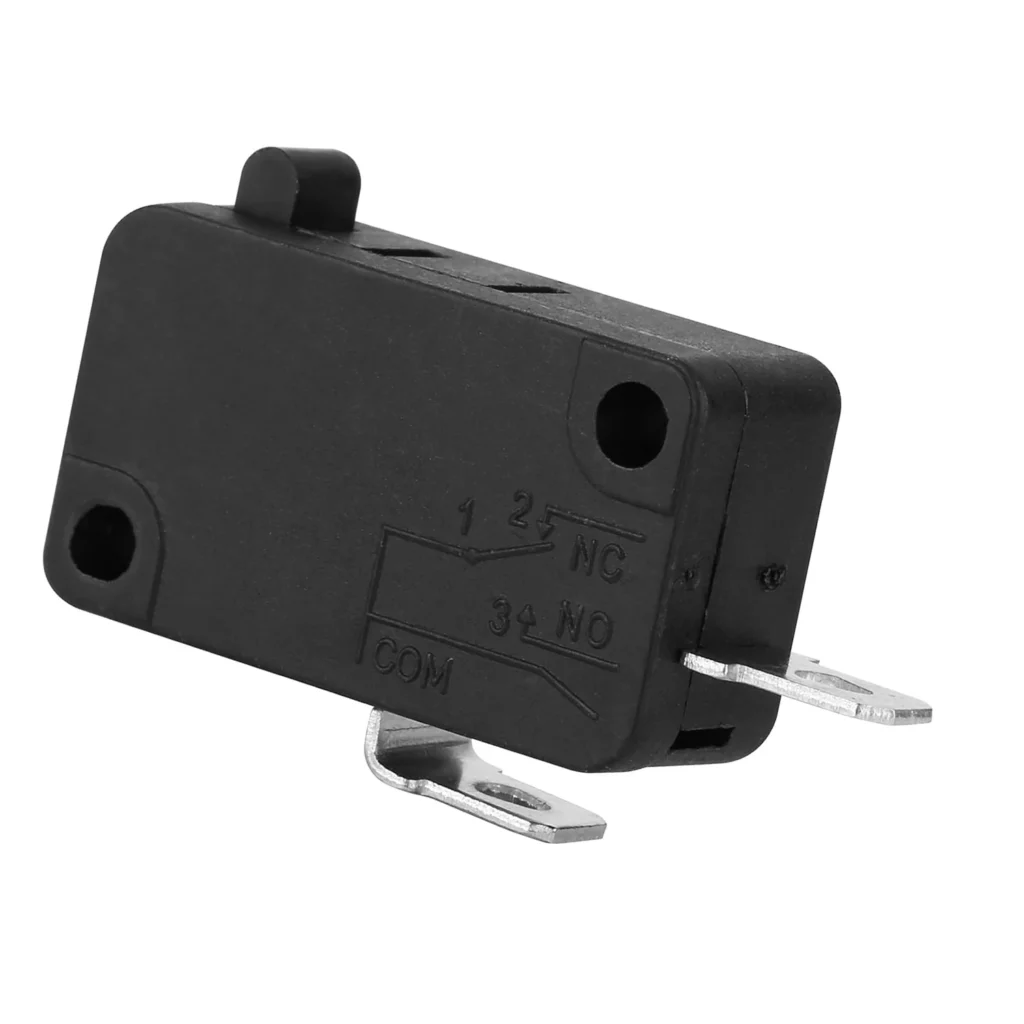
Your Cosori AF601 won't start when you press the button. You hear a faint click sometimes, but most times nothing happens at all. That little KW7-0 micro switch behind the control panel has finally worn out after thousands of cycles, and now your air fryer's just sitting there looking expensive and useless.
The KW7-0 is one of those universal micro switches that shows up everywhere — air fryers, microwave ovens, induction cookers, you name it. It's the same basic switch whether you've got a Power XL Vortex, a Gourmia GAF799, or a Whirlpool microwave like the MH7140XFQ0. The good news? It's a straightforward swap that takes about 20 minutes once you've got the panel open.
What You Need Before Starting
- Phillips head screwdriver (usually #1 or #2)
- Flathead screwdriver (for prying clips)
- Needle-nose pliers (for wire terminal removal)
- Multimeter (optional, for testing the old switch)
- Your replacement KW7-0 switch
Estimated Time: 20-30 minutes
Difficulty: Moderate — Requires careful disassembly
Safety First
Unplug the appliance completely before you touch anything. Micro switches control power circuits, and even though they're low-voltage activation switches, they're connected to circuits that can bite. For air fryers, just unplugging is enough. For microwave ovens, you're dealing with high-voltage capacitors that stay charged even after unplugging — if you're not trained on microwave repair, stick with air fryers and induction cookers for this DIY job.
Step 1: Access the Control Panel
Flip your appliance over or turn it to access the back panel. Most air fryers like the Cosori models have 4-6 screws holding the control housing in place. On the Power XL Air Fryer XL 7Qt, there are usually five screws around the perimeter of the back cover. Remove these and carefully lift away the housing. You'll see the circuit board with various switches mounted to it — the KW7-0 is typically a small rectangular switch with two or three metal terminals sticking out.
Step 2: Locate and Document the Faulty Switch
Before you pull anything, snap a photo with your phone. The KW7-0 usually has either two or three terminals depending on whether it's normally open, normally closed, or a changeover configuration. Your replacement should match the terminal count. On most air fryers, you're looking for the switch directly behind the power button or start button — it'll have wires running to it from the harness. The switch body is about 12mm x 5mm, black or silver, with a small lever actuator on top.
Step 3: Disconnect the Wiring
The terminals on the KW7-0 usually have push-on spade connectors. Grip each connector with your needle-nose pliers and pull straight off — don't yank the wires themselves or you'll tear them from the connector. If the terminals are soldered directly to a PCB (common in some microwaves like the Whirlpool MH8150XJQ0), you'll need to desolder them with a soldering iron. Mark which wire went where, though honestly these switches are usually just completing a circuit so polarity doesn't matter on the two-terminal versions.
Step 4: Remove the Old Switch
Most KW7-0 switches snap into a mounting bracket or slot. Look for small plastic tabs on the sides — press these in while pushing the switch out from behind. Some models use a single screw through the mounting bracket. On Whirlpool microwaves using part numbers like W10149355 or W10269458, the switch might be part of a larger door interlock assembly — in that case, you're replacing the whole assembly, not just the switch.
Step 5: Install the New KW7-0 Switch
Line up your new switch with the mounting slot and press it in until you hear or feel it click. The lever actuator should be positioned so the button actually presses it — sounds obvious, but I've seen switches installed backwards more than once. Reconnect your wire terminals, making sure they're pushed on firmly. Give each one a gentle tug to confirm they're seated. If you're soldering, make sure you've got the orientation correct based on your photo from step 2.
Testing After Installation
Reassemble just enough to test — don't put all the screws back yet. Plug in the appliance and try the button. You should hear a definite click from the switch and see the unit respond immediately. Test it 10-15 times to make sure it's consistent. If the switch works but feels mushy or the button doesn't return properly, you might need to adjust the switch position slightly. Once everything's working, button it all back up.
Frequently Asked Questions
Will the KW7-0 work as a replacement for KW7-0A, KW7-1, or KW7-2?
Yes, these are all cross-compatible switches with the same basic footprint and terminal configuration. The letter and number suffixes indicate minor variations in actuation force or contact material, but they're mechanically interchangeable for most applications. Just match the terminal count (2 or 3 terminals) and you're good.
How do I know if the micro switch is actually the problem?
Set your multimeter to continuity mode and test across the two main terminals while pressing the switch actuator. You should see continuity (beep) when pressed and open circuit when released on a normally-open switch. If you get no continuity at all or intermittent readings, the switch is toast. Also, if the plastic housing is cracked or the metal lever is bent, just replace it — switches are cheap, your time isn't.
Can I use this same switch in my Whirlpool microwave?
Probably, but be careful. Whirlpool part numbers like W10727360 or W10269458 sometimes refer to complete door switch assemblies, not just the micro switch itself. The KW7-0 might be the actual switch inside that assembly, but you need to disassemble the old part to confirm. For microwaves, I always recommend checking the actual part you're replacing against the replacement before starting — high-voltage appliances aren't the place to guess.
Take a clear photo of the wiring before disconnecting anything — it's your insurance policy against reassembly confusion.
Need the part for this repair?
KW7-0 · In Stock · Ships next business day