
How to Replace DC47-00022A Gas Dryer Igniter on Samsung & Kenmore Dryers — Step-by-Step
Turn off gas supply valve before starting. Unplug dryer from power. Handle ceramic igniter carefully — it's fragile and will shatter if dropped.
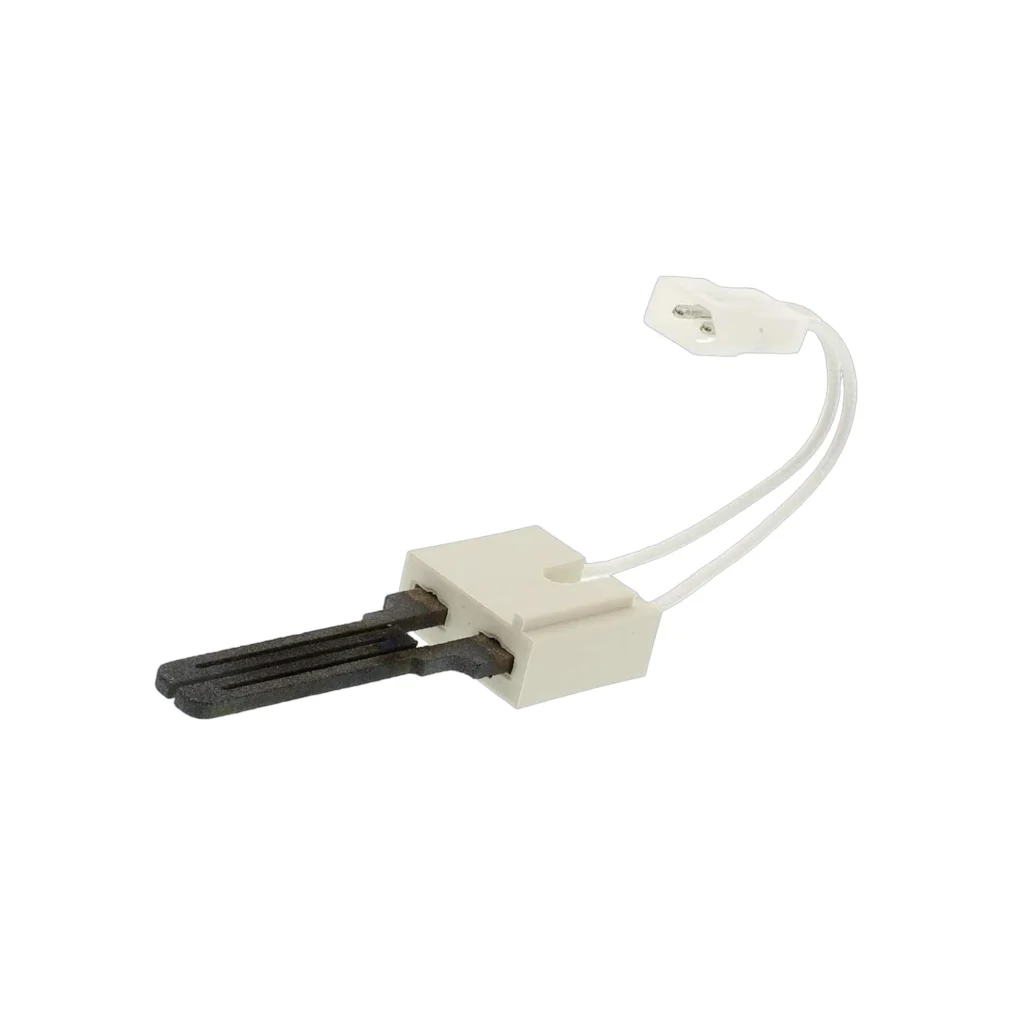
Your Samsung dryer's tumbling, but there's no heat. You can hear the motor running, smell no gas, and your clothes come out damp after an hour-long cycle. That's the classic sign of a failed igniter — specifically the DC47-00022A, which is the glow coil that lights the gas in models like the DV457GVGSWR, DV42H5000GW, and DVG50R5200W.
This igniter draws current to open the gas valve, then glows orange-hot to ignite the burner. When it weakens (usually after 3-5 years), it'll glow but won't draw enough amperage to trip the valve open. You'll see the glow, but no flame.
What You Need Before Starting
- 1/4" nut driver or socket
- Phillips screwdriver
- Flashlight
- Work gloves (the igniter is fragile ceramic)
- Multimeter (optional, for testing)
Repair Time: 20-30 minutes
Difficulty: Easy
Safety First
Turn off the gas supply valve behind the dryer before you start. Unplug the dryer from the wall outlet. If your dryer is hardwired, flip the breaker. Gas leaks are no joke — if you smell gas at any point during this repair, stop immediately, open windows, and don't operate any electrical switches. The igniter itself is ceramic-coated and shatters easily, so handle it like you're holding an egg.
Step 1: Access the Burner Assembly
Pull the dryer away from the wall so you've got room to work. On Samsung gas dryers, the burner assembly sits behind a lower front panel or rear access panel depending on your model. For front-loaders like the DV405GTPAWR and DV419AGU, you'll typically remove the lower kick plate — it's held by two screws at the bottom corners. For some models like the DVG54R7200V, you'll access from the rear.
Remove the screws, set the panel aside. You should now see the burner assembly — a metal housing with the igniter glowing coil visible near the gas valve.
Step 2: Disconnect the Igniter Wires
The igniter connects via a two-wire harness with a plug. It's usually white or beige plastic. Pull straight out — don't yank on the wires themselves. If it's stuck, wiggle it gently side to side while pulling. The connection might be tight from years of heat cycling.
Once disconnected, you can test the old igniter with a multimeter if you want confirmation. Set it to ohms and touch the probes to the igniter terminals. You should read 50-400 ohms. If it's open (infinite resistance) or way outside that range, it's dead.
Step 3: Remove the Mounting Bracket
The DC47-00022A igniter mounts to the burner tube with a metal bracket held by two screws. They're usually 1/4" hex head screws. Remove both screws and carefully slide the igniter and bracket out of the burner tube opening. Don't drop it — these igniters crack if you look at them wrong.
Check the burner tube opening while you're in there. If there's lint buildup, vacuum it out. Lint near the burner is a fire hazard and also causes inconsistent heating.
Step 4: Install the New Igniter
Take your new DC47-00022A igniter (don't touch the ceramic element with bare hands — oils cause premature failure) and position it in the mounting bracket if it's not pre-assembled. Slide the assembly back into the burner tube opening exactly where the old one came out. The igniter tip should extend into the burner tube about 1/2 inch.
Thread in the two mounting screws and snug them down — not gorilla-tight, just firm. Over-tightening can crack the ceramic. Reconnect the wire harness. You'll hear a click when it seats properly.
Step 5: Test the Repair
Reattach the access panel, push the dryer back into position, and reconnect the power. Turn the gas supply valve back on. Start a timed dry cycle and watch through the access opening (leave the panel loose for now). Within 30-60 seconds, the igniter should glow bright orange. About 10-15 seconds after it glows, you'll hear a whoosh and see blue flames in the burner.
Let it run for 2-3 minutes to confirm consistent operation. If the flame cycles off and on every few minutes, that's normal — it's maintaining temperature. If the igniter glows but no flame appears, double-check your wire connection and make sure the gas valve is fully open.
Testing After Installation
Run a full dry cycle with a load of damp towels. The dryer should heat within the first two minutes and dry the load completely in normal time (30-45 minutes for a typical load). If the dryer heats but takes longer than normal to dry, you might have a venting issue — that's separate from the igniter. Check your exhaust vent for lint blockage.
Monitor the first few cycles for any unusual smells (you might notice a slight burning smell from manufacturing oils on the new igniter — that's normal for the first cycle) or performance issues.
Frequently Asked Questions
Will this igniter work on my Kenmore dryer?
Yes, if your Kenmore dryer uses the DC47-00022A part number (also cross-references as AP4211272 and PS4205220). Many Kenmore Elite gas dryers from 2010-2020 are actually Samsung-manufactured and use this exact igniter. Check your model number against the compatibility list or pull your old igniter and match the part number stamped on the metal bracket.
How long should a gas dryer igniter last?
Typically 3-5 years with regular use, but it varies. If you run your dryer daily, you might see failure closer to 3 years. Light users can get 7-8 years. The igniter weakens gradually — it'll start taking longer to light, then eventually won't generate enough current to open the gas valve. When it fails, it usually still glows, which confuses people who think a glowing igniter means it's working.
Can I use a different brand igniter as a substitute?
Not recommended. Generic igniters might physically fit but have different resistance values, which affects how quickly they draw current and signal the gas valve. Using the wrong resistance can cause delayed lighting, incomplete burns, or safety shutoffs. The DC47-00022A is specifically calibrated for Samsung's gas valve timing. Stick with the OEM part number or verified cross-references like AP4211272 for reliable operation.
Don't touch the ceramic element with bare hands. Oils from your skin cause hot spots that lead to premature failure. Use gloves or hold it by the metal bracket only.
Need the part for this repair?
DC47-00022A · In Stock · Ships next business day