
How to Replace 330031 Surface Burner Receptacle Kit on Whirlpool Electric Range — Step-by-Step
Turn off the 240V circuit breaker before starting — electric range voltage is dangerous
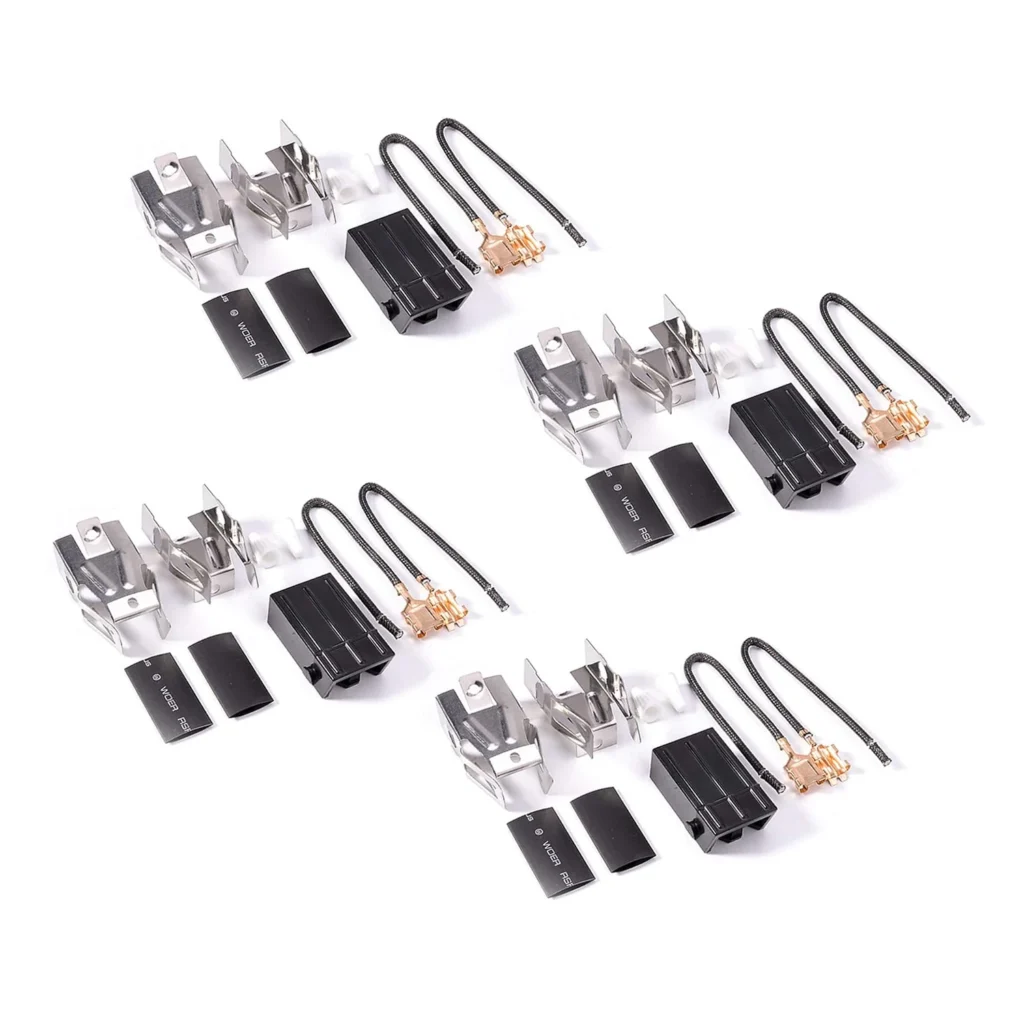
One burner stopped working on your Whirlpool electric range while the others work fine. You've already tested the element itself on another burner position — it heats up just fine. That's your smoking gun: the receptacle is shot. The 330031 surface burner receptacle kit is the component that delivers power to your heating element, and when it fails, you'll get nothing but cold metal no matter which element you plug in.
This is one of the most straightforward electric range repairs you can tackle. The receptacle is the white ceramic block with metal terminals that the coil element plugs into. Over time, these terminals corrode or burn out from repeated heating cycles. Models like the RF3020XYW0, RF390PXWW1, and FES310BQ1 all use this same receptacle design.
What You Need Before Starting
- ¼-inch nut driver or socket
- Needle-nose pliers
- Flathead screwdriver
- Work gloves (metal edges can be sharp)
- Camera or phone (to photograph wire connections)
Repair time: 15-25 minutes
Difficulty: EASY
Safety First
Turn off the circuit breaker to your range — not just the stove's control knobs. Electric ranges run on 240V, which is serious voltage. Verify power is off by trying to turn on a different burner. If you've got a gas range, you're looking at the wrong part — this receptacle is electric-only.
Step 1: Remove the Burner Element and Drip Pan
Lift the coil element straight up and pull it out of the receptacle. It should slide out with minimal force. Set it aside, then lift out the chrome drip pan underneath. Now you can see the receptacle mounted to the cooktop with a single screw or two metal tabs.
Step 2: Photograph the Wire Connections
Before you disconnect anything, take a clear photo of how the wires connect to the receptacle terminals. There are typically two or three wires with spade connectors. The wires might be black, white, and sometimes red or green depending on your model. This photo is your insurance policy against mixing up connections.
Step 3: Remove the Old Receptacle
Locate the mounting screw on top of the cooktop — it's usually visible once the drip pan is removed. Use your ¼-inch nut driver to remove this screw. On some models like the RS6700XKW3, you'll need to reach underneath the cooktop and release two metal tabs instead. Once the receptacle is loose, pull the wires off the terminals with needle-nose pliers. They should slide off easily, but if they're corroded, wiggle them gently side to side.
Step 4: Install the New 330031 Receptacle
Take your new receptacle and connect the wires to the matching terminals using your reference photo. Push each spade connector firmly onto its terminal until you hear a small click or feel it seat. The ceramic block should be oriented with the element slots facing upward. Secure the receptacle with the mounting screw or snap the tabs into place underneath.
Step 5: Reassemble and Test
Drop the drip pan back into position, then plug the coil element into the new receptacle. Make sure it's fully seated — you shouldn't see any gap between the element prongs and the receptacle. Turn the breaker back on, set the burner to medium heat, and watch for the element to start glowing red within 30-45 seconds.
Testing After Installation
Let the burner run for a full minute, then turn it off. Check that the element heated evenly across its entire coil without any dead spots. Repeat this test on high heat to verify the receptacle can handle full power. If the element still won't heat, double-check your wire connections match your photo — a reversed connection won't deliver power properly.
Frequently Asked Questions
Will this receptacle work on my Kenmore range?
Yes, if your model number matches the compatibility list. Kenmore models like KECS100SAL6 and KECS100SBC3 use the same receptacle design since Whirlpool manufactures many Kenmore appliances. Check your drip pan size — if it's 8 inches, this receptacle will fit.
Can I replace just one receptacle or should I do all of them?
You can replace just the failed receptacle, but if your range is more than 10 years old, consider replacing all the receptacles while you're at it. They wear at similar rates, and you've already got the drip pans off. It takes an extra 15 minutes and prevents another burner from failing next month.
Why did my receptacle fail in the first place?
Receptacles fail from two main causes: corrosion from spills that seep past the drip pan, or thermal stress from running burners on high heat for extended periods. The metal terminals inside the ceramic block oxidize and lose their ability to conduct electricity efficiently. Once you see black carbon buildup or pitting on the terminals, replacement is the only fix.
Photograph wire connections before disconnecting to ensure correct reassembly
Need the part for this repair?
330031 · In Stock · Ships next business day