
How to Extend Your Bosch Dishwasher Lower Rack Wheel Life — Maintenance Guide
Always unplug dishwasher or turn off circuit breaker before removing racks for maintenance. Wheels can pinch fingers when rack is tilted — keep hands clear of mounting brackets.
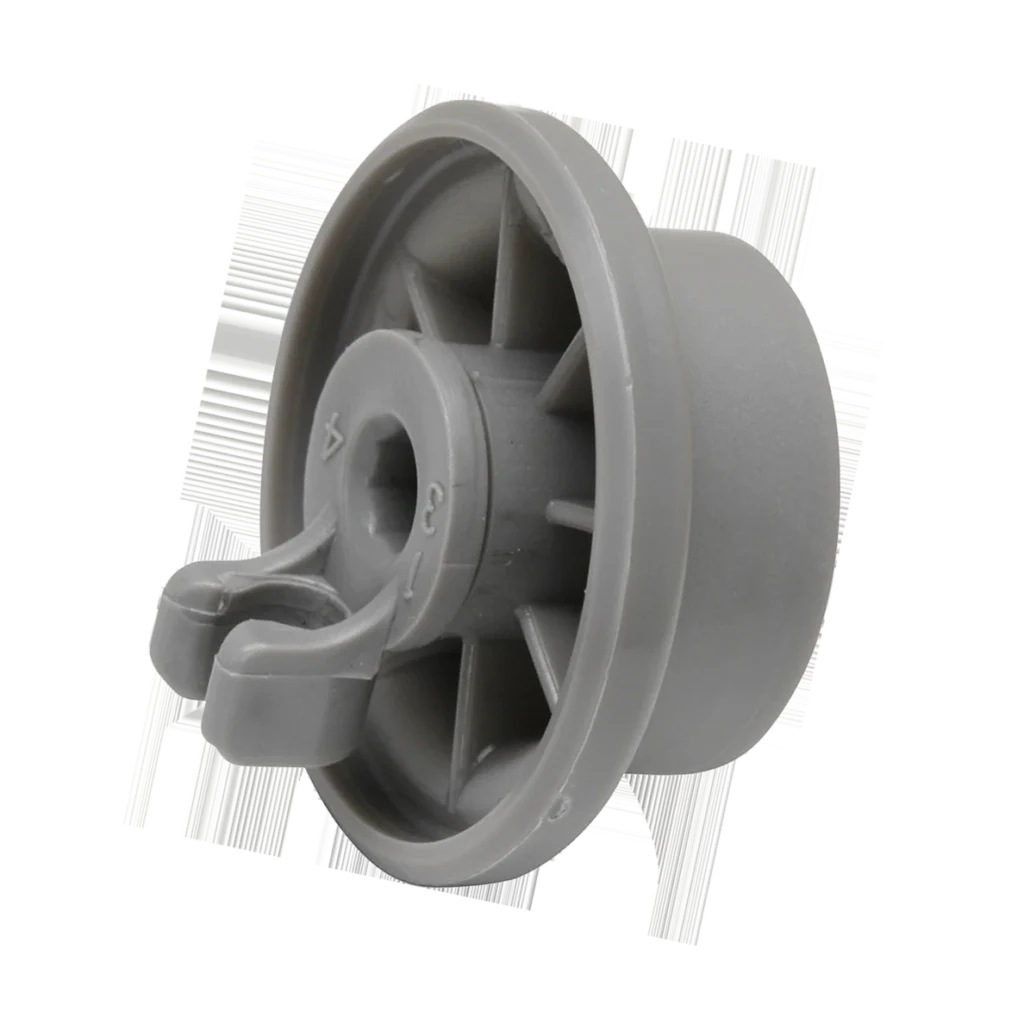
Most Bosch dishwasher lower rack wheels should last 5-7 years, but I see them fail in 18 months all the time. The difference? Those little maintenance habits nobody tells you about when you buy the dishwasher.
The 165314 wheel assembly (also fits Kenmore, Gaggenau, and Thermador models) takes a beating every single cycle. You're loading 40-60 pounds of dishes, then rolling that weight back and forth on wheels barely bigger than a nickel. Add detergent residue, hard water deposits, and food particles, and you've got a recipe for premature failure.
How Long Should It Last?
Under normal conditions, these wheels should give you 2,500-3,000 cycles. That's about 5-7 years for most households. But I've pulled wheels that were seized solid after just a year because nobody ever cleaned the track.
Here's what affects lifespan:
- Water hardness: Hard water creates mineral buildup that acts like sandpaper on the wheel axle
- Loading habits: Overloading the rack puts 2-3 times the designed stress on each wheel
- Detergent type: Powder detergents leave more residue than gel or pods
- Rack track condition: Corroded or damaged tracks accelerate wheel wear
- Cleaning frequency: Food particles in the track grind away at the wheels
The wheel itself is gray plastic with a metal axle. When it fails, you'll usually see the plastic crack around the axle mounting point, or the wheel will stop rotating smoothly on its axle.
Signs It's Wearing Out
Don't wait until the rack won't roll. Catch these warning signs early and you'll save yourself from having to replace multiple wheels at once:
Resistance When Rolling the Rack
The lower rack should glide in and out with minimal effort. If you're fighting it or having to lift slightly while pulling, at least one wheel is binding. Run your finger along each wheel — it should spin freely with just a light touch. If it's sticky or won't turn at all, that wheel's done.
Visible Flat Spots or Cracks
Pull the rack all the way out and flip it to inspect the wheels. Look for flat spots where the wheel doesn't roll smoothly anymore. You'll also see hairline cracks radiating from the center axle hole. Those cracks mean the plastic is fatigued and failure is imminent — usually within the next 50-100 cycles.
Uneven Rack Movement or Tilting
If the rack feels like it's tilting to one side as you roll it, or it catches and releases in a jerky motion, you've got uneven wheel wear. This happens when one wheel seizes and forces the others to compensate. It's also a sign that your rack alignment is off, which will destroy the remaining good wheels faster.
White or Brown Buildup Around the Wheel Base
That crusty residue isn't just ugly — it's abrasive. Hard water deposits mixed with detergent and food particles create a grinding compound that wears down both the wheel and the track. If you see buildup, those wheels are wearing faster than they should.
Monthly Maintenance That Actually Works
I'll be straight with you — most people never maintain these wheels until they fail. But 15 minutes a month will triple their lifespan.
The Quick Monthly Clean
Pull the lower rack completely out. Flip it over on a towel. Use a damp cloth with white vinegar to wipe each wheel and the track area where it rides. Spin each wheel with your finger to work the vinegar into the axle area. You're dissolving mineral deposits before they can cause damage.
For the track itself, run a damp cloth along the entire length, front to back. You'll be shocked at the gunk that comes off. That gunk is what grinds down your wheels.
The Deep Quarterly Clean
Every three months, remove the rack and soak a cloth in CLR or a 50/50 vinegar-water solution. Really work it around each wheel, getting under the wheel into the mounting bracket. Let it sit for 5 minutes, then scrub with an old toothbrush. This gets the buildup you can't see — the stuff that's starting to seize the axle.
Check each wheel's mounting point. Press on the wheel — there should be zero play or wobble. If it moves side-to-side on the axle, that wheel is loose and needs replacement soon.
Loading Habits That Save Your Wheels
Don't max out the lower rack's weight capacity every cycle. Spread heavy items across both racks when possible. The wheels are rated for about 50 pounds, but running them at 40 pounds instead of 50 will extend their life by years.
Never force the rack if it's catching. Stop, find what's binding, and fix it. Forcing a stuck rack is how you crack the wheel mounting points.
When to Replace vs Maintain
Here's the honest truth: if the wheel has visible cracks or won't spin freely after cleaning, replace it. These wheels are $8-15 each for the 165314, and trying to nurse a cracked wheel along will damage your rack tracks, which cost $80-150 to replace.
Replace all wheels at once if they're more than 5 years old and showing wear. I know it seems excessive, but here's why: if one wheel fails completely and you don't notice, the rack will drag on that corner. That grinds down the plastic rack track, which can't be repaired. You'll need a whole new rack assembly.
On the flip side, if your wheels are less than 3 years old and just rolling rough, aggressive cleaning usually brings them back. Soak them in straight CLR for 30 minutes, scrub thoroughly, and test. I've saved plenty of wheels this way.
One more thing: if you're replacing wheels on a Bosch SHX46A05UC, SHU43C02UC, or any of the compatible models listed for this part, check the rack track condition first. Run your finger along it — you shouldn't feel any burrs, cracks, or rough spots. If the track is damaged, new wheels won't last either.
Frequently Asked Questions
How Often Should I Actually Check These Wheels?
Give them a visual once a month when you're loading the dishwasher. Pull the rack out, flip it up enough to see underneath, and make sure the wheels spin freely. Every three months, do the deep clean I described. It sounds like a lot, but you're talking about 5 minutes of actual work to avoid a $200 rack replacement.
Can I Use WD-40 or Silicone Spray on the Wheels?
No. Absolutely not. These products attract food particles and detergent residue, which creates a grinding paste that'll kill your wheels faster than doing nothing. Stick with vinegar or CLR for cleaning. The wheels are designed to run dry — they don't need lubrication.
Why Do Some Wheels Fail Faster Than Others on the Same Rack?
Loading patterns. Most people load the heaviest items on one side out of habit. That side's wheels carry more weight every cycle and wear faster. Also, the back wheels typically fail first because that's where food particles settle when the spray arm spins. Rotate your loading pattern and those wheels will wear more evenly.
Element showing wear?
165314 · Replace before it fully fails