
How to Replace 3355806 Washer Lid Switch Assembly on Whirlpool Washers — Step-by-Step
Always disconnect the washer from electrical power before beginning any repair. The lid switch carries household voltage and can cause shock if the machine is plugged in.
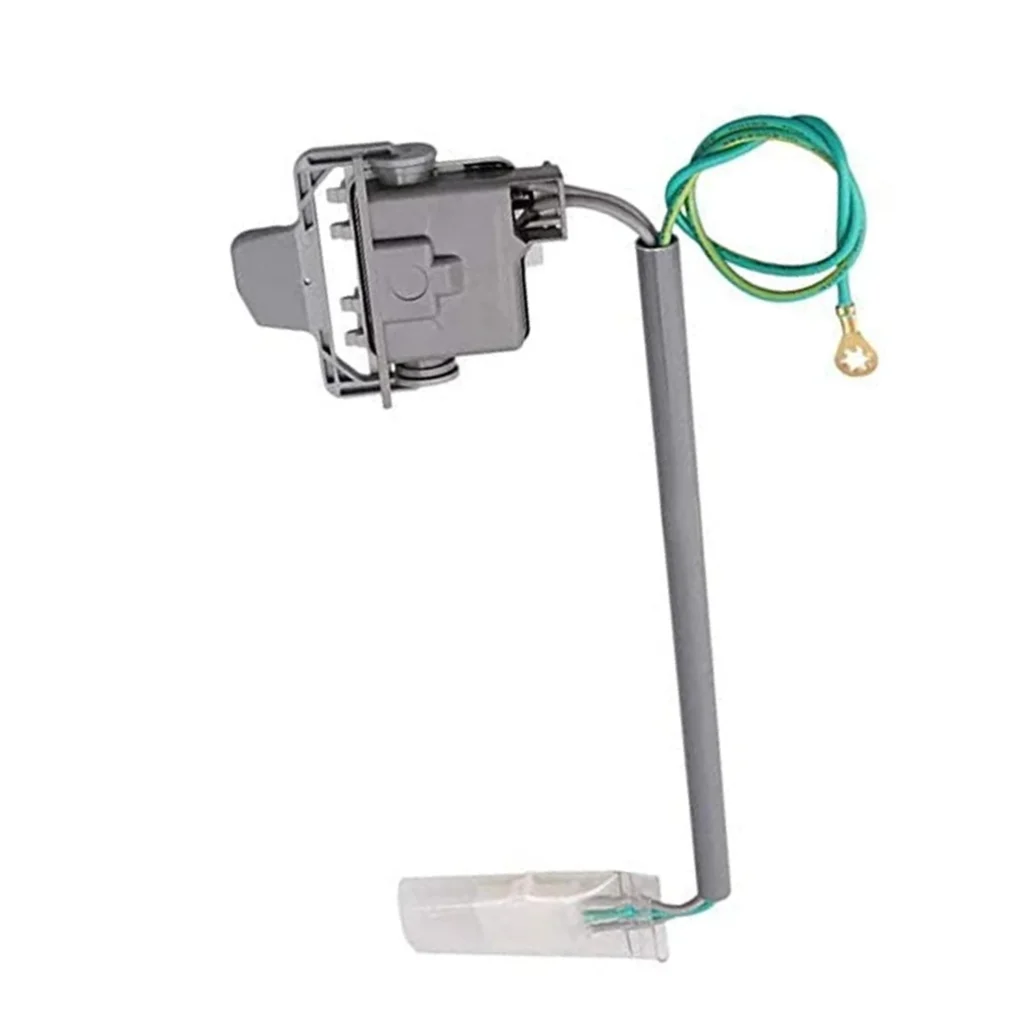
Your Whirlpool washer fills with water just fine, agitates through the wash cycle, then... nothing. It sits there full of soapy water, refusing to spin or drain. You lift the lid and close it again — still nothing. That's the classic sign of a failed lid switch. One DIYer described it perfectly: "First I thought it may be the timer since it wasn't advancing to the next cycle, but after trying that it didn't seem to have any affect." The culprit? That little 3355806 lid switch assembly tucked under the top panel.
This switch is a safety mechanism that prevents the washer from spinning when the lid's open. When it fails, your washer thinks the lid is always open — even when it's closed tight. The good news? This is one of the easier washer repairs you can tackle yourself, even if you've never worked on appliances before.
What You Need Before Starting
Gather these tools before you begin:
- Phillips and flathead screwdrivers
- 1/4-inch nut driver or socket set
- Pliers (needle-nose work best)
- Wrench set (for grounding terminal)
- Towel (to protect the washer top)
Repair Time: 30-60 minutes for most models
Difficulty: Easy
This repair works for Whirlpool models like LTE5243DQ0, LTE5243DQ1, LTE5243BN0, LTE5243BW0, and dozens of other compatible Whirlpool, Kenmore, Roper, and Maytag washers. The 3355806 switch replaces part numbers WP3355806, AP6008072, PS11741201, and 520880.
Safety First
Disconnect the machine from mains electricity before you start. Unplug the washer completely — don't just turn off the circuit breaker. Water and electricity don't mix, and you'll be working near electrical connections. If your washer is in a tight space and you can't easily pull it out, at least make absolutely certain it's unplugged before touching anything.
Step 1: Access the Top Panel
Most Whirlpool washers have the lid switch mounted to the underside of the top panel. You'll need to remove this panel to reach it. Look for two screws at the back corners of the top — they're usually visible when you lift the lid. Remove these screws and set them aside. Some models also have clips at the front. Push the top panel backward about an inch, then lift up from the front. Prop it open with something soft (a folded towel works great) to protect the paint.
Step 2: Locate and Disconnect the Old Switch
The lid switch assembly sits right where the lid latch makes contact when you close it. You'll see a small plastic housing with wire connectors attached. Take a photo with your phone before disconnecting anything — you'll thank yourself later. Use pliers to carefully pull off the wire connectors. They usually have a tab you can squeeze to release them. Don't yank on the wires themselves; grip the plastic connector housings.
One user who'd done this repair noted: "Getting the back two screws out was very difficult because I couldn't see them from the front and I could not move the unit out of the enclosed space." If you're in the same situation, a magnetic screwdriver or a socket with an extension can save you a lot of frustration.
Step 3: Remove the Grounding Terminal and Mounting Hardware
There's typically a grounding wire attached to the switch or nearby on the washer cabinet. Remove this first — it's usually held by a single screw or bolt. Once the ground is free, remove the screws holding the switch assembly in place. Most models use two Phillips screws, but some use 1/4-inch hex heads. The switch should lift right out once the fasteners are removed.
Step 4: Install the New 3355806 Switch
Position the new switch exactly where the old one sat. Thread in the mounting screws and tighten them snugly — but don't overtighten and crack the plastic housing. Reattach the grounding terminal to the machine body. This ground connection is critical for safety, so make sure it's tight and making good metal-to-metal contact with bare metal (not paint).
Now reconnect the wire harnesses. They only fit one way, so if you're forcing it, you've got the wrong connector. You should hear or feel a small click when they seat properly. Double-check your earlier photo to make sure everything's connected.
Step 5: Reassemble and Test
Lower the top panel back into position. Slide it forward until it clicks into the front clips, then replace the two back screws. Make sure everything's aligned properly — you don't want gaps that'll let water splash out during the spin cycle.
Plug the washer back in. Don't start a full load yet. Instead, run a quick test: close the lid and start a spin cycle. The washer should begin spinning immediately. Open the lid mid-cycle — the spinning should stop within a couple seconds. Close it again — spinning should resume. That's how you know the new switch is working correctly.
Testing After Installation
Run a complete wash cycle with a small load to verify everything's working. Pay attention to these checkpoints:
- Washer fills normally with the lid closed
- Agitation cycle completes
- Washer drains completely
- Spin cycle starts and runs to completion
- Opening the lid immediately stops the spinning
- Closing the lid resumes the cycle
If the washer still won't spin or drain after replacing the lid switch, you might have a separate issue with the drain pump, drive belt, or motor coupling. But nine times out of ten, a washer that won't spin or drain with these symptoms just needs this simple switch replacement.
Frequently Asked Questions
How do I know if my lid switch is bad without taking the washer apart?
If your washer fills and agitates but won't drain or spin — and you hear no click when you close the lid — the switch is likely failed. You can also test it with a multimeter set to continuity mode. Access the switch, disconnect it, and test across the terminals. With the actuator pressed (simulating a closed lid), you should get continuity. If there's no continuity when pressed, the switch is dead.
Will this switch work on my Kenmore washer?
Yes, the 3355806 switch works on many Kenmore washers that were manufactured by Whirlpool. Kenmore doesn't make their own appliances — they're rebranded Whirlpool, GE, or Frigidaire units. If your Kenmore model number starts with 110, it's a Whirlpool-made machine and this switch will likely fit. Check the compatible models list or compare your old switch to the photos of the 3355806 to be certain.
Can I bypass the lid switch temporarily to finish a load of laundry?
Technically yes, but don't. You can jump the switch terminals to complete the circuit, but that defeats the safety mechanism that prevents the washer from spinning with the lid open. A spinning washer basket can cause serious injury if you reach in while it's moving. It's not worth the risk. For $22.99 and an hour of your time, just replace the switch properly.
Take a photo of the wire connections before disconnecting anything. The connectors only fit one way, but having a reference photo eliminates any guesswork during reassembly.
Need the part for this repair?
3355806 · In Stock · Ships next business day