
How to Replace 285805 Washer Water Inlet Valve on Whirlpool & Kenmore — Step-by-Step
Unplug washer and shut off water supply valves before starting — electrical shock and water damage risks are real
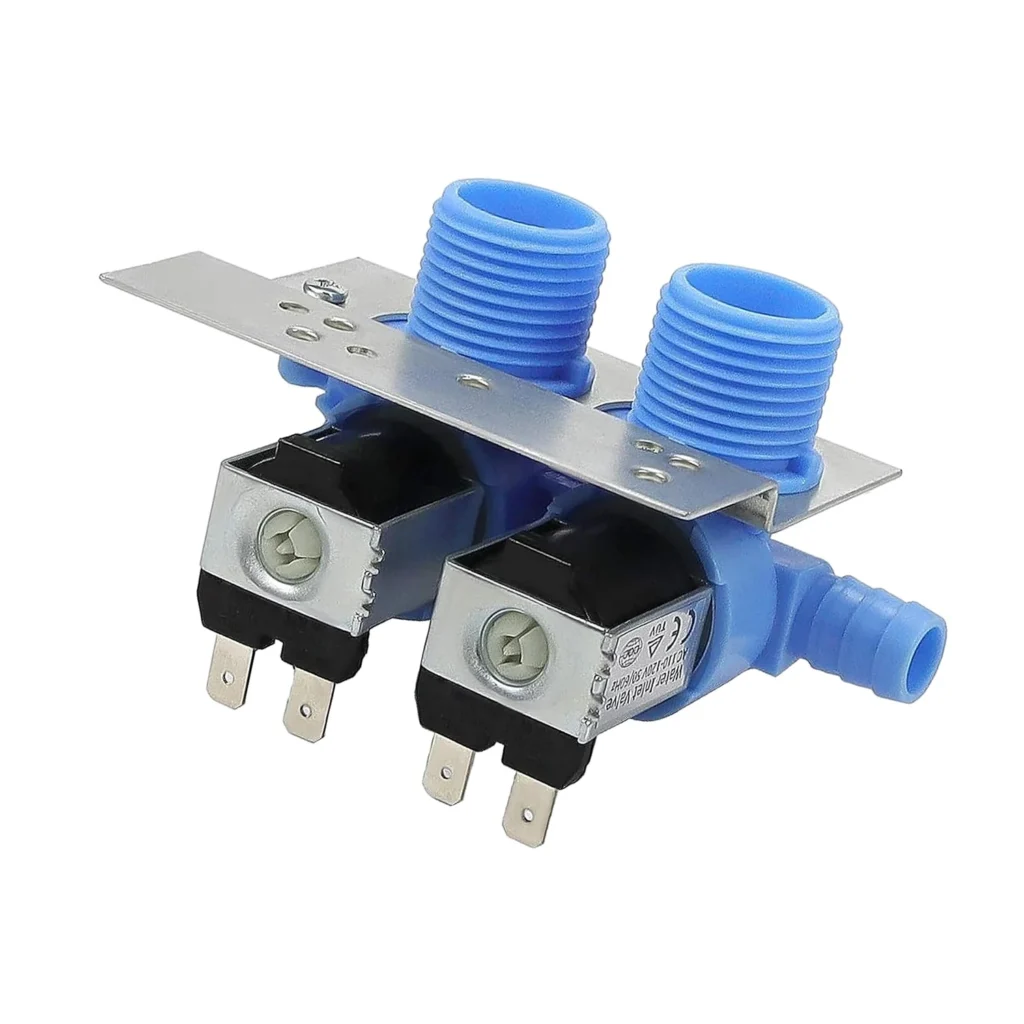
Your Whirlpool washer fills painfully slow — or worse, doesn't fill at all. You turn the dial, hear the usual click, but the tub stays bone dry. That's your water inlet valve failing, and replacing the 285805 is actually more straightforward than you'd think. One DIYer put it perfectly: "Washer is not leaking into tub anymore, would recommend." Let's get yours working again.
What You Need Before Starting
This is a moderate DIY repair that'll take 30-45 minutes once you've got everything ready. Here's what you need:
- Phillips screwdriver
- Flathead screwdriver
- Needle-nose pliers
- Bucket or towels (for residual water)
- Work gloves (those metal edges are sharp)
Difficulty: Moderate — You'll need to access the back panel and work with water connections.
Estimated Time: 30-45 minutes (though one user noted their installation "took ten minutes instead of two hours" once they figured out the mounting bracket wasn't necessary for their unit).
Safety First
Unplug the washer completely. Don't just turn it off — pull that plug. Next, shut off both the hot and cold water supply valves behind the machine. Turn them clockwise until they stop. You'll still have some water in the hoses, so keep that bucket handy. Water and electricity don't mix, and you're about to be working with both connection points.
Step 1: Pull the Washer Out and Access the Back Panel
You need room to work. Pull the washer forward about two feet from the wall. Once you've got clearance, look at the back panel — on most Whirlpool, Kenmore, and KitchenAid models (like the LSQ8243HQ0 or 7LSR9245HZ0), the inlet valve sits right at the top where the fill hoses connect. You might need to remove a few screws to get the rear access panel off, but many models let you reach the valve without full panel removal.
Step 2: Disconnect the Water Supply Hoses
Grab your pliers and loosen the hot and cold water hoses from the inlet valve. Turn counterclockwise. Water will dribble out — that's normal. Let it drain into your bucket. Once the hoses are off, you'll see the valve itself: a rectangular component with two solenoids (those round coil sections) and wire connectors on top. Take a quick photo with your phone of how the wires connect. Trust me on this.
Step 3: Remove Electrical Connections and Mounting Hardware
Press the tabs on the wire harness connectors and pull them straight off the solenoid terminals. There's usually one connector per solenoid. Now locate the mounting screws or bracket holding the valve to the washer frame. Most models use two screws at the top. Remove these and carefully pull the old valve out. Here's where that user comment makes sense: "The mounting bracket was not necessary for this unit." Some replacement valves include brackets, but your specific model might mount directly to the frame. Check before you spend extra time.
Step 4: Install the New 285805 Valve
Position your new 285805 valve where the old one sat. The inlet ports (where hoses connect) should face outward toward you. Secure it with the mounting screws you removed earlier. Hand-tighten first, then snug them down with your screwdriver — don't overtighten or you'll crack the plastic housing. Reconnect the wire harnesses to the solenoids. They only fit one way, but double-check against that photo you took.
Step 5: Reconnect Water Hoses and Test
Thread the hot and cold water hoses back onto the valve inlets. Hot goes to the left port, cold to the right (there should be markings). Tighten by hand first, then give them a quarter-turn with pliers. Don't crank them down — you'll strip the threads. Turn the water supply valves back on slowly. Watch for leaks around the connections. If you see drips, tighten slightly more.
Testing After Installation
Plug the washer back in and push it into position. Run a rinse cycle with the tub empty. Listen for water flowing into the drum. It should fill steadily without spraying or leaking from the valve area. If you had "no hot or cold water" before, both temperatures should work now. If water was filling too slowly, you'll notice the improvement immediately. Let the cycle finish and check underneath the washer for any pooling water.
Frequently Asked Questions
Will this 285805 valve work on my Kenmore 110 series washer?
Yes — this valve is compatible with dozens of Kenmore 110 models including the 110.16872691 and 110.18702791. Whirlpool manufactured these washers, so the parts interchange. Just verify your model number against the compatibility list to be certain.
My washer still won't fill after replacing the valve — what now?
Check three things: First, make sure the water supply valves are fully open. Second, inspect the inlet screens inside the valve ports — they can clog with sediment and restrict flow even on a new valve. Third, test the lid switch. If it's faulty, the washer won't signal the valve to open at all.
Do I really need to replace both solenoids or can I just fix one?
The 285805 is a complete valve assembly with both hot and cold solenoids built in. You can't replace them individually. The good news? At $31.99, you're getting both solenoids, the valve body, and all the internal components. That's actually cheaper than trying to source solenoids separately.
Take a photo of wire connections before disconnecting anything — makes reassembly foolproof
Need the part for this repair?
285805 · In Stock · Ships next business day