
LG Dryer tE1 Error Code — What It Means & How to Fix
Thermistor (temperature sensor) malfunction detected
The tE1 error code appears when the dryer's thermistor fails to send accurate temperature readings to the control board. This sensor monitors drum temperature to regulate the heating element. When it fails, the dryer cannot maintain proper drying temperature, resulting in extended dry times, mid-cycle shutdowns, or complete failure to heat. The error is a protective shutdown to prevent overheating.
Always unplug the dryer before removing panels. Gas dryers require shutting off the gas supply valve. The heating element housing can remain hot for 30+ minutes after use — allow cooling time before working near it.
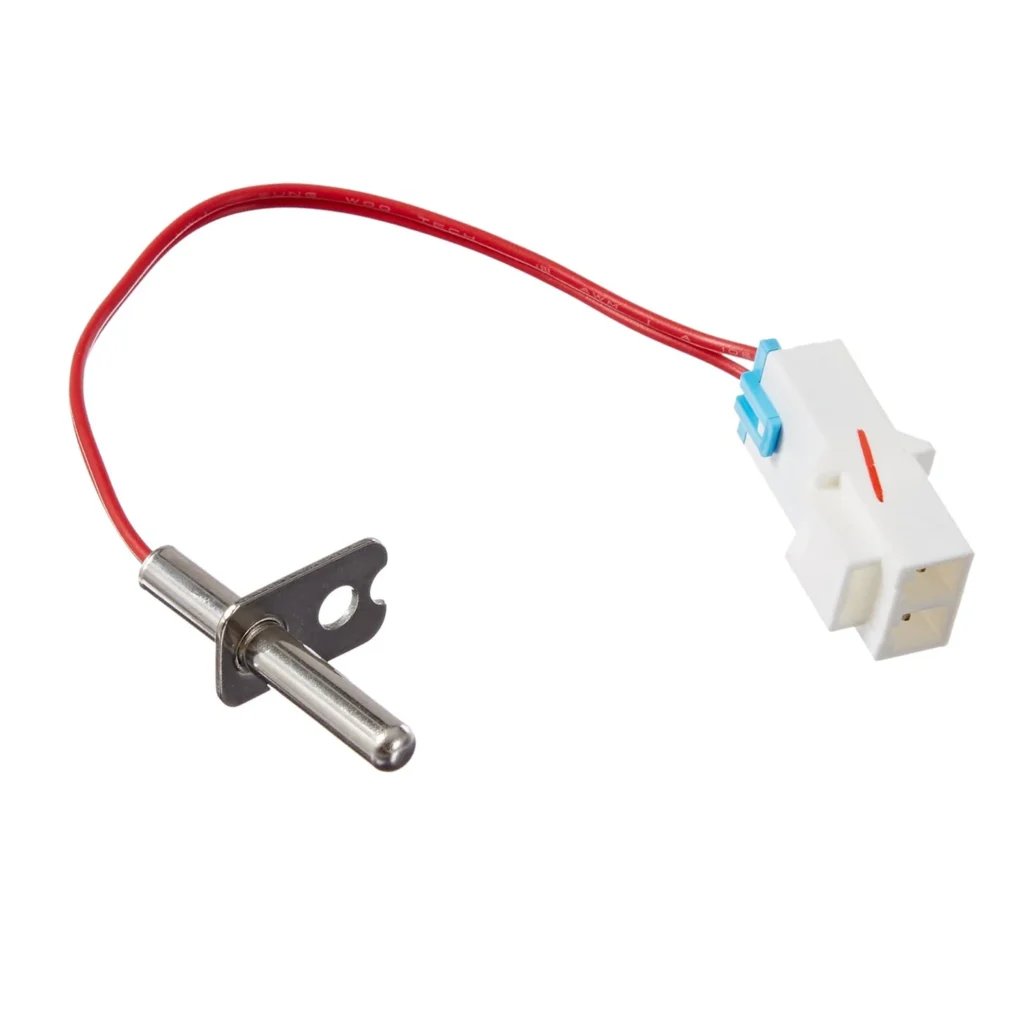
You're mid-cycle when your LG dryer suddenly stops, and 'tE1' flashes on the display. Your clothes are still damp, and you're stuck wondering if you need a repair tech or if this is something you can handle yourself. The good news? This specific error code almost always points to one component — and it's easier to replace than you'd think.
What tE1 Actually Means
The tE1 error code indicates your dryer's thermistor is sending faulty readings to the control board. The thermistor (part 6323EL2001B) is a temperature sensor that sits inside the dryer drum housing. It tells the control board how hot the air is so the heating element knows when to turn on and off.
When this sensor fails, the dryer can't regulate temperature properly. That's why you'll notice clothes taking twice as long to dry, or the machine stopping mid-cycle because it thinks something's dangerously wrong. The control board literally can't 'see' the temperature anymore, so it throws the tE1 code and shuts down as a safety measure.
Most Likely Causes
Failed thermistor sensor (probability: high) — The thermistor itself has failed due to age, heat stress, or corrosion on the electrical contacts. This is the direct cause in about 85% of tE1 errors. On models like the DLE5955W and DLEX7177WM, these sensors typically last 8-12 years before the resistance values drift out of spec.
Lint buildup on the thermistor (probability: medium) — A thick layer of lint coating the thermistor prevents it from accurately sensing air temperature. The sensor works, but it's essentially insulated from the actual dryer environment. You'll see this more often if the exhaust vent is restricted or hasn't been cleaned in years.
Damaged wiring harness (probability: low) — The connector or wires leading to the thermistor have become brittle from heat cycles and cracked. This creates an intermittent connection that the control board reads as a sensor failure. Check for visible burn marks or melted plastic near the connector.
Failed control board (probability: very low) — Rarely, the control board's temperature monitoring circuit fails instead of the thermistor itself. This happens in less than 5% of cases, but if you've replaced the thermistor and still get tE1, the board is next on the list.
Step-by-Step Fix
1. Unplug the dryer and pull it away from the wall. You need access to the rear panel. If you have a gas dryer, turn off the gas supply valve as well.
2. Remove the rear access panel. There are typically 6-8 screws around the perimeter. Set them aside — you'll notice the drum and blower housing once the panel is off.
3. Locate the thermistor. It's mounted on the duct housing near where the heating element sits. On models like the DLE2514W and DLE5977W, it's on the left side of the blower housing. Look for a small sensor with two wires attached — it's about the size of a quarter with a white plastic body.
4. Disconnect the wire harness. Press the locking tab and pull straight out. If lint has built up around the sensor, use a vacuum or compressed air to clear it before removing the sensor itself.
5. Remove the mounting screw. The thermistor is held by a single screw. Once removed, the sensor pulls straight out of its bracket.
6. Install the new 6323EL2001B thermistor. Slide it into the bracket, secure with the mounting screw, and reconnect the wire harness until you hear it click. Make sure the sensor tip is flush against the duct — any air gap will cause inaccurate readings.
7. Reassemble and test. Replace the rear panel, plug the dryer back in, and run a timed dry cycle. The tE1 error should clear immediately. If the dryer heats normally and completes the cycle, you're done.
When the Fix Doesn't Work
If you've replaced the thermistor and the tE1 error persists, check these in order: First, inspect the wire harness for continuity with a multimeter — you're looking for 0 ohms resistance between both ends of each wire. Second, verify the thermistor resistance at room temperature (should be around 10,000 ohms at 77°F). If that checks out but the error remains, the control board's temperature monitoring circuit has likely failed and needs replacement.
Some technicians also recommend checking for a restricted exhaust vent, since extreme back-pressure can cause temperature spikes that damage thermistors prematurely. If your vent run is longer than 15 feet or has multiple 90-degree bends, that could be contributing to repeat failures.
Frequently Asked Questions
Can I run my LG dryer with the tE1 error showing?
No. The dryer will either refuse to start or will run but not heat. Even if it runs, you risk overheating because the control board can't monitor temperature. Running it in this state can damage the heating element or even create a fire hazard from overheating.
Why does my dryer show tE1 after I cleaned the lint filter?
Cleaning the lint filter doesn't directly cause tE1, but it might reveal an existing problem. If the thermistor was already failing and lint buildup was masking symptoms, removing that lint exposes the faulty sensor. The timing is coincidental — the thermistor was already on its way out.
How long does a dryer thermistor typically last?
Most thermistors last 8-12 years under normal use. Heavy use (multiple loads daily) or poor venting can shorten this to 5-7 years. If you're replacing the thermistor on a dryer that's less than 5 years old, investigate your exhaust vent system — something is causing excessive heat stress.
Before replacing the thermistor, use compressed air to blow out lint buildup around the sensor and duct housing. A dirty sensor can sometimes trigger tE1 even when the part itself is still functional. If cleaning doesn't clear the error within one test cycle, proceed with replacement.
Need the control board or touchpad?
Genuine OEM & aftermarket options in stock