
How to Replace W10869800 Water Inlet Valve on Whirlpool Washer — Step-by-Step
Unplug washer and shut off water supply valves before starting. Residual water will drain from hoses during removal.
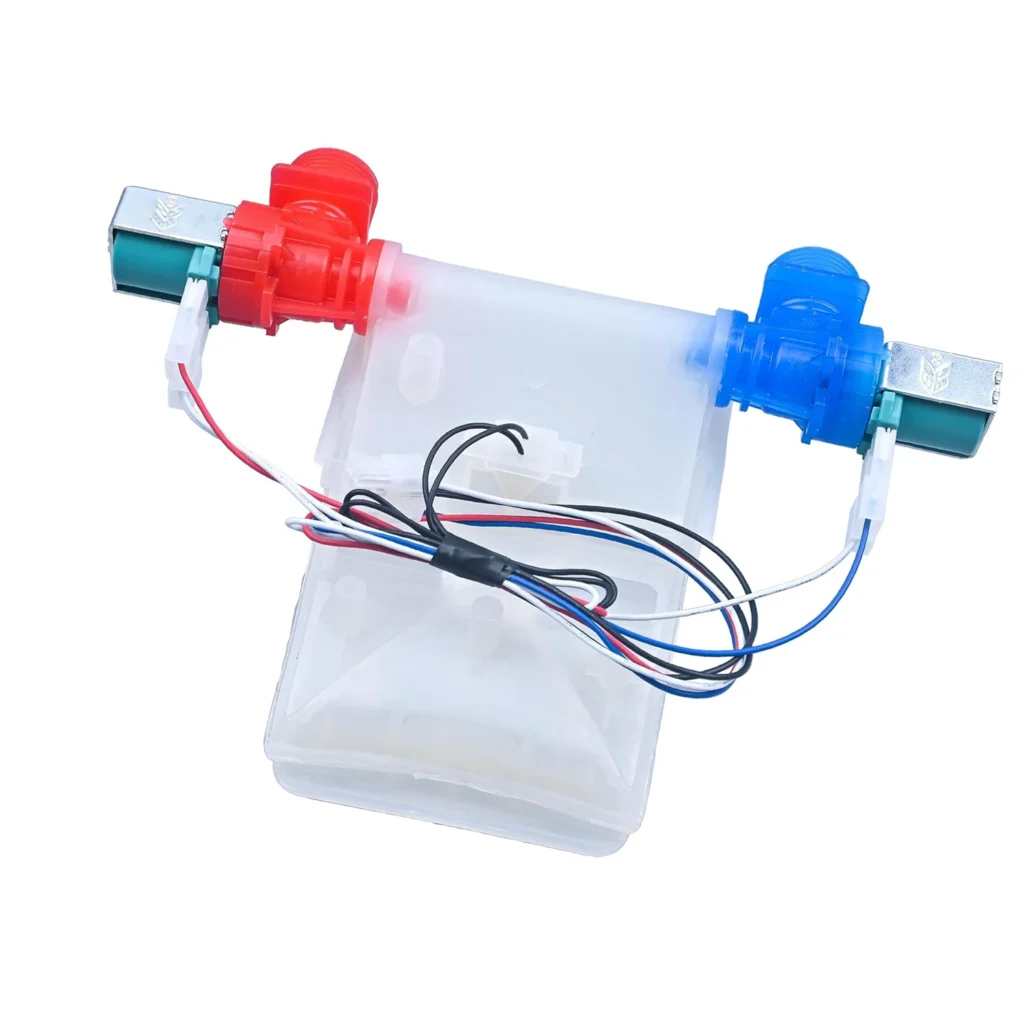
Water pooling behind your Whirlpool washer? If you've noticed your WTW4850HW1 or WTW5000DW3 isn't filling properly—or worse, leaking from the back panel—the water inlet valve is likely your culprit. This valve controls both hot and cold water flow into your machine, and when it fails, you'll know it fast.
What You Need Before Starting
Tools required:
- 1/4-inch nut driver or socket wrench
- Flathead screwdriver
- Pliers (for hose clamps)
- Bucket or towels (water will drain)
- Work gloves
Time estimate: 30-45 minutes
Difficulty: Moderate — You'll need to work behind the washer and handle water supply lines.
Safety First
Unplug your washer completely before starting. Turn off both hot and cold water supply valves behind the machine—these are typically quarter-turn valves. Even with valves closed, expect some residual water to spill when you disconnect the inlet hoses, so keep that bucket handy. Never skip unplugging the machine; the valve solenoids carry electrical current.
Step 1: Access the Water Inlet Valve
Pull your washer away from the wall to access the back panel. The water inlet valve is located where your fill hoses connect—you'll see two threaded ports (hot and cold) connected to a plastic housing. On models like the WTW4950HW2 and MVWC465HW3, it's mounted to the rear panel with two screws. Disconnect both fill hoses using pliers if they're tight, turning counterclockwise.
Step 2: Remove Internal Hose Connections
Inside the washer, you'll find two to three internal hoses connected to the valve outlet with spring clamps or wire clamps. Use pliers to squeeze the spring clamp tabs and slide them back down the hose. Twist and pull each hose off—they'll be snug. Have your bucket ready; water trapped in these hoses will drain out.
Step 3: Disconnect the Wire Harness
The valve has an electrical connector with two or three wires controlling the solenoids. Press the locking tab and pull the connector straight off. Don't yank on the wires themselves. On Maytag models like the MVWC565FW0, this connector is gray plastic with a visible release tab on top.
Step 4: Remove the Old Valve
Two screws secure the valve to the back panel. Remove these with your 1/4-inch nut driver. The valve will pull free from the mounting holes. Inspect the old valve—if you see calcium buildup on the screens or cracks in the plastic housing, you've confirmed the failure point. Check the inlet screens while you're here; clean or replace them if they're clogged with sediment.
Step 5: Install the W10869800 Replacement
Position your new W10869800 valve into the mounting holes. The threaded inlet ports should face outward toward where your fill hoses connect. Secure with the two mounting screws—snug them down but don't overtighten and crack the plastic housing. Reconnect the wire harness until you hear it click. Push the internal hoses back onto the outlet ports and slide the spring clamps into position about 1/2 inch from the end of each hose.
Step 6: Reconnect Fill Hoses and Test
Thread your hot and cold fill hoses back onto the valve ports. Hand-tighten first, then give them a quarter-turn with pliers—just enough to compress the rubber washer inside. Turn on your water supply valves slowly, checking for leaks at both the valve connection and internal hoses. Plug in your washer and run a quick rinse cycle. Watch the back panel during the first few minutes of filling.
Testing After Installation
Run a full wash cycle to verify proper operation. You should hear distinct clicks when the valve opens and closes. Check that both hot and cold water flow correctly—select a warm wash to test both solenoids. Inspect behind the washer after the cycle completes, looking for any moisture or drips. If you see leaking at the hose connections, the rubber washers may need replacing or the connections need slight tightening.
Frequently Asked Questions
Why does my washer leak from the inlet valve area?
Leaking from the inlet valve typically happens when the internal diaphragm seals deteriorate or crack. Mineral deposits can prevent proper sealing, causing water to seep through even when the valve is supposed to be closed. External leaks at the threaded connections usually mean worn rubber washers in your fill hoses—replace these separately if needed.
Can I use W10869800 if my washer has W11038689 listed?
Yes, W10869800 directly replaces W11038689, W10776841, and W11024486. These are superseded part numbers—Whirlpool updated the design slightly but maintained full backward compatibility. The mounting points, hose connections, and electrical connector are identical across all these numbers.
My washer fills too slowly after replacing the valve. What's wrong?
Slow filling after valve replacement usually points to clogged inlet screens. Each threaded port has a small mesh screen that filters sediment—if you didn't clean or replace these during installation, debris can restrict flow. Remove the fill hoses and check both screens. You can clean them with an old toothbrush and vinegar, or replace them if they're damaged. Also verify your household water pressure is adequate—should be at least 20 PSI.
Clean or replace inlet screens while the valve is removed to prevent future flow restrictions from sediment buildup.
Need the part for this repair?
W10869800 · In Stock · Ships next business day