
How to Replace W10289387 Washer Water Inlet Valve on Whirlpool — Step-by-Step
Unplug washer completely and turn off water supply valves before starting repair to prevent electrical shock and flooding
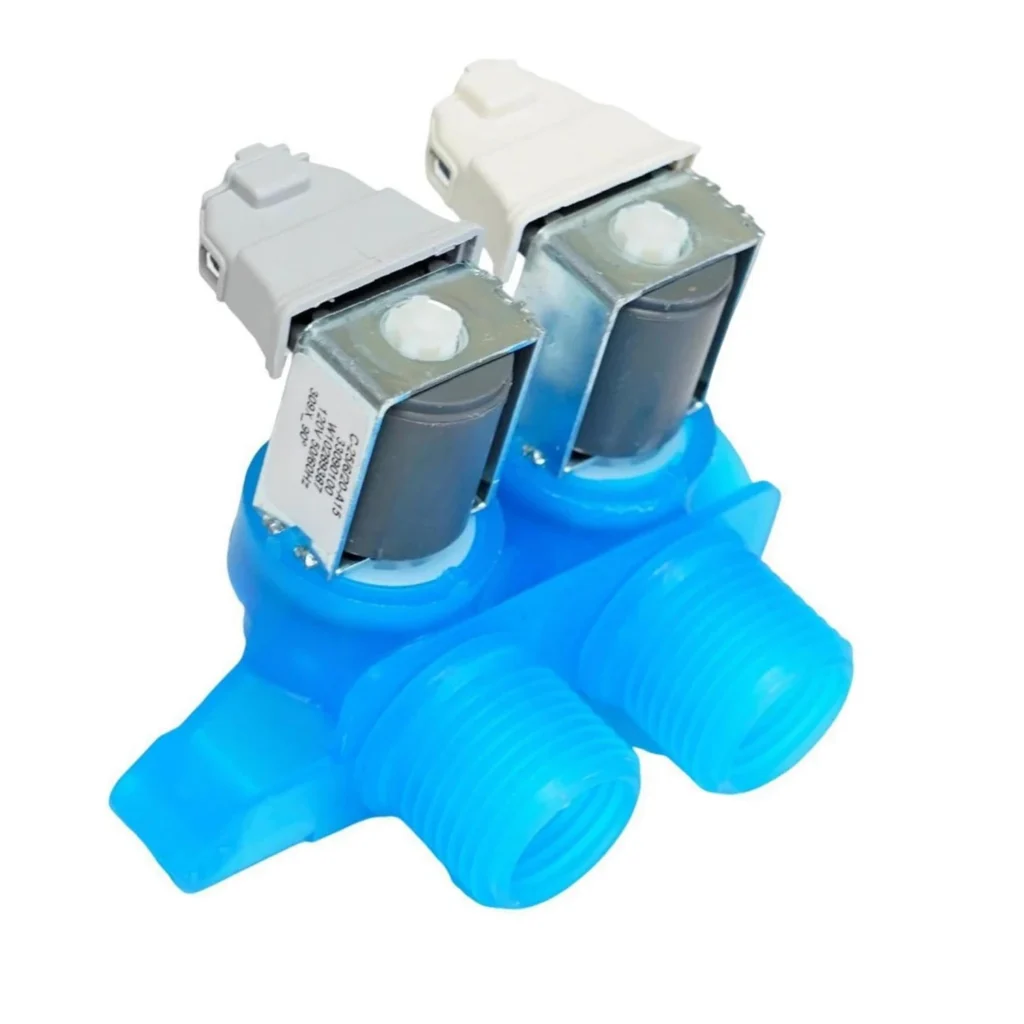
Your Whirlpool washer starts its cycle, and nothing happens. No water. Just silence and a blinking light. You've checked the hoses — they're fine. The problem? Your water inlet valve has failed, and it needs replacing. The W10289387 valve controls water flow into your washer, and when it quits, your laundry piles up fast.
This valve fits popular Whirlpool front-loaders like the WFW9400SW04 and WFW9410XW00, plus Maytag models including the MHW6000XW0 and MHW6000XW1. It's the same part whether you've got a Whirlpool, Maytag, or Amana machine — just different badge engineering.
What You Need Before Starting
This repair takes about 45 minutes once you know what you're doing. Here's what you'll need:
- 5/16" and 1/4" nut drivers or socket set
- Phillips screwdriver
- Flathead screwdriver for hose clamps
- Needle-nose pliers
- Towels (you'll have water spillage)
- Small bucket or pan
- Work gloves
Difficulty: Moderate | Time: 45-60 minutes
Safety First
Unplug your washer completely — don't just turn it off. Turn off both hot and cold water supply valves behind the machine. These valves control water flow to the inlet valve, and you don't want a flood. Pull the washer away from the wall so you've got room to work. Water will drip when you disconnect hoses, so have those towels ready.
Step 1: Remove the Top Panel
Most Whirlpool front-loaders hide the inlet valve under the top panel. You'll find two screws at the back top corners — remove them with your nut driver. Slide the top panel back about an inch, then lift up and off. Set it aside where it won't get scratched.
Step 2: Disconnect Water Supply Hoses
Look at the back of the machine where your supply hoses connect. You'll see the valve has two threaded connections — hot and cold. Use your adjustable wrench to loosen these connections. Water will drip out, so position your bucket underneath. Once the supply hoses are off, you'll see two smaller hoses inside the machine that connect to the valve — one leading to the detergent dispenser, another to the tub. Use pliers to squeeze the hose clamps and slide them back, then twist and pull the hoses off.
Step 3: Disconnect the Electrical Connector
The valve has a wiring harness plugged into it. Find the plastic connector and press the release tab while pulling straight out. Don't yank on the wires themselves — grab the connector body. Some models have the connector on top, others on the side.
Step 4: Remove the Mounting Screws
The W10289387 valve mounts to the back panel with two or three screws, depending on your exact model. Remove these with your nut driver. The valve should now be free. Lift it out and compare it to your new part — they should look identical with the same mounting holes and connection points.
Step 5: Install the New W10289387 Valve
Position your new valve exactly where the old one sat. Line up the mounting holes and thread in the screws finger-tight first, then snug them down with your nut driver. Don't overtighten — you're threading into plastic. Reconnect the electrical harness until you hear it click. Push the internal hoses back onto the valve outlets and slide the hose clamps into position. Finally, thread on your hot and cold supply hoses to the back of the valve — hand-tighten first, then give them a quarter turn with your wrench.
Step 6: Test for Leaks
Before you button everything up, turn on your water supply valves slowly. Watch all connection points for drips. If you see water, shut off the supply and tighten that connection. Once everything's dry, plug in the washer and run a quick rinse cycle. Listen for water flowing through the valve — it should click open and you'll hear water rushing in. Check all connections again while water's flowing. No leaks? You're good. Replace the top panel and push the washer back into position.
Testing After Installation
Run a complete wash cycle with a small load. The valve should open at the start of the cycle and you'll hear water filling the drum. It should shut off when the drum reaches the correct level. Try both hot and cold cycles to verify both solenoids in the valve work properly. If water doesn't stop flowing or the cycle won't start, double-check your electrical connection — it might not be fully seated.
Frequently Asked Questions
How do I know if my inlet valve is bad or if it's a different problem?
If your washer isn't filling at all but you hear clicking, the valve's getting power but the solenoids are fried. If there's no clicking and no water, check your lid switch or door lock first — the washer won't fill if it thinks the door's open. If water fills slowly or won't stop filling, the valve screens are clogged or the valve's stuck open. The W10289387 handles both hot and cold, so if only one temperature works, you've definitely got a valve problem.
Can I clean the old valve instead of replacing it?
Sometimes. If the screens at the inlet ports are clogged with sediment, you can remove them with needle-nose pliers and rinse them. But if the solenoids have failed — which is what usually happens — cleaning won't help. The coils inside burn out over time, especially if you've had power surges. At $146.99, it's not cheap, but it beats a $300 service call.
Will this valve work on my Maytag or Amana washer?
Yes, if your model number is compatible. Whirlpool owns Maytag and Amana, so they use the same parts across brands. The W10289387 fits dozens of models including the Maytag MHW6000XW series and various Amana front-loaders. Check your model number against the compatibility list — if it matches a WFW94 series Whirlpool or MHW6000 Maytag, you're good to go. The part's identical regardless of what badge is on the front.
Remove inlet screens and inspect for sediment before installing new valve — clogged screens can damage the new part
Need the part for this repair?
W10289387 · In Stock · Ships next business day