
How to Replace W10516085 Dryer Lint Screen on Whirlpool & Maytag Dryers — Step-by-Step
Always unplug dryer before maintenance. If you smell burning or see scorch marks around lint housing, stop using dryer immediately and contact a professional.
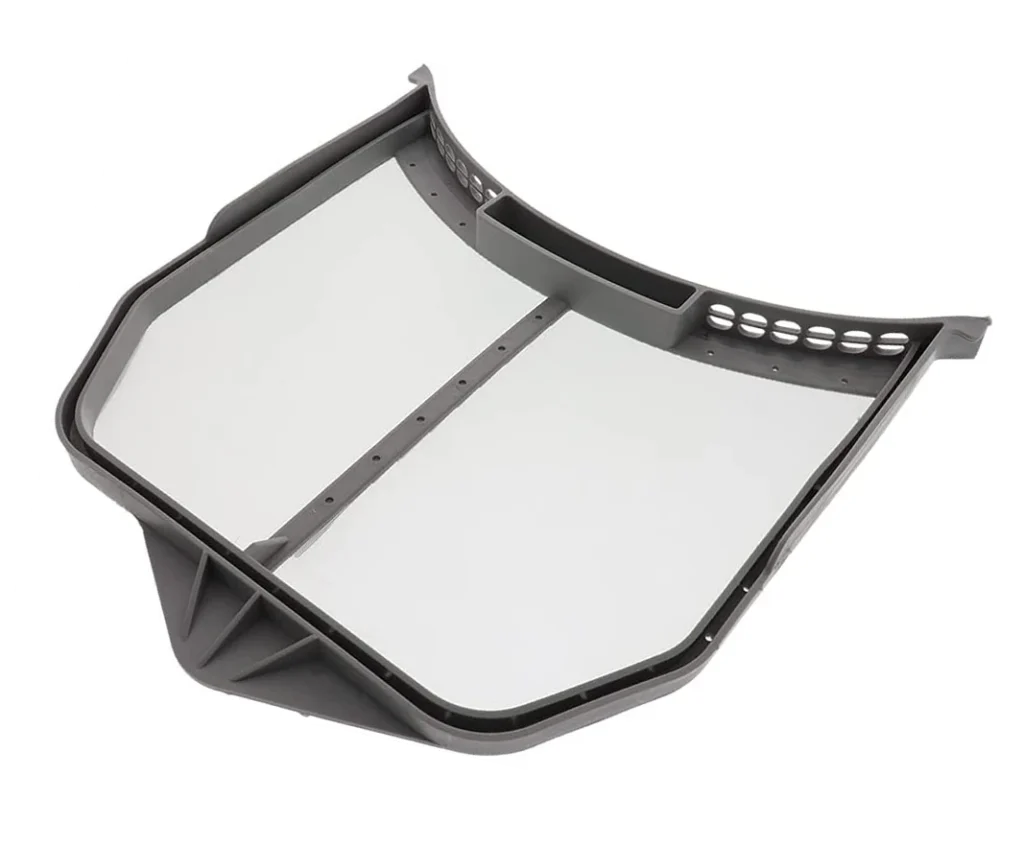
Your dryer's running, but clothes are taking forever to dry. You pull out the lint screen and notice it's cracked down the middle, or worse — the plastic frame crumbled apart in your hands. This is the most common reason people replace the W10516085 lint screen on Whirlpool and Maytag dryers like the WED5620HW, WED75HEFW, or WED72HEDW models.
Unlike older metal screens that lasted decades, these plastic-framed lint screens crack from heat exposure and repeated cleaning. Once that frame fails, lint bypasses the screen and clogs your dryer vent — a serious fire hazard.
What You Need Before Starting
This is one of the easiest dryer repairs you'll ever do. No tools required.
- New W10516085 lint screen
- Damp cloth for cleaning the housing
- Vacuum with crevice attachment (optional but recommended)
Repair time: 2 minutes
Difficulty: ● Easy — No experience needed
Safety First
There's minimal risk here, but always unplug your dryer before working on it. Even for simple replacements, you don't want the drum accidentally spinning while you're reaching inside. If you smell burning or see scorch marks around the lint housing, you've got bigger problems — call a pro before running the dryer again.
Step 1: Remove the Old Lint Screen
Pull the lint screen straight up and out of its housing. If it's cracked, pieces might break off — that's normal. Check inside the housing with a flashlight. You'll probably see lint packed around the edges that's been sneaking past the damaged screen.
Step 2: Clean the Lint Screen Housing
This step's crucial. Use your vacuum's crevice tool to suck out any lint buildup inside the housing. Then wipe down the walls with a damp cloth. If you've got years of buildup, you might need to use a dryer vent brush to reach deeper into the duct. I've pulled out lint wads the size of softballs from neglected housings.
Step 3: Inspect the Housing for Damage
Run your fingers along the inside of the housing. Feel for cracks or warped plastic. The W10516085 screen fits into a specific slot — if that slot's damaged from heat, the new screen won't seal properly. Most housings are fine, but if yours is cracked, you'll need part W10120998 to replace the entire housing assembly.
Step 4: Install the New W10516085 Screen
Slide the new screen straight down into the housing until it seats fully. You should feel it click or settle into place. The screen should sit flush with the top of the dryer — no gaps. Give it a gentle tug to make sure it's secure. That's it. Seriously.
Step 5: Test the Fit and Airflow
Pull the screen out and push it back in a few times. It should glide smoothly without binding. Now plug your dryer back in and run it empty for two minutes. Open the door — you should feel strong airflow coming from the lint screen area. Weak airflow means you've still got a vent blockage somewhere downstream.
Testing After Installation
Run a load of towels on high heat for 20 minutes. Pull the lint screen — it should have a normal layer of lint stuck to it. If lint's bypassing the screen and you find it in the drum or around the door seal, the screen isn't seated properly. Remove it and reinstall, making sure it drops all the way into the housing.
Check your drying times too. If clothes still take 90 minutes to dry, your problem isn't the lint screen — it's a clogged vent line. You'll need to disconnect and clean the entire vent from the dryer to the outside exhaust.
Frequently Asked Questions
Will this screen fit my Maytag dryer model?
The W10516085 replaces several part numbers including WPW10516085, W10370972, and W10211906. It fits most Whirlpool and Maytag dryers made after 2010, including the entire WED and MGD series. Check your model number against the compatibility list — models like 7MWED81HEDW0, 7MWGD87HEDC0, and WED86HEBW0 all use this exact screen.
Why does my lint screen keep cracking?
Heat degrades the plastic frame over time, especially if you run high-heat cycles constantly or have a partially blocked vent causing back pressure. Some screens last two years, others last ten — depends on use. If you're replacing them yearly, clean your entire vent system. Excessive heat means trapped air, and trapped air means vent blockage.
Can I just buy the mesh instead of the whole frame?
Nope. Whirlpool doesn't sell the mesh separately for this model. The W10516085 is a complete assembly — frame and mesh together. Some older dryers had removable mesh you could replace, but these newer plastic-frame screens are one piece. On the bright side, it takes literally 30 seconds to swap out.
Clean the entire lint screen housing every 6 months, not just the screen itself. Lint buildup in the housing reduces airflow and shortens screen life.
Need the part for this repair?
W10516085 · In Stock · Ships next business day