
How to Replace W11130362 Suspension Rod Kit on Whirlpool Maytag Washer — Step-by-Step
Suspension springs are under constant tension. Wear safety glasses and gloves. Keep hands clear when releasing spring clips to avoid injury from sudden movement.
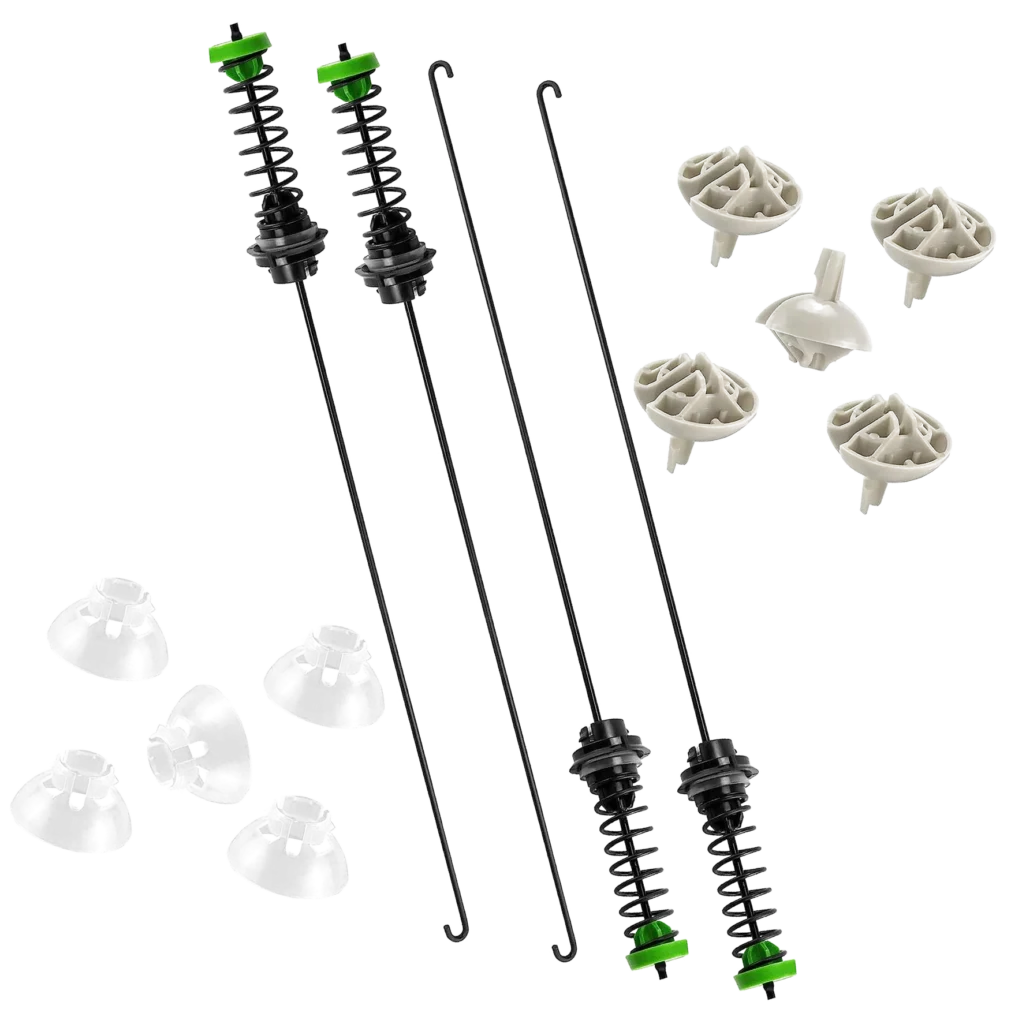
Your Whirlpool WTW5000DW starts walking across the laundry room during spin cycle. The banging gets so loud your neighbor texts asking if everything's okay. You open the lid mid-cycle and watch the drum tilting like a carnival ride. That's your suspension rods failing — those four critical stabilizers that keep the wash basket centered and steady.
The W11130362 suspension rod kit replaces worn or broken rods on Whirlpool, Maytag, and Kenmore top-load washers. When these rods wear out, your washer shakes violently, the drum tilts during spin, and you'll hear metal-on-metal contact. This kit includes all four rods, and replacing them takes about an hour with basic hand tools.
What You Need Before Starting
- Socket wrench set (primarily 1/2" socket)
- Flathead screwdriver
- Needle-nose pliers
- Work gloves (the springs are under serious tension)
- Helper (optional but recommended for tub weight)
Repair Time: 45-60 minutes
Difficulty: MODERATE — Requires working with spring tension and tub weight
Safety First
Unplug the washer completely before starting. Don't just turn off the water — pull the actual power cord from the wall. Those suspension springs are under constant tension holding up a 40-pound wash basket. If you release one incorrectly, it can snap back and cause serious injury. Wear safety glasses and work gloves throughout this repair. Keep children and pets away from your work area.
Step 1: Access the Suspension Rods
Pull the washer away from the wall to access all sides. Remove the three screws along the back top edge of the cabinet. Slide the entire cabinet forward about an inch, then lift it straight up and off. Set it aside carefully — you'll need it later. Now you can see all four suspension rods extending from the cabinet frame down to the wash basket corners.
Step 2: Mark Rod Positions Before Removal
Take a photo with your phone showing how each rod connects at the top and bottom. The rods aren't identical — they're oriented specific ways. Look at the top mounting bracket where each rod attaches to the frame. You'll see a ball socket connection. At the bottom, each rod has a spring clip holding it to the tub corner bracket. Mark which rod goes where before removing anything.
Step 3: Release the Bottom Spring Clips
Start with one rod. Use needle-nose pliers to compress the spring clip at the bottom of the rod where it connects to the wash basket bracket. You're looking for a C-shaped clip that holds the rod ball in the socket. Squeeze it, twist slightly, and pull the rod free from the basket. The rod will stay attached at the top for now. Repeat for the remaining three rods. The wash basket will lower slightly as you release each one — this is normal.
Step 4: Disconnect Rods from Top Frame
At the top of each rod, you'll find another ball-and-socket connection to the washer frame. Some models use a simple pull-off design, others have a retaining clip. For Whirlpool WTW5000DW and MVWC565FW models, gently pull the rod straight down while wiggling it — the ball joint will pop free. If there's a metal retaining clip, use a flathead screwdriver to pry it off first. Remove all four old rods completely.
Step 5: Install New Suspension Rods
Here's where your photos matter. Take the first new rod from the W11130362 kit and insert the top ball joint into the frame socket. Push firmly until you hear it click. If your model uses retaining clips, snap them back into place. Now pull the rod down and align the bottom ball with the wash basket corner bracket. Compress the spring clip with your pliers and push the ball into the socket until the clip engages. Tug on the rod — it shouldn't come loose. Install the remaining three rods the same way, working around the basket in a diagonal pattern (front-left, rear-right, front-right, rear-left) to keep tension balanced.
Step 6: Check Tub Alignment and Reassemble
With all four new rods installed, gently rock the wash basket. It should move slightly but return to center. The basket should sit level when at rest. If it tilts to one side, one of your rod connections isn't seated properly. Before replacing the cabinet, manually spin the basket slowly and watch for any wobble. Once everything looks centered, slide the cabinet back over the frame, push it down until it clicks into place at the front, then reinstall the three rear screws.
Testing After Installation
Plug the washer back in and run a small load on the highest spin speed setting. Stand next to the machine during the spin cycle. You shouldn't hear any banging or see excessive movement. The washer might vibrate slightly — that's normal — but it shouldn't walk or shake violently. If you still have shaking issues after replacing the suspension rods, check that the washer is level (adjust the front feet) and that you removed all shipping bolts if this is a recently moved machine.
Frequently Asked Questions
Do I need to replace all four suspension rods at once?
Yes, absolutely. Even if only one rod shows obvious damage, the others have experienced the same wear cycles and stress. Replacing just one creates uneven suspension where the new rod is stiffer than the old ones, causing the tub to tilt during spin. The W11130362 kit includes all four rods for this exact reason. Install all of them together for balanced performance.
Will this fix work on my Kenmore 110-series washer?
This kit is compatible with specific Kenmore models that use the same cabinet design as Whirlpool WTW and Maytag MVWC series washers. Check your model number against the compatibility list. Kenmore washers manufactured by Whirlpool (model numbers typically starting with 110.2) often use these exact suspension rods. If your Kenmore has a different manufacturer code, you'll need a different part number.
Can worn suspension rods damage other washer components?
Yes, and that's why you should replace them as soon as you notice shaking issues. When suspension rods fail, the wash basket makes hard contact with the cabinet walls during spin. This impacts damage the outer tub, can crack the cabinet plastic, and puts excessive stress on the drive components and bearings. I've seen washers where delayed suspension rod replacement led to a $400 bearing job that could've been avoided with this $86 repair done earlier.
Take photos before removing old rods to ensure correct positioning. Install new rods in diagonal pattern to maintain balanced tension on the wash basket.
Need the part for this repair?
W11130362 · In Stock · Ships next business day