
How to Replace 6323EL2001B Dryer Thermistor Assembly on LG Kenmore — Step-by-Step
Unplug dryer completely before starting. Allow 20 minutes to cool if recently used. Wear gloves when handling cabinet panels — edges are sharp.
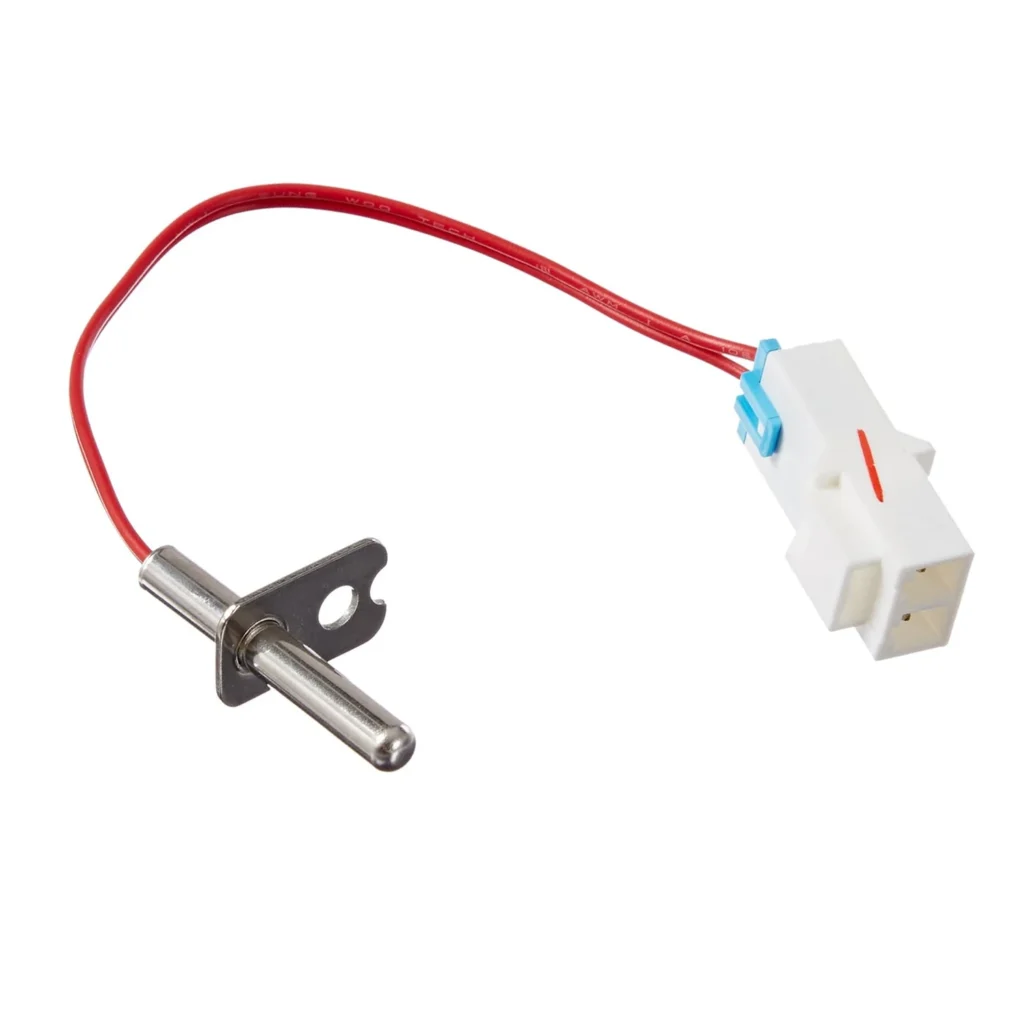
Your LG dryer's been running for what feels like hours, but when you open the door, your clothes are still damp. Or maybe it's shutting off randomly mid-cycle, leaving you with half-dried laundry and mounting frustration. Nine times out of ten, that's your thermistor assembly failing to accurately read the drum temperature. The 6323EL2001B thermistor is the temperature sensor that tells your dryer's control board when to heat and when to shut off — when it goes bad, your dryer becomes a guessing game.
What You Need Before Starting
This is one of the simpler dryer repairs you'll tackle. The thermistor sits on the blower housing, accessible from the back or front depending on your model. Here's what you'll need:
- Phillips head screwdriver
- Putty knife or flat-blade screwdriver (for cabinet clips)
- Work gloves (sheet metal edges are sharp)
- Multimeter (optional, for testing the old thermistor)
- Quarter-inch nut driver or socket
Estimated Time: 20-30 minutes
Difficulty: Easy — Even first-timers can handle this with basic tools.
Safety First
Unplug the dryer completely before starting. If you have a gas dryer, also shut off the gas supply valve. The thermistor is electrical, but you'll be working near heating elements and sharp metal edges. Wear gloves to protect your hands from the cabinet edges — they're sharper than you'd think. Give the dryer at least 20 minutes to cool down if it's been running.
Step 1: Access the Blower Housing
For most LG models like the DLE5955W or DLEX7177WM, you'll access the thermistor from the front. Unplug the dryer and pull it away from the wall. Open the door and use a putty knife to release the two spring clips holding the top panel — slide it along the gap between the top and front panel about 2-3 inches from each corner. Pop the top up and lean it back against the wall. You'll see two screws inside the door opening at the top of the front panel. Remove those, then lift the entire front panel up and off. The blower housing is the large black plastic assembly on the lower left.
Step 2: Locate and Disconnect the Failed Thermistor
The 6323EL2001B thermistor is a small white plastic component with two wires, mounted on the side of the blower housing. It's held in place by a single quarter-inch screw or clip. Before you remove it, take a photo of the wire connection for reference. Disconnect the wire harness by pressing the locking tab and pulling straight off — don't yank on the wires themselves. Remove the mounting screw and pull the old thermistor out of its holder.
Step 3: Clean the Mounting Area
Here's where most people skip a crucial step. Lint buildup around the thermistor is actually the leading cause of failure — it insulates the sensor and prevents accurate temperature readings. Use a vacuum with a brush attachment to clean out the entire blower housing area. Get into the crevices around where the thermistor sits. This five-minute cleaning can double the life of your new part.
Step 4: Install the New 6323EL2001B Thermistor
Slide the new thermistor into the mounting bracket on the blower housing. The sensor tip needs to make solid contact with the housing for accurate readings, so make sure it's seated fully before tightening the screw. Secure it with the mounting screw — snug but not overtightened, you're threading into plastic. Connect the wire harness until you hear it click into place.
Step 5: Reassemble and Test
Reverse your disassembly steps: lift the front panel back into position, making sure the bottom tabs engage first, then push the top in. Replace the two screws inside the door opening. Lower the top panel and push down firmly until both spring clips snap back into place. Plug the dryer back in (or turn the gas back on). Run a test cycle with damp towels — within 10 minutes, you should feel strong heat, and the cycle should complete normally without shutting off early.
Testing After Installation
Don't just assume it's fixed — verify it. Run a timed dry cycle with a few damp towels for 20 minutes. The dryer should heat up within 3-5 minutes and maintain consistent temperature. Check that the drum feels warm but not scorching hot. Most importantly, run a full auto-dry cycle — if the thermistor is working correctly, it should sense when clothes are dry and shut off automatically. If you're still getting error codes on models like the DLEX4000B or DLE7177WM, you may have a control board issue, but that's rare.
Frequently Asked Questions
Will this thermistor work on my Kenmore dryer?
Yes, if your Kenmore dryer was made by LG (most Kenmore Elite dryers from 2005-2015 were). Check your model number — if it starts with 796.8 or 796.9, it's an LG-manufactured unit and this thermistor will fit. The 6323EL2001B replaces the older 6323EL2001H part number as well.
How do I know if my thermistor is bad or if it's something else?
If you have a multimeter, you can test the old thermistor. At room temperature (around 70°F), it should read approximately 50,000 ohms of resistance. If it reads infinite resistance (open circuit) or very low resistance, it's definitely bad. But honestly, if your dryer's taking twice as long to dry or stopping mid-cycle with no error code, and your lint filter and vent are clean, the thermistor is the most likely culprit.
Can I just bypass the thermistor to get my dryer working?
Absolutely not. The thermistor is a critical safety component that prevents your dryer from overheating. Bypassing it could cause a fire. If you need your dryer working immediately, replace the thermistor — it's a $15 part and a 30-minute fix. Don't risk your home trying to save an hour.
Clean all lint buildup around the blower housing before installing the new thermistor. Lint insulation is the leading cause of thermistor failure.
Need the part for this repair?
6323EL2001B · In Stock · Ships next business day