
How to Extend Your Whirlpool Dishwasher Upper Rack Adjuster Life — Maintenance Guide
Always remove the upper rack completely before inspecting or servicing the adjuster mechanism. Do not force adjustments when rack movement feels stiff or restricted.
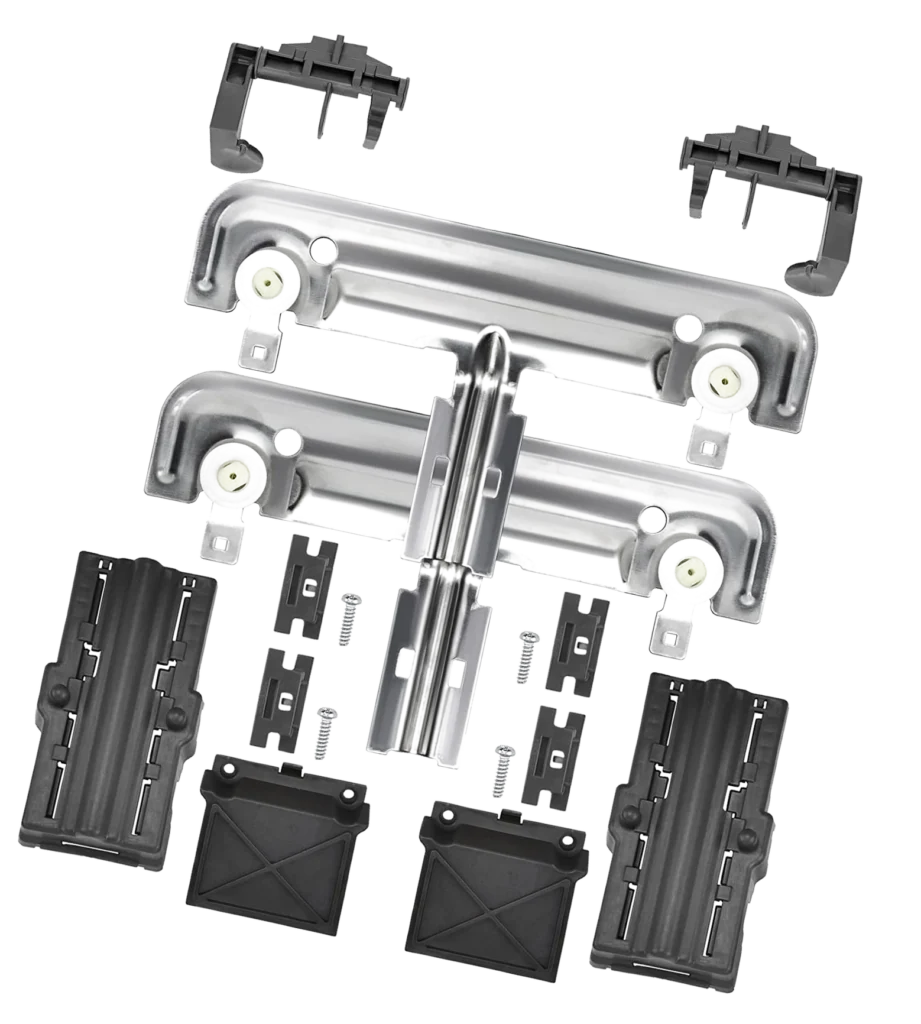
Most dishwasher upper rack adjusters should last 7-10 years, but I've seen these fail in as little as 18 months when they're loaded wrong or gunked up with hard water deposits. If you've got a Whirlpool WDT750SAHZ0 or similar model, that $54 replacement part becomes a recurring expense unless you maintain it properly.
The upper rack adjuster kit (W10712395) handles the weight and movement of your top rack dozens of times per day. That's a lot of stress on plastic gears and metal brackets, especially when you're loading heavy pots or overloading one side.
How Long Should It Last?
Under normal conditions, this adjuster system should give you 7-10 years of reliable service. But "normal" is the key word there.
What kills these parts early:
- Hard water buildup — mineral deposits lock up the adjustment mechanism, forcing you to yank harder until something breaks
- Uneven loading — stacking all your heavy dishes on one side bends the adjustment rails over time
- Forcing stuck adjustments — when the rack won't move smoothly, people force it instead of cleaning it first
- Dishwasher detergent residue — thick gel detergents leave gummy residue in the track system
With proper care, you can push that lifespan to 12-15 years on models like the WDT780SAEM0 or WDT970SAHV0. It's about reducing friction and keeping the mechanism clean.
Signs It's Wearing Out
The adjustment mechanism doesn't just fail overnight. You'll notice warning signs weeks or months before it completely breaks.
The Rack Won't Stay at Your Selected Height
You set it to the upper position, load the dishwasher, and halfway through the cycle it drops back down. That's the locking mechanism wearing out — the teeth on the adjuster wheels are getting rounded off and can't grip anymore.
On Whirlpool models like the WDT975SAHZ0, this usually starts on one side first. You'll notice the rack tilts slightly because one adjuster holds while the other slips.
Grinding or Clicking When You Adjust Height
Smooth adjustment is silent. If you're hearing grinding, clicking, or scraping noises when you move the rack up or down, that's plastic gears chewing themselves up. The sound means material is being torn off with every adjustment.
This noise often starts quiet and gets progressively louder over 2-3 months. Don't ignore it — that's wear happening in real time.
The Adjustment Lever Feels Loose or Doesn't Engage
When you pull the adjustment lever and it feels mushy or doesn't seem to do anything, the internal spring or lever mechanism is failing. This is common on KitchenAid branded dishwashers using this same part — the lever gets pulled thousands of times and eventually the spring tension gives out.
Visible Cracks in the White Plastic Housing
Check the white plastic adjuster housing where it mounts to the rack. Stress cracks typically form at the mounting points first, then spread. Once you see cracks, you're weeks away from complete failure — the part will break during a normal adjustment.
When to Replace vs Maintain
Here's the honest breakdown: if the adjuster mechanism still works smoothly but just needs cleaning, maintain it. If you're seeing cracks, hearing grinding, or the rack won't stay in position, you're past maintenance — you need the W10712395 kit.
The replacement includes both left and right adjusters, the complete mounting hardware, and the height adjustment levers. It's designed as a kit because once one side fails, the other isn't far behind.
But if you're just dealing with hard water buildup or sticky movement, a good cleaning and preventive maintenance can buy you years more life. Don't replace what you can fix.
Maintenance Schedule That Actually Works
After every 30 loads (about once a month for most households): Pull the upper rack completely out and wipe down the adjustment rails with a damp cloth. Check for food particles or detergent buildup in the adjuster mechanism. This takes 90 seconds and prevents 90% of premature failures.
Every 3 months: Run an empty cycle with 2 cups of white vinegar in a bowl on the bottom rack. This dissolves mineral deposits throughout the dishwasher, including in the adjuster tracks where you can't easily reach. Don't use vinegar if you have a stainless steel interior on models like the WDTA50SAHZ0 — use citric acid powder instead.
Twice a year: Remove the upper rack completely and inspect the adjuster wheels and mounting brackets. Look for wear patterns, cracks, or loose screws. Tighten any mounting hardware that's come loose. Apply a tiny amount of food-safe silicone lubricant to the adjustment rails — just enough to make movement smooth again.
Load Your Rack Right
This isn't just about organization — it's about protecting the adjuster mechanism.
Always balance weight between left and right sides. If you're loading a heavy serving bowl on the right, put something comparable on the left. Uneven weight bends the adjustment rails and puts stress on one adjuster more than the other.
Keep heavy items on the bottom rack when possible. The upper rack adjuster is designed for plates, glasses, and bowls — not cast iron skillets or stock pots. I've seen people try to fit oversized items up top and wonder why their adjuster broke three months later.
Don't force the rack when adjusting. If it's not moving smoothly, something's blocking it or the mechanism needs cleaning. Forcing it just accelerates wear and can crack the plastic housing.
The Hard Water Problem
If you've got hard water (and most of the country does), that white crusty buildup isn't just ugly — it's actively destroying your adjuster mechanism. Calcium and magnesium deposits accumulate in the adjustment tracks and around the wheel mechanisms, adding friction with every adjustment.
For homes with hard water, monthly vinegar rinses aren't optional — they're required maintenance. You can also install a whole-house water softener, but that's overkill just for the dishwasher. A monthly descaling routine is cheaper and just as effective for this specific part.
Frequently Asked Questions
Can I replace just one adjuster instead of buying the kit?
Technically yes, but it's not smart. The W10712395 kit includes both sides because they wear at similar rates. If one failed, the other is close behind — you'll be back in there replacing the second side within months. The kit costs $54, individual adjusters (when available) run $30-35 each. Do the math and replace both.
Will this adjuster kit work on Kenmore dishwashers?
Yes, if your Kenmore model is actually a rebranded Whirlpool (which most are). Check your model number against the compatibility list. This same part is used across Whirlpool, KitchenAid, and Kenmore brands because they're all made by Whirlpool Corporation. The part replaces AP5957560, W10350375, and W10250159 — if any of those numbers match your original part, you're good.
How do I know if my rack adjuster problem is really the adjuster and not something else?
Simple test: remove the upper rack completely and inspect the adjuster wheels and mounting brackets. If you see cracks, broken plastic, or wheels that don't spin freely, it's the adjuster. If everything looks intact but the rack still won't stay in position, check the rack itself — sometimes the mounting points on the actual rack frame fail instead. Also check for obstructions in the track system, like a stuck piece of plastic wrap or label that's preventing smooth movement.
Element showing wear?
W10712395 · Replace before it fully fails