
How to Extend Your Samsung Washer Drum Shaft Life — Maintenance Guide
Disconnect power before inspecting drum play. Never reach behind the drum while the machine is plugged in.
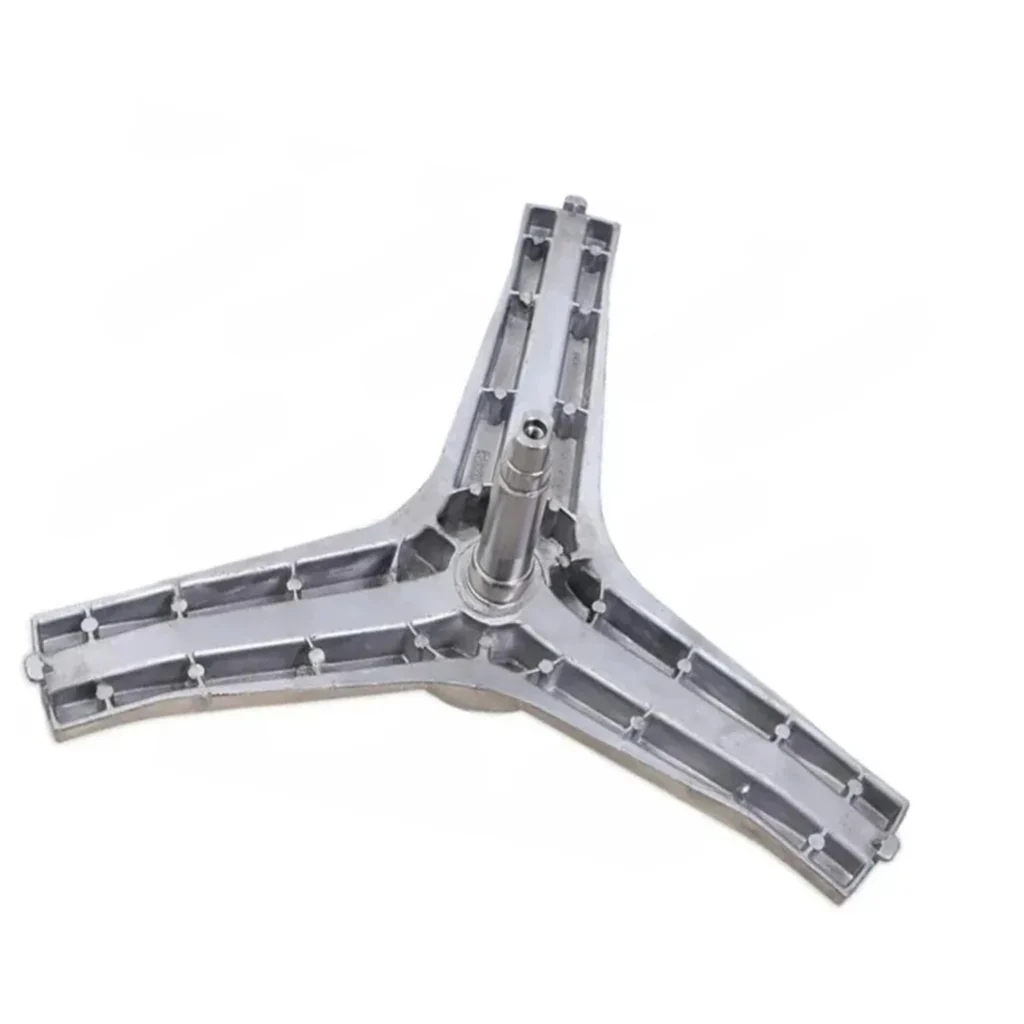
Here's something most people don't realize: that $252 drum shaft assembly in your Samsung washer should last 10-12 years, but most fail around year 7. The difference? How you load your machine and what you ignore during those first warning signs.
The DC97-14369G drum flange shaft assembly is the backbone of your washer's drum — literally. It's what keeps your 20-pound load of wet towels spinning smoothly at 1200 RPM without the whole machine walking across your laundry room. When it starts failing, you'll know. The question is whether you catch it early enough to prevent a $400 repair bill.
How Long Should It Last?
Under normal conditions, this shaft assembly should give you 10-12 years of service. That's based on 8-10 loads per week with proper loading technique. I've seen units on their original shaft after 15 years, and I've seen failures at year 5. The difference comes down to three things:
- Load distribution — Unbalanced loads put lateral stress on the shaft bearings
- Overloading frequency — Exceeding capacity by even 20% regularly cuts lifespan in half
- Water quality — Hard water accelerates bearing seal deterioration
With proper maintenance and loading habits, you can push that to 12-15 years. That's an extra 3-5 years for about 10 minutes of attention every few months.
Signs It's Wearing Out
The shaft assembly doesn't just fail overnight. It gives you plenty of warning — if you're paying attention. Here's what to watch for, in order of severity:
Grinding or Rumbling During Spin Cycle
This is your first warning. When the bearings start to wear, you'll hear a low grinding or rumbling sound during the spin cycle, especially during the high-speed spin. It starts quiet — you might only notice it when the room is otherwise silent — and gets progressively louder over weeks or months. Don't confuse this with the normal whooshing sound of water draining. This is metal-on-metal contact, and it means the bearing seals have failed and let water in.
At this stage, you've got maybe 2-3 months before it gets expensive. The bearings are wearing, but they haven't damaged the shaft itself yet.
Visible Water Leaking from Rear of Drum
See water dripping from behind the drum, near where it connects to the back of the machine? That's your bearing seal completely shot. Water's getting past the seal and into the bearings, which accelerates wear dramatically. Once you see this, you're looking at weeks, not months, before bearing failure causes drum wobble.
This usually happens after you've been ignoring that grinding sound for a while. The bearings heat up from friction, the seals degrade faster, and suddenly water has a path where it shouldn't be.
Excessive Drum Movement or Play
Open your washer door and grab the drum at the 3 o'clock and 9 o'clock positions. Try to rock it side to side. You should feel almost no movement — maybe 1-2mm of play, barely perceptible. If you can move it 5mm or more, your bearings are worn enough that the shaft is moving in ways it shouldn't. That play puts stress on the spider arm and can eventually crack it, turning a $250 repair into a $400+ job.
On models like the WF8814ASA and WF106U4SAGD, this excessive play often shows up as the drum hitting the door seal during spin, leaving black marks on your clothes.
Rust Stains on Laundry
Finding rust-colored streaks on your clothes after a wash? That's bearing material and rust from the shaft area contaminating your wash water. At this point, the bearings are disintegrating. You're running on borrowed time, and continuing to use the washer risks damaging the drum spider arm — a part that's often not sold separately from the entire drum assembly.
When to Replace vs Maintain
Let's be honest: this isn't a part you maintain to extend its life like you would with a dryer vent. Once the bearings start grinding, maintenance is over — you're in repair mode. But here's what you can do to prevent premature failure:
Replace immediately if:
- You hear grinding that persists after redistributing the load
- You see water leaking from the rear drum area
- The drum has more than 3-4mm of play when you rock it manually
- You're getting rust stains on laundry
You can continue using it if:
- The noise only appears with severe overloading (fix your loading habits)
- There's no visible water leak
- Drum play is minimal and consistent with age
Here's the critical decision point: if you're hearing noise but not seeing leaks, you've got time to order the part and plan the repair. If you're seeing leaks, stop using the machine except for essential loads. Every cycle at that point is causing additional damage.
Preventive Care That Actually Works
The DC97-14369G shaft assembly is sealed. You can't lubricate it, you can't adjust it, and you can't rebuild it. But you can absolutely prevent premature failure:
Stop Overloading
Your WW22K6800AW has a 2.2 cubic foot capacity. That's about 15-16 pounds of laundry. Most people stuff in 20-25 pounds because it "fits." That extra weight multiplies stress on the bearings exponentially during spin. If the drum struggles to balance, you're shaving years off this part's life.
Balance Every Load
Don't wash one heavy comforter by itself. Don't throw in three pairs of jeans and call it a load. These create imbalanced loads that cause the drum to bang around, putting lateral stress on the shaft. Add a few towels to balance things out.
Use Drain and Spin Sparingly
The drain and spin cycle runs at maximum RPM. Using it frequently — especially for heavy or unbalanced loads — accelerates bearing wear. It's not meant for regular use; it's for finishing a load that stopped mid-cycle.
Leave the Door Open Between Loads
This lets moisture evaporate from the drum area, including around the bearing seals. Trapped moisture accelerates seal degradation. It's a small thing that makes a real difference over years.
Run Monthly Hot Water Cycles
Use the hottest water setting with nothing in the drum once a month. This flushes out detergent buildup and mineral deposits that can work their way into bearing areas. Add a cup of white vinegar to help break down deposits.
Frequently Asked Questions
How do I know if it's the drum shaft or just loose components?
Rock the drum manually with the machine unplugged. If you feel vertical play (up and down movement) rather than just rotational play, that's usually the shaft assembly. Loose components create rattling sounds that change with drum position; shaft bearing failure creates a constant grinding that's tied to drum rotation speed. If the noise gets louder as the spin speed increases and doesn't change when you redistribute the load, it's the bearings.
Can I replace just the bearings instead of the whole assembly?
Technically yes, but practically no. The DC97-14369G is an assembly that includes the shaft, flange, and bearings as one unit. Samsung designed it this way specifically to prevent DIY bearing replacement, which often led to improper installation and repeat failures. Trying to press out the old bearings and press in new ones requires a 20-ton shop press and precision alignment tools. The $252 assembly price includes everything properly assembled and aligned. Attempting to source individual bearings and replace them yourself typically ends up costing more when you factor in tools and the risk of damaging the shaft during bearing removal.
Will replacing the drum shaft fix my leak problem?
It depends where the leak is coming from. If water's dripping from behind the drum near the bearing area, then yes — the shaft assembly includes new bearing seals that will stop that leak. But if you're seeing water at the front of the machine or near the door seal, that's a different issue. The shaft assembly specifically addresses leaks at the rear bearing/shaft interface. Before ordering this part, verify the leak location by running a spin cycle and watching where water first appears. Rear drum area = shaft assembly. Front or sides = door boot, pump, or hose issue.
Element showing wear?
DC97-14369G · Replace before it fully fails