
How to Extend Your Samsung Dryer Heater Assembly Life — DC93-00154A Maintenance Guide
Always disconnect power before inspecting heater assembly. Element operates at high temperatures and retains heat after shutdown.
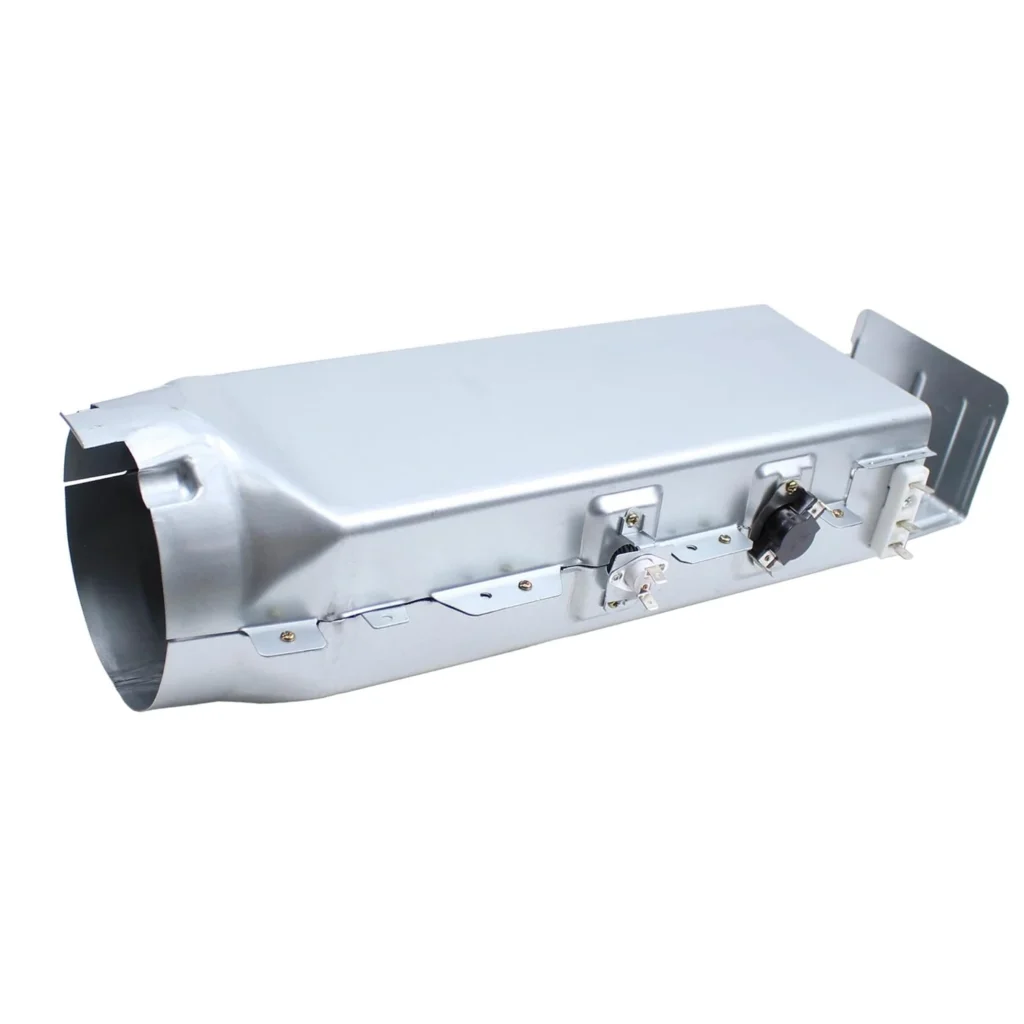
Most Samsung dryer heating elements should last 8–12 years, but I've seen the DC93-00154A fail in half that time when lint buildup chokes the ductwork. At $208.99, this isn't a part you want to replace prematurely — especially when most failures trace back to maintenance issues, not the element itself.
This heater assembly sits right in the airflow path of your Samsung dryer. When lint accumulates around it, temperatures spike. The element cycles on and off more frequently than designed, and thermal stress builds up. Eventually, the coil develops hot spots and burns through.
How Long Should It Last?
Under normal conditions with proper airflow, the DC93-00154A typically lasts 10–15 years. That's roughly 2,000–3,000 drying cycles. But here's what affects that lifespan:
Lint accumulation is enemy number one. Even a thin layer of lint on the element housing acts like insulation, trapping heat where it shouldn't be. The element runs hotter, cycles harder, and fails sooner.
Vent restriction causes similar problems. If your external vent is kinked, crushed, or packed with lint, hot air backs up into the dryer. The heater assembly compensates by working overtime, shortening its life by years.
Voltage fluctuations stress the heating coil. If you're in an area with unstable power, consider a surge protector rated for 240V appliances.
I've replaced heater assemblies in Samsung models like the DV511AER/XAA and DV520AEW/XAA that were only four years old. In every case, the owner hadn't cleaned the vent system in years. The element itself was fine — it just couldn't survive the hostile environment.
Signs It's Wearing Out
The DC93-00154A doesn't fail silently. It gives you warnings, and catching them early means you can extend its life or plan for replacement before laundry day turns into a crisis.
Clothes Take Forever to Dry
When drying time creeps from 45 minutes to 90 minutes for the same load, your heater assembly is struggling. Sometimes it's a weak element that's developed resistance issues. More often, it's being choked by restricted airflow — and that restriction is damaging the element.
Pull the lint screen and check behind it with a flashlight. You'll often find a thick mat of lint that the screen missed. That buildup forces the heater to work harder and longer.
No Heat at All
This one's obvious but worth mentioning. When the heater assembly fails completely, the dryer tumbles but produces zero heat. Before you order the $208.99 replacement, verify that your thermal fuse hasn't blown. The fuse is a $10 part that fails when the dryer overheats — often because of lint buildup around the heater assembly.
Test the fuse with a multimeter. If it shows continuity, your heater assembly is likely the culprit. If it's blown, replace it, but also address why it overheated in the first place.
Burning Smell During Operation
This is your dryer screaming for help. A burning smell means lint is scorching on the heater assembly housing. Stop using the dryer immediately. Continuing to run it risks an actual fire — and dryer fires account for thousands of house fires annually.
Unplug the dryer, remove the front panel, and vacuum around the heater assembly area. You'll likely find clumps of lint stuck to every surface. Clean it thoroughly before running another cycle.
Inconsistent Heating
The dryer heats for a while, then goes cold, then heats again — but not on a normal cycle pattern. This suggests the thermal cutoff is tripping repeatedly, or the element itself has developed a weak spot. Either way, the heater assembly is near the end of its life.
Maintenance Schedule That Actually Works
I'm not going to tell you to inspect your heater assembly monthly. That's unrealistic for most households. Here's what actually prevents premature failure:
After every load: Clean the lint screen. Yes, every single load. Lint accumulation is exponential — missing just a few cleanings creates buildup that restricts airflow significantly.
Every three months: Vacuum behind the lint screen. Remove the screen and use a dryer vent brush or vacuum attachment to clean the cavity. This catches the 20–30% of lint that bypasses the screen.
Every six months: Inspect your external vent. Go outside while the dryer's running and feel the airflow. It should be strong and steady. If it's weak or nonexistent, your vent needs cleaning.
Annually: Deep clean the entire vent system. Disconnect the vent hose from the dryer, vacuum it out, and clean the ductwork all the way to the exterior. If you've got a long vent run (over 15 feet) or multiple bends, consider hiring a professional vent cleaning service.
When to Replace vs Maintain
Here's the honest answer: if your heater assembly has failed, maintenance won't save it. You need a replacement. But here's how to know whether you're dealing with a failed part or a maintenance issue:
Replace immediately if: The element shows visible breaks or burn marks when inspected, the dryer won't heat even after replacing thermal fuses, or you smell burning plastic from the heater assembly area.
Maintenance might fix it if: Drying times are just slightly longer than normal, the dryer heats inconsistently but does heat, or you haven't cleaned the vent system in over a year.
Start with thorough cleaning. Remove the front panel (usually 4–6 screws), vacuum everywhere you can reach, clean the vent system completely, and replace the thermal fuse if it's blown. Then test the dryer with a small load.
If cleaning solves the problem, you've just saved $208.99 and extended the life of your heater assembly. If it doesn't, the element itself has failed and needs replacement.
Compatible Models Reference
The DC93-00154A works across dozens of Samsung dryer models. I've installed it in everything from the DV511AER/XAA to the DV42H5600EP/A3. Before ordering, verify your model number (check the sticker inside the door frame) and confirm compatibility. Samsung occasionally uses different heater assemblies for models that look identical from the outside.
Frequently Asked Questions
Can I clean the heater assembly element itself?
You can, but be extremely gentle. Never touch the heating coil — oils from your skin create hot spots that cause premature failure. If you need to remove dust or lint from the element, use compressed air from a distance of at least 6 inches. Better yet, clean around the assembly and let airflow do the rest.
How do I know if my thermal fuse is blown vs the heater assembly failed?
Test the thermal fuse with a multimeter set to continuity. A good fuse shows continuity (usually a beep). A blown fuse shows no continuity. If your fuse is blown, replace it first — it's a $10 part compared to $208.99 for the heater assembly. If the new fuse blows immediately, you've got airflow restriction issues causing overheating.
Should I upgrade to a surge protector for my dryer?
If you live in an area with frequent power fluctuations or lightning storms, yes. Dryers pull 240V and sudden voltage spikes can damage the heating element. Look for a surge protector rated for at least 30 amps and 240V. It'll cost around $50 but could save you from premature heater assembly failure.
Element showing wear?
DC93-00154A · Replace before it fully fails