
How to Replace WR60X10220 Condenser Fan Motor on GE Refrigerator — Step-by-Step
Unplug the refrigerator before starting. The compressor and condenser area can remain hot for 30 minutes after shutdown. Fan blades have sharp edges — wear gloves when handling.
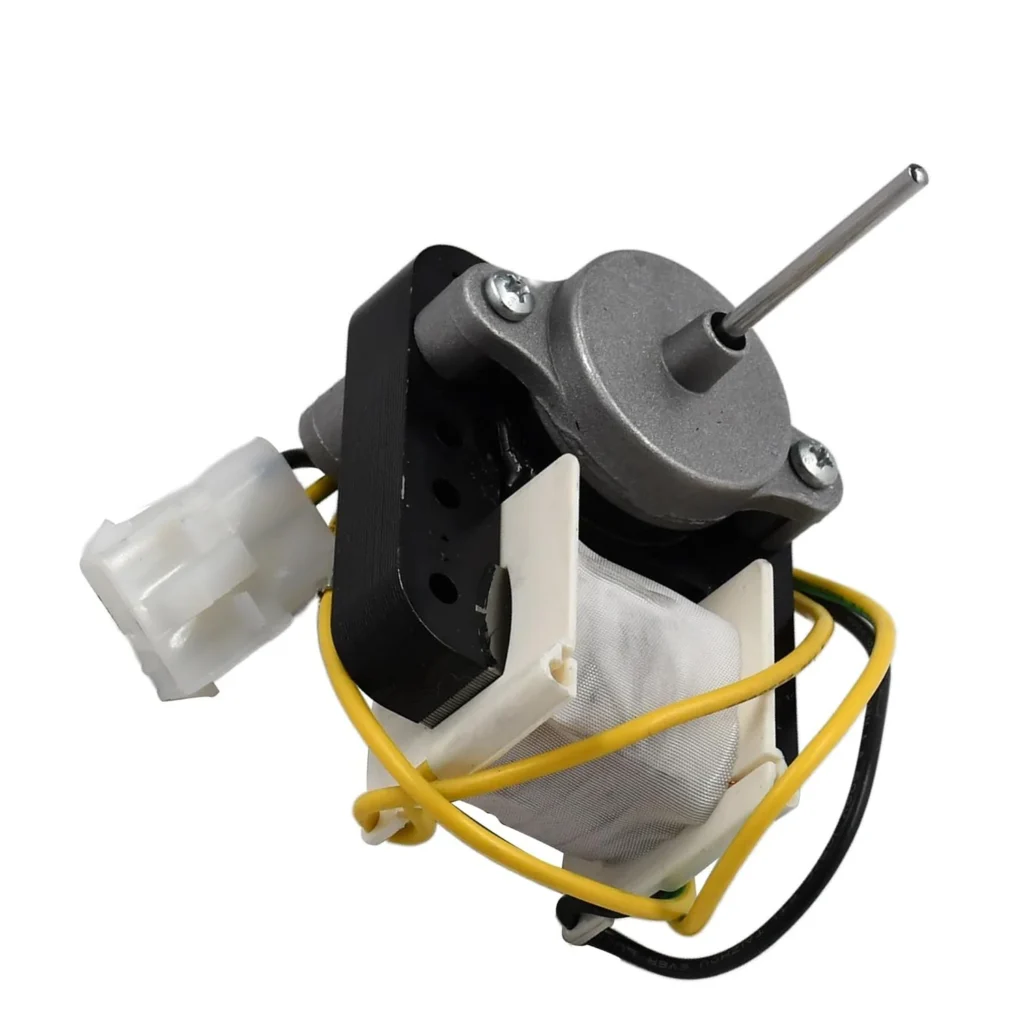
Your GE refrigerator's running constantly but everything's warm. You hear clicking sounds from behind the unit, or maybe a grinding noise that wasn't there last week. The condenser fan motor — the one that cools the compressor and condenser coils — has likely failed. When this happens on models like the BSS25GFPCWW or GSS25GFPHCC, you'll notice both compartments warming up because the compressor can't dissipate heat properly.
The WR60X10220 motor is the direct replacement for older part numbers WR60X10133, WR60X10171, and WR60X10192. It works across GE, Hotpoint, and RCA side-by-side models. Replacing it takes about an hour and doesn't require refrigerant work or special licensing.
What You Need Before Starting
- 1/4" nut driver or socket
- Phillips screwdriver
- Flathead screwdriver
- Work gloves (fan blades can be sharp)
- Towel or cardboard to protect flooring
Repair Time: 45-60 minutes
Difficulty: Moderate
Safety First
Unplug the refrigerator completely before starting. Don't just rely on the circuit breaker — physically disconnect the power cord. You'll be working near the compressor which can stay hot for 30 minutes after shutdown, so let the unit cool if it's been running. The condenser coils behind the access panel may have sharp edges, and the fan blade itself can cut skin easily. Wear gloves when handling the old motor and blade assembly.
Step 1: Access the Condenser Compartment
Pull the fridge away from the wall — you need about three feet of clearance to work comfortably. The condenser fan is located in the lower back panel behind the refrigerator. Remove the metal or cardboard panel covering the compressor compartment by unscrewing the 1/4" hex screws along the edges. On BSS25 and GSS25 models, there are typically six screws holding this panel. Set the panel aside and locate the fan motor — it's the smaller motor to the left or right of the compressor, with a blade attached.
Step 2: Disconnect the Wiring Harness
The fan motor connects via a two-wire plug. Press the locking tab on the connector and pull it straight off. If it's stuck from years of heat exposure, gently work a flathead screwdriver under the connector housing to release it — don't pull on the wires themselves. Take a photo of the wire routing before disconnecting so you remember how it threads through the mounting brackets.
Step 3: Remove the Fan Blade
The fan blade attaches to the motor shaft with either a spring clip or a small set screw. Look at the center hub of the blade. If you see a metal spring clip, use needlenose pliers to compress it and slide it off the shaft. If there's a tiny set screw (common on A4425GDT models), loosen it with a small flathead screwdriver but don't remove it completely. Slide the blade straight off the shaft. Mark which side faced the motor with a marker — reinstalling it backward will cause vibration noise.
Step 4: Unbolt the Old Motor
The motor mounts to a metal bracket with two or three screws. Remove these mounting screws with your Phillips screwdriver or 1/4" nut driver, supporting the motor with your other hand so it doesn't drop. On some installations, the motor bracket itself unbolts from the back wall — if that's the case, remove those bracket screws too and take the whole assembly out. This makes installation easier since you can work on a bench instead of crouched behind the fridge.
Step 5: Install the WR60X10220 Motor
Mount the new motor to the bracket in the exact position the old one occupied. If you removed the bracket from the wall, reinstall it now with the motor attached. Thread the wires through the same routing path as before — they shouldn't be touching the compressor or rubbing against sharp metal edges. Tighten the mounting screws snugly but don't overtighten; you're threading into thin metal that can strip easily. Slide the fan blade onto the motor shaft with the marked side facing the motor. Secure it with the spring clip or set screw. The blade should spin freely without wobbling or scraping anything.
Step 6: Reconnect Power and Test
Plug the wire harness back into the motor — you should hear it click into place. Double-check that no wires are near the fan blade path. Replace the rear access panel and push the refrigerator back into position, leaving a few inches of clearance. Plug in the fridge and listen. The condenser fan should start running within 30 seconds (the compressor may take longer to kick in). You should hear smooth, quiet airflow — not grinding, clicking, or squealing. Feel the airflow from the bottom front grille; you should feel warm air being expelled as the condenser releases heat.
Testing After Installation
Let the refrigerator run for 2-3 hours and check the temperatures. The freezer should drop to 0°F and the fridge to 37°F within four hours if the condenser fan is working properly. Listen for any unusual sounds during the first few cycles — a slight hum is normal, but grinding or rattling means the blade might be misaligned or hitting something. If you hear clicking that stops and starts, verify the wire connector is fully seated; a loose connection can cause the motor to cycle on and off.
Frequently Asked Questions
How do I know if my condenser fan motor failed versus the evaporator fan?
The condenser fan is behind the refrigerator in the compressor compartment and blows warm air out. The evaporator fan is inside the freezer and circulates cold air. If your freezer is cold but the fridge is warm, that's usually the evaporator fan. If both compartments are warming up and you hear clicking or no fan noise from the back bottom of the unit, it's the condenser fan. The WR60X10220 replaces the condenser fan specifically.
Can I reuse the old fan blade with the new motor?
Yes, if the blade isn't cracked or damaged. The WR60X10220 typically doesn't include a blade, so you'll transfer the old one. Check for cracks in the plastic, especially at the center hub where stress concentrates. If the blade wobbles when you spin it by hand, or if the center hole is worn oval-shaped, replace it with a new blade at the same time. A damaged blade will make the new motor noisy and wear out prematurely.
Why does my new condenser fan motor keep stopping?
Three common causes: the wire connector isn't fully seated and loses contact when the motor vibrates, the blade is hitting the condenser coils because it's installed backwards, or the compressor is overheating because the coils are clogged with dust. Check the wire connection first — disconnect and reconnect it firmly. Then verify the blade spins freely without touching anything. Finally, vacuum the condenser coils while you have the back panel off. Dust buildup makes the motor work harder and can trip its internal overload protection.
Take a photo of the wire routing before disconnecting anything. This saves guesswork during reassembly and prevents wires from rubbing against hot components.
Need the part for this repair?
WR60X10220 · In Stock · Ships next business day