
How to Replace WR57X30890 Isolation Valve and Jumper on GE Refrigerator — Step-by-Step
Unplug refrigerator and turn off water supply before starting. Water will spill during disconnection — keep towels ready.
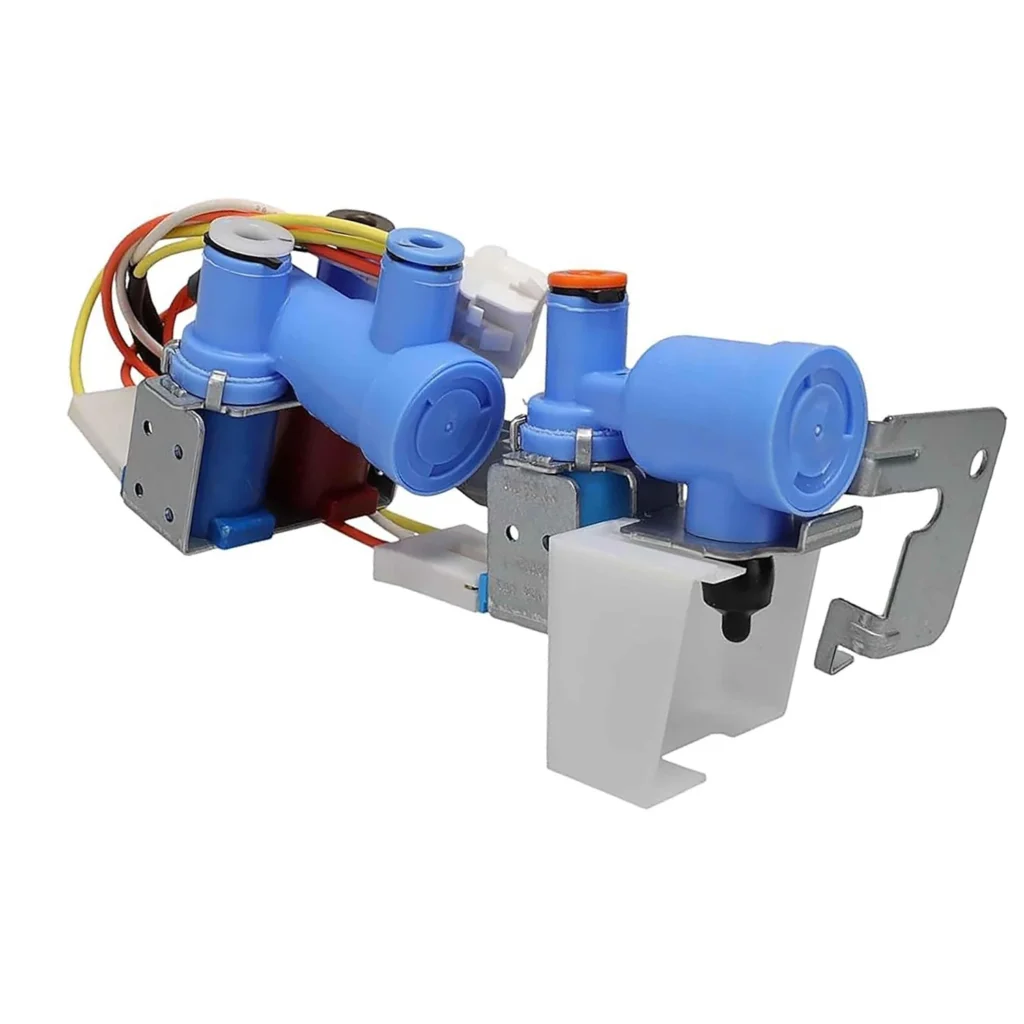
When your GE refrigerator suddenly stops dispensing water or the ice maker quits making ice, you're looking at a potential isolation valve failure. This part — the WR57X30890 — sits in the fresh food compartment and controls water flow to both the dispenser and ice maker. It's a common failure point on models like the GSS25GSHNCSS, GNE27JYMWFFS, and dozens of other GE side-by-sides.
What You Need Before Starting
This isn't a difficult repair, but you'll need to work carefully around water lines. Here's what to gather:
- Phillips screwdriver
- Flathead screwdriver
- Needle-nose pliers
- Towels (water will drip)
- Small bowl or container
- Work gloves (optional but helpful)
Repair Time: 20-30 minutes
Difficulty: Easy to Moderate
Safety First
Unplug your refrigerator completely before starting this repair. You'll be disconnecting water lines, so expect some residual water to spill — that's normal. Turn off the water supply to your refrigerator at the wall valve if accessible. Keep towels handy throughout the process, and don't force any connections. The plastic fittings can crack if you're too aggressive.
Step 1: Empty and Remove Fresh Food Shelves
You need access to the back wall of the fresh food section. Pull out the top two shelves and remove any food items. On most GE models, you'll see the isolation valve assembly mounted on the upper back wall, usually on the right side. It's a white plastic assembly with multiple water line connections.
Step 2: Locate and Disconnect the Water Lines
The isolation valve has three or four water line connections. Take a photo with your phone before disconnecting anything — this'll save you headaches during reassembly. Press the release collar on each quick-connect fitting while gently pulling the tubing straight out. Water will drip, so have your towel and bowl ready. If a fitting feels stuck, wiggle the tubing slightly while pressing the release collar. Don't yank it.
Step 3: Remove the Mounting Screws
Two Phillips screws typically hold the valve assembly to the refrigerator liner. Remove these screws and set them aside. On some models like the GSE25HEMKHDS or GZS22DMJRFES, there's also a wiring harness clip — disconnect it by squeezing the release tab. The entire assembly should now pull free from the back wall.
Step 4: Install the New WR57X30890 Assembly
Position your new isolation valve in the same location. The mounting holes should align perfectly. Thread in the screws, but don't overtighten — you're screwing into plastic liner. Reconnect the wiring harness if your model has one. Now comes the water lines: push each tube firmly into its fitting until you hear a click. Give each line a gentle tug to confirm it's locked in place. Match your reference photo to ensure correct routing.
Step 5: Test the System
Replace the shelves, plug the refrigerator back in, and turn on the water supply. Check all connections for leaks. Press the water dispenser button and watch for steady flow. If you've got an ice maker, it'll take a few hours to start producing ice, but you should hear water filling after the first cycle. Look inside the fresh food compartment around the valve — any dripping means you need to reseat that water line connection.
Testing After Installation
Run the water dispenser for 30 seconds to flush air from the lines. Check for leaks at all connection points. Listen for the ice maker to cycle within 2-3 hours. If water flow seems weak or the ice maker doesn't fill, you may have a kinked water line or an incompletely seated connection. Shut off the water, unplug, and recheck your work.
Frequently Asked Questions
Why does my refrigerator leak after replacing the isolation valve?
Leaking after installation almost always means a water line isn't fully seated in its quick-connect fitting. You need to hear and feel a distinct click when the tube locks in. Pull each line to test — if it comes out easily, push it in harder until it clicks. Also check that you didn't accidentally crack a fitting while working.
Will this part fit my GE refrigerator model?
The WR57X30890 replaces WR57X26569, WR57X30891, AP6891693, and PS12727426. It fits dozens of GE, Hotpoint, and Haier side-by-side models including GSS25GSHNCSS, GNE25JYKGFFS, GSS23GGPBCWW, and GWE19JGLGFWW. Check your model number against the compatibility list or verify your old part number matches one of the replacements.
Can I just replace the jumper part instead of the whole valve?
The jumper and isolation valve come as an integrated assembly on this part number. They're not sold separately because the internal seals deteriorate together. If you're experiencing no water flow or leaking, replacing the entire WR57X30890 assembly is the proper repair. It ensures all seals and valves are new.
Take a photo of water line connections before disconnecting. This reference makes reassembly foolproof and prevents routing mistakes.
Need the part for this repair?
WR57X30890 · In Stock · Ships next business day