
How to Replace WR57X10051 Dual Inlet Water Valve on GE Refrigerator — Step-by-Step
Unplug refrigerator and turn off water supply before starting. Water will drain from lines during disconnection.
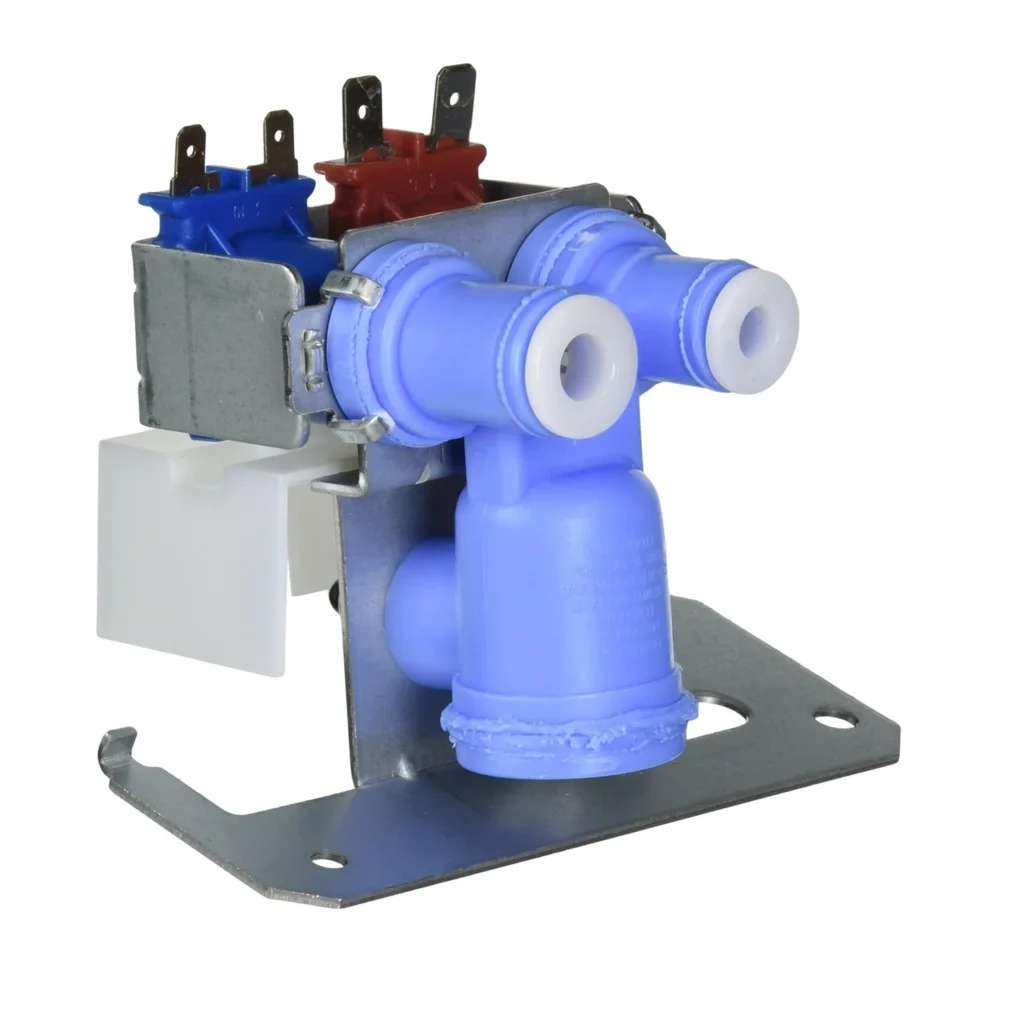
You walk into your kitchen and there's a puddle underneath your GE refrigerator. Again. Or maybe your ice maker suddenly stopped producing ice last Tuesday, and the water dispenser barely dribbles when you press it. Nine times out of ten, you're looking at a failed dual inlet water valve — the part that controls water flow to both your ice maker and dispenser.
The WR57X10051 is the dual inlet valve used across dozens of GE, Hotpoint, and Kenmore side-by-side models including the GSS25TSRCSS, PSS26SGRBSS, and ZISW42DSC. It's an electrical solenoid valve that opens when you press the dispenser or when the ice maker calls for water. When it fails, you'll see leaking from the valve body itself, or you'll get zero water flow even though everything else seems fine.
What You Need Before Starting
This is a straightforward replacement that most people can handle in about 45 minutes. Here's what you'll need:
- 1/4" nut driver or socket
- Flathead screwdriver
- Towels (for water cleanup)
- Small bucket or container
- Utility knife or sharp scissors
Repair Time: 30-45 minutes
Difficulty: MODERATE
Safety First
Unplug your refrigerator completely before starting this repair. You'll be working with both electrical connections and water lines, so disconnect the main water supply line behind the fridge and turn off the water shut-off valve. Keep towels handy — there's always residual water in the lines that'll drip out when you disconnect them. If you've got a built-in model, you may need to pull the unit out from the wall to access the valve, which is typically mounted on the back lower panel.
Step 1: Access the Water Valve
Pull the refrigerator away from the wall to access the back panel. The dual inlet valve is mounted on the lower back section, usually on the left side. You'll see two water lines coming out of it — one feeds the ice maker, the other feeds the dispenser. Remove the metal cover panel with your 1/4" nut driver. There are typically four to six screws holding it in place.
Step 2: Disconnect Water Supply and Electrical
Disconnect the main water supply line that comes from your house plumbing. This usually has a compression fitting or quick-connect. Have your bucket ready because water will drain out. Next, unplug the electrical harness from the valve — there's a tab you press to release it. Take a quick photo of which wire goes where if you want a reference, though the connector only fits one way.
Step 3: Remove the Old Valve and Water Lines
Here's where the WR57X10051 has a specific quirk: the old valve uses plastic water lines with retaining nuts that connect to the outlet ports. Your new valve comes with updated quick-connect fittings that are actually easier to work with. Use your utility knife to carefully cut off the old retaining nuts from the plastic water lines. Don't nick the tubing itself — you're going to reuse these lines with the new valve's push-to-connect fittings.
Remove the mounting screws holding the old valve to the refrigerator frame. The valve should come free with the cut water lines still attached to the ice maker and dispenser paths.
Step 4: Install the New WR57X10051 Valve
Mount the new valve in the same position using the existing screw holes. The WR57X10051 comes with new quick-connect fittings on the outlet ports — these are way better than the old retaining nut style. To connect your existing plastic water lines, simply push them straight into the quick-connect ports until you feel them seat. You'll hear a small click. Give each line a gentle tug to make sure it's locked in place.
Connect the main water supply line to the inlet port. This valve has a 1/4" compression inlet, so thread on the compression nut and tighten it hand-tight, then give it another quarter turn with your wrench. Don't overtighten or you'll crack the plastic fitting.
Step 5: Reconnect Electrical and Test
Plug the electrical harness back into the valve. It only fits one way, so just push until you hear it click. Before you put the cover panel back on, turn the water supply back on and check for leaks. Watch both the inlet connection and the two outlet quick-connects. If you see any drips at the quick-connects, you can remove and reseat the water line — depress the colored ring around where the tube goes in, pull the tube out, and push it back in firmly.
Testing After Installation
Plug your refrigerator back in and wait about 30 seconds for everything to power up. Press the water dispenser paddle and you should get steady flow within a few seconds. If it's just air at first, that's normal — keep dispensing until you get consistent water. For the ice maker, it'll go through its normal cycle. On most GE models, you should hear water filling the ice maker within a few hours, or you can manually trigger a cycle if your model has that feature.
Check back after 24 hours to make sure there's no water on the floor and your ice maker is producing cubes. If you're still having issues with no water flow, check that the household water supply is fully open and that there are no kinks in the water line behind the fridge.
Frequently Asked Questions
How do I remove the water lines from the new quick-connect fittings?
The WR57X10051 uses push-to-connect fittings that are different from the old retaining nut style. To remove a water line, press down firmly on the colored ring where the tube enters the fitting, then pull the tube straight out while holding the ring down. It takes a bit of finger pressure, but once you depress that ring, the tube slides right out.
Why is my new valve leaking from the inlet connection?
The 1/4" compression inlet needs to be tight enough to seal, but not so tight that you crack the plastic valve body. If it's leaking, try tightening the compression nut another eighth of a turn. If it's still leaking, check that the brass compression ferrule is seated properly on the copper water line and hasn't been cross-threaded.
My ice maker still isn't working after replacing the valve — what else could it be?
If water flows from the dispenser but your ice maker isn't getting water, check the water line routing from the valve to the ice maker for kinks or pinches. Also verify the ice maker is turned on — there's usually a wire arm or switch that controls it. On some GE models, the ice maker itself has a separate fill valve or the fill tube could be frozen shut. Let the freezer run for 24 hours and see if it starts working.
The new valve's quick-connect fittings are much easier than the old retaining nuts — just push the water lines in firmly until they click.
Need the part for this repair?
WR57X10051 · In Stock · Ships next business day