
How to Replace WR55X26671 LED Light Board Assembly on GE Refrigerator — Step-by-Step
Unplug refrigerator before starting repair. LED board housing has sharp edges — wear gloves.
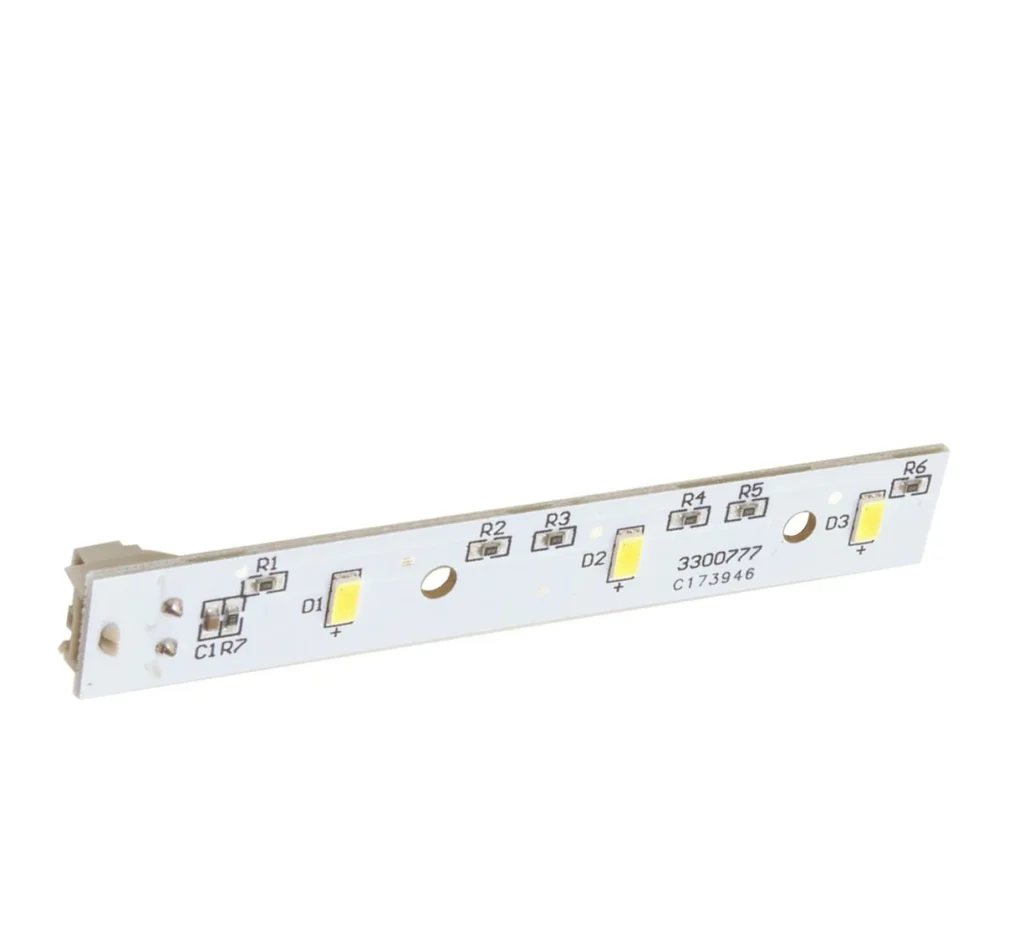
You open your GE refrigerator at 2 AM for a midnight snack, and instead of the usual bright interior, you're greeted by complete darkness. The LED light board has failed — a common issue on models like the DSE25JGHECBB, GSE25HGHJHBB, and dozens of other GE side-by-side and French door refrigerators. The good news? Replacing the WR55X26671 LED light board assembly takes about 15 minutes and doesn't require an appliance technician.
What You Need Before Starting
This is one of the simpler refrigerator repairs you'll tackle. Here's what you need:
- Phillips head screwdriver
- Flathead screwdriver (for prying trim panels)
- Work gloves (LED boards have sharp edges)
- Flashlight or headlamp
Estimated time: 15-20 minutes
Difficulty: Easy
Safety First
Unplug your refrigerator before starting this repair. If you can't access the outlet, turn off the circuit breaker. LED boards operate on low voltage, but you're still working with electrical connections inside your fridge. Wear work gloves — the metal housing on these LED assemblies can have sharp edges that'll slice your fingers if you're not careful.
Step 1: Remove the Light Cover or Trim Panel
Most GE models have a plastic light cover or trim panel covering the LED board. Look for small tabs or screws holding it in place. On models like the GSE25HGHJHWW, you'll find two Phillips screws at the front edges. Remove these screws, then gently pull the cover forward. Some covers snap in place — use your flathead screwdriver to carefully pry the tabs loose without cracking the plastic.
Step 2: Disconnect the Wire Harness
Once the cover's off, you'll see the LED board with a wire harness connector plugged into it. This connector usually has a locking tab — press it down while pulling the connector straight out. Don't yank on the wires themselves. The connector should release easily once you've pressed the tab.
Step 3: Remove the Old LED Board Assembly
The WR55X26671 assembly is held in place by two to four screws, depending on your model. These are typically Phillips head screws around the perimeter of the board. Remove all mounting screws and carefully lift the old board out. Watch for any plastic clips that might still be holding it — forcing it can crack the housing.
Step 4: Install the New WR55X26671 LED Board
Position your new LED board assembly exactly where the old one sat. The mounting holes should line up perfectly. Thread in all the mounting screws, but don't fully tighten them yet. Get all screws started first, then tighten them in a cross pattern to ensure even pressure. Don't overtighten — you're threading into plastic, and it's easy to strip.
Step 5: Reconnect and Test
Plug the wire harness back into the new LED board — you should hear a click when it seats properly. Before reinstalling the cover, plug your refrigerator back in and open the door to test the lights. They should illuminate immediately. If nothing happens, unplug the unit and check that the connector is fully seated.
Step 6: Reinstall the Cover
Once you've confirmed the lights work, snap or screw the trim cover back into place. Make sure all tabs are fully seated so the cover doesn't rattle when you close the door.
Testing After Installation
Open and close the refrigerator door several times to verify the door switch is activating the lights properly. Check both the fresh food compartment and freezer if you have dual lighting. The LEDs should turn on instantly without flickering or dim spots. If you notice any dark sections on the board, you may have a loose connector.
Frequently Asked Questions
Will this WR55X26671 board work in my specific GE model?
This LED board assembly replaces AP6035586, PS11767930, 4468532, and EAP11767930. It's compatible with dozens of GE side-by-side and French door models including the DSE25, GSE25, and GSS23 series. Check your model number against the compatibility list — it's stamped on a label inside your fridge, usually on the left wall or ceiling.
Why did my original LED board fail?
LED boards typically fail from power surges, moisture infiltration, or simply age. The solder connections on these boards can crack over time from temperature cycling. If you've had power outages or brownouts, that can accelerate failure. Most LED boards last 5-7 years before showing issues.
Can I replace just the LEDs instead of the whole board?
Technically yes, but it's not practical. The LEDs are surface-mounted components that require specialized soldering equipment. By the time you buy the LEDs and soldering tools, you've spent more than the replacement board costs. Plus, if one LED failed, others are likely close behind. Replace the whole assembly and be done with it.
Start all mounting screws before tightening any of them to ensure proper alignment and prevent cross-threading.
Need the part for this repair?
WR55X26671 · In Stock · Ships next business day