
How to Replace WR51X442 Dual Defrost Heater & Thermostat Kit on GE Refrigerator — Step-by-Step
Unplug refrigerator completely before starting. Defrost heater operates on 120V AC. Wear gloves when handling sharp metal edges and frozen components.
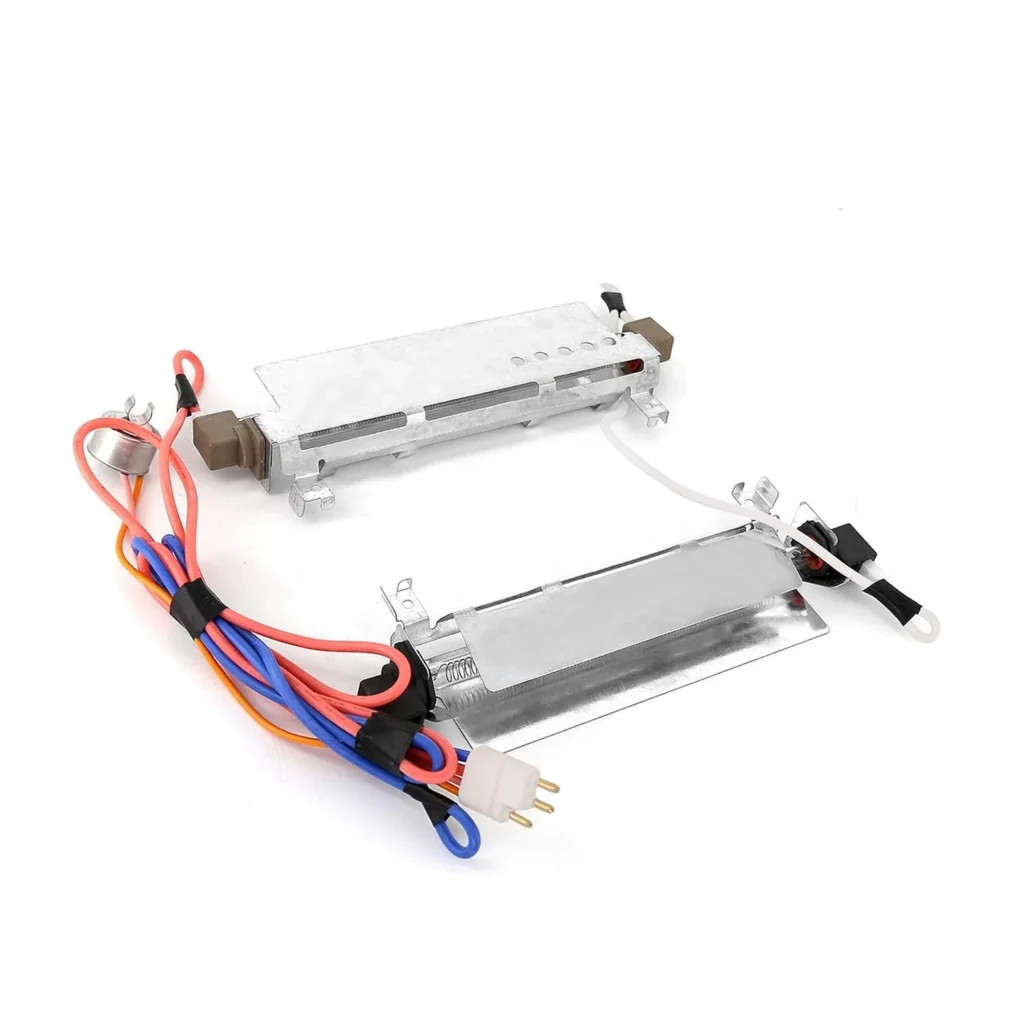
You open your GE refrigerator and notice a half-inch of frost coating the back wall of the freezer. The ice cream's soft, and there's a puddle forming underneath the crisper drawers. Your defrost system has failed, and that frost buildup isn't going away on its own. The WR51X442 dual defrost heater and thermostat kit fixes both the heating element and the temperature sensor that controls it — two of the most common failure points in GE's defrost system.
This repair addresses multiple symptoms at once: freezer section running too warm because frost blocks airflow, or paradoxically too cold because the thermostat's stuck open. You'll also fix situations where the fridge compartment warms up since the frosted-over evaporator coils can't cool properly anymore.
What You Need Before Starting
Gather these tools before you begin:
- 1/4-inch nut driver or socket set
- Phillips head screwdriver
- Flathead screwdriver
- Needle-nose pliers
- Hair dryer or heat gun (for defrosting)
- Towels (lots of them)
- Cooler with ice for storing food
- Work gloves
Estimated repair time: 2-3 hours (includes defrost time)
Difficulty level: INTERMEDIATE
You'll need to completely defrost the freezer before accessing the defrost heater, which adds significant time to this repair.
Safety First
Warning: Unplug the refrigerator completely before starting this repair. The defrost heater operates on 120V AC and can cause serious shock. Never work on electrical components with the unit plugged in. Additionally, wear gloves when handling the evaporator cover — the metal edges are sharp and the frost can cause skin damage. Place towels around the base of the freezer because you're going to have substantial water runoff during the defrosting process.
Step 1: Empty and Defrost the Freezer Completely
Remove all food from the freezer and transfer it to a cooler. Unplug the refrigerator from the wall outlet. You can't access the defrost heater until all that frost melts away. Speed up the process with a hair dryer on low heat, keeping it at least 6 inches away from plastic components. Place towels inside the freezer bottom and on the floor in front — you're looking at several cups of water here. This defrost process typically takes 45-90 minutes depending on frost thickness.
Step 2: Remove the Evaporator Cover Panel
Once fully defrosted, locate the large plastic panel covering the back wall of the freezer compartment. Remove all screws securing this cover using your Phillips screwdriver — typically 6-8 screws along the edges. Some models have clips at the top, so gently pull the panel forward at the bottom first, then lift up to clear the top clips. Set the panel aside. You'll now see the evaporator coils — thin aluminum fins with the defrost heater running underneath them.
Step 3: Disconnect and Remove the Old Heater and Thermostat
The defrost heater is the glass tube running horizontally under the evaporator coils, held by metal clips. The defrost thermostat is a small round or rectangular component clipped to the coils themselves. Take a photo of the wire routing before disconnecting anything. Unplug the wire harness connectors for both components — they're usually push-together connectors that release when you squeeze the tabs. Use needle-nose pliers to carefully unhook the metal clips holding the heater in place, then slide the heater out. Pop the thermostat off its mounting clip — it typically just pulls straight off.
Step 4: Install the New WR51X442 Kit Components
The WR51X442 kit includes both the heater and thermostat as a matched set. Position the new defrost heater where the old one sat, securing it with the metal clips — they should snap into place. Make sure the heater sits evenly and doesn't touch any plastic components. Clip the new thermostat onto the evaporator coil in the same location as the old one — proper contact with the coil is critical for accurate temperature sensing. Connect both wire harnesses, ensuring you hear a distinct click when they seat fully.
Step 5: Reassemble and Test the System
Replace the evaporator cover panel, making sure all clips engage at the top before tightening screws. Don't overtighten — these thread into plastic and strip easily. Plug the refrigerator back in and set the temperature controls to their normal positions. Within 15 minutes, you should hear the compressor running and feel cold air from the vents. The defrost cycle won't activate for 6-8 hours typically, but you can verify proper installation by checking that the freezer maintains temperature without frost buildup over the next 24-48 hours.
Testing After Installation
Monitor the freezer for the next two days. The temperature should stabilize between 0-5°F, and you shouldn't see any frost accumulation on the back wall. If frost returns quickly, double-check that the thermostat is making firm contact with the evaporator coils — poor contact prevents proper defrost cycle operation. Also verify that both wire connectors are fully seated. The fridge compartment should return to 37-40°F within 6-8 hours of restarting.
Frequently Asked Questions
How do I know if the defrost heater or thermostat failed?
Frost buildup on the back freezer wall is the telltale sign. If you see thick frost or ice covering the evaporator coils, your defrost system isn't working. The WR51X442 kit replaces both components because when one fails, the other isn't far behind — they experience the same thermal stress cycles. Rather than diagnosing which specific component failed, replacing both together prevents a callback repair in three months.
Will this kit work on my Hotpoint or Kenmore refrigerator?
Yes, if your model number is listed in the compatibility data. GE manufactured refrigerators under multiple brand names including Hotpoint, RCA, and some Kenmore models. The WR51X442 replaces earlier part numbers WR51X342 and WR51X463, so check your original part number. When in doubt, match your refrigerator's model number against the full compatibility list.
Can I test the new heater before reassembling everything?
Not safely. The defrost heater only operates during the defrost cycle when the compressor is off, and the cycle is controlled by a timer or adaptive defrost board. Applying power directly to test it risks electrical shock and doesn't prove the thermostat integration works correctly. Install everything properly, then monitor for frost buildup over 48 hours — that's your real-world test.
Take photos of wire routing before disconnecting anything. The defrost cycle timing means you won't see results immediately — monitor for 48 hours to confirm proper operation.
Need the part for this repair?
WR51X442 · In Stock · Ships next business day