
How to Replace WR49X10283 Compressor Inverter Control Board on GE Monogram Refrigerator — Step-by-Step
Unplug refrigerator completely and wait 5 minutes before starting. Inverter board carries high voltage even when compressor is off.
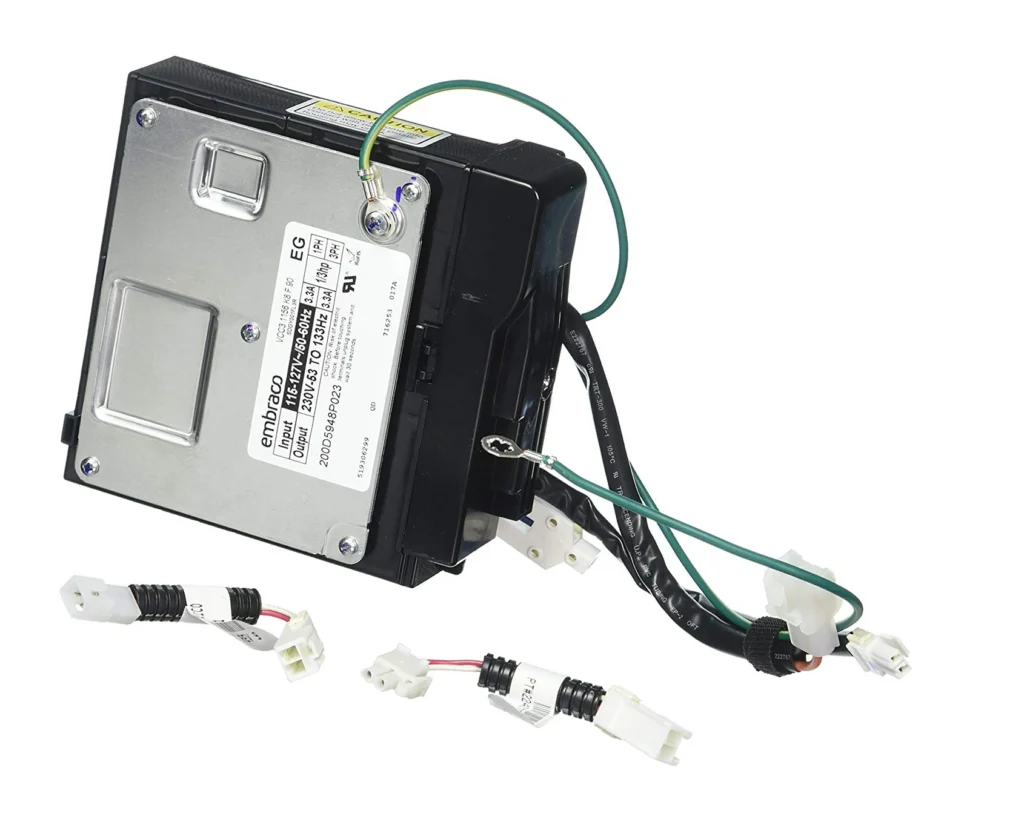
Your GE Monogram refrigerator stops cooling overnight. The compressor won't start, or maybe it starts then shuts off after a few seconds. You hear clicking sounds from behind the unit. These are classic signs your compressor inverter control board—the brain that regulates compressor speed—has failed. The WR49X10283 board commonly fails in models like the ZISS420DRISS and ZISS480DRFSS, often taking out the compressor's ability to run at variable speeds.
This board sits on the back of the refrigerator near the compressor. It's a direct replacement for WR55X10490, WR55X10685, WR55X10979, and WR55X11029. Replacing it yourself saves $300-400 in service calls, and the job takes less than an hour if you're methodical.
What You Need Before Starting
Gather these tools and materials before you pull the refrigerator out:
- 1/4" nut driver or socket set
- Phillips head screwdriver
- Flathead screwdriver (for wire connectors)
- Needle-nose pliers
- Work gloves (metal edges are sharp)
- Smartphone camera (to photograph wire connections)
- Masking tape and marker (for labeling wires)
Repair Time: 45-60 minutes
Difficulty: Moderate — Requires unplugging multiple connectors and working behind the refrigerator
Safety First
Unplug the refrigerator completely. Don't just turn off the control panel. The inverter board carries high voltage even when the compressor isn't running. Pull the plug and wait 5 minutes for capacitors to discharge. Wear work gloves—the sheet metal backing has sharp edges that'll slice your hands if you're careless. If your refrigerator has an ice maker water line, you don't need to disconnect it for this repair.
Step 1: Access the Compressor Compartment
Pull the refrigerator away from the wall—you need about 3 feet of clearance. Remove the lower rear access panel using your 1/4" nut driver. On Monogram models, there are typically 6-8 hex screws around the perimeter. Set them aside in a container. The panel may stick slightly from dust buildup; gently pry it loose with the flathead screwdriver.
Step 2: Locate and Photograph the Inverter Board
The inverter control board is mounted on the right side of the compressor compartment, usually on a vertical metal bracket. It's a black rectangular unit about 5x7 inches with multiple wire harness connectors. Before touching anything, take clear photos of every wire connection from multiple angles. You'll thank yourself later. Label each connector with masking tape and a number—there are typically 4-6 connectors on this board.
Step 3: Disconnect Wire Harnesses
Start disconnecting the wire harnesses. Each connector has a locking tab—press it down while pulling the connector straight out. Don't yank on the wires themselves. The main power connector is the largest one and requires firm pressure on the release tab. Some connectors on Monogram units are tight from years of heat cycling. Use needle-nose pliers to gently wiggle them free if needed, but never force them.
Step 4: Remove the Old Board
The board is secured with 2-3 Phillips head screws to its mounting bracket. Remove these screws and carefully slide the board up and out of any retaining clips. Inspect the old board—you'll often see burn marks near the power transistors or bulging capacitors. That's your confirmation this board was dead. Check the mounting bracket for any melted plastic or damage. If the bracket is damaged, contact GE for part number availability.
Step 5: Install the New WR49X10283 Board
Position the new board onto the mounting bracket, aligning the screw holes. Secure it with the Phillips screws—snug but not overtight. Now reconnect each wire harness in reverse order using your photos as reference. Each connector clicks when fully seated. Give each one a gentle tug to verify it's locked. The main power connector requires the most force—push until you hear a distinct click.
Step 6: Reassemble and Test
Replace the rear access panel and secure all hex screws. Push the refrigerator back into position, leaving a 2-inch gap from the wall for airflow. Plug it in. You should hear the compressor start within 2-3 minutes. The startup may sound different than before—that's normal. The new board runs through a self-diagnostic cycle on first power-up.
Testing After Installation
Let the refrigerator run for 30 minutes. Open the fresh food section and freezer—you should feel cold air circulating. Check that the compressor is running smoothly without excessive clicking or humming. The variable speed compressor should ramp up and down as the board adjusts cooling demands. Monitor temperatures for 24 hours. Fresh food should stabilize at 37°F, freezer at 0°F. If the compressor runs continuously without cycling, recheck your wire connections—a loose connector prevents proper temperature feedback.
Frequently Asked Questions
Will this board work if my model number isn't listed?
Cross-reference your existing board's part number. If your current board is stamped WR55X10490, WR55X10685, WR55X10979, or WR55X11029, the WR49X10283 is the correct replacement. GE consolidated these part numbers into one updated board. It's compatible with all GE Monogram, Café, and some Profile models using variable-speed compressors manufactured between 2012-2020.
Do I need to reset anything after installing the new board?
No manual reset is required. The board automatically calibrates during the first power-up cycle. However, you may want to clear any existing error codes by holding the refrigerator's temperature adjustment buttons simultaneously for 3 seconds. Refer to your owner's manual for the specific button combination—it varies by control panel model.
How can I tell if the board is bad versus the compressor itself?
If you hear clicking sounds but the compressor never starts, that points to the board. If the compressor starts briefly then shuts down with error codes on the display panel, that's also typically the inverter board. A completely silent system with no clicks usually indicates compressor failure or a relay issue. You can test by checking for 120V at the compressor terminals—if voltage is present but the compressor doesn't run, the compressor is likely seized.
Photograph all wire connections before disconnecting anything. Label each connector with numbered masking tape to prevent confusion during reassembly.
Need the part for this repair?
WR49X10283 · In Stock · Ships next business day