
How to Replace WH13X27314 Water Inlet Valve on GE Washer — Step-by-Step
Unplug washer and turn off both water supply valves before starting. Expect residual water when disconnecting hoses.
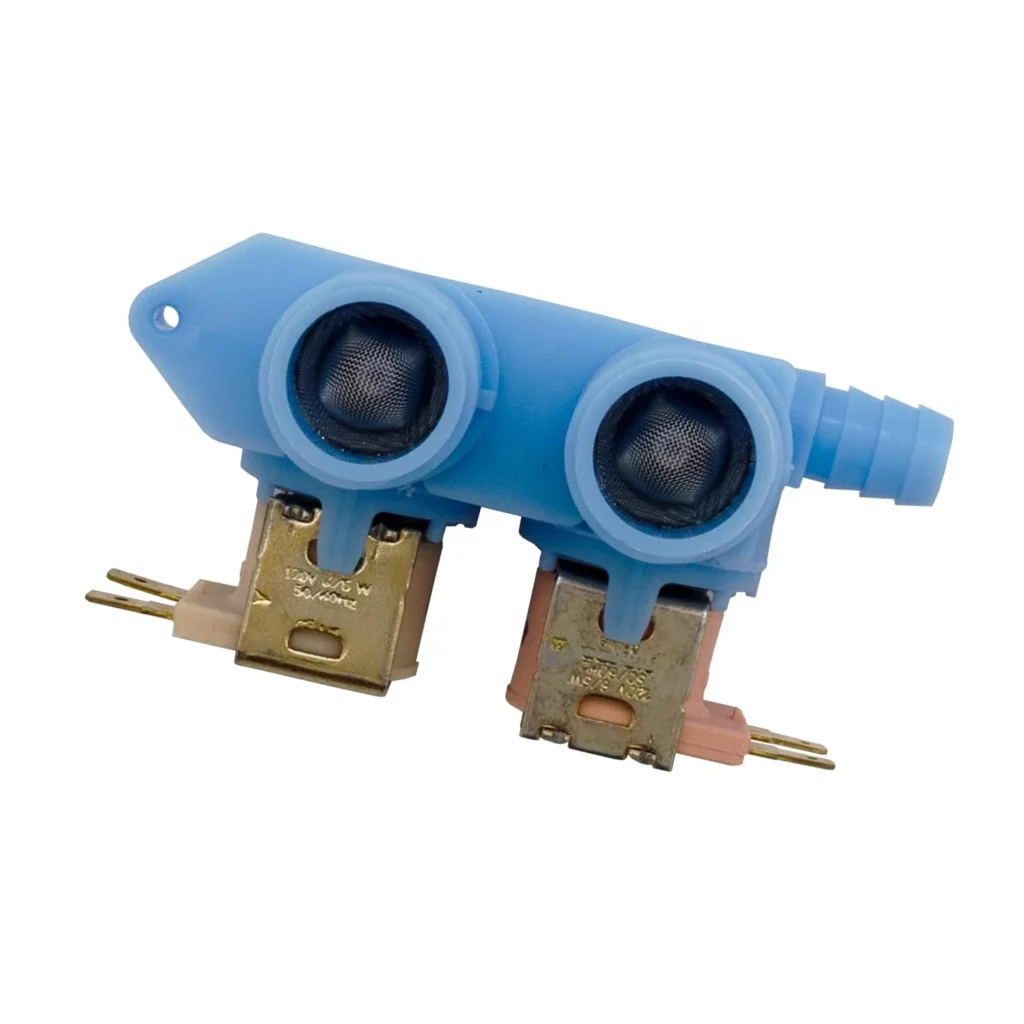
You start a load of laundry and nothing happens. The drum sits empty, bone dry, while the washer hums along like everything's fine. Or worse — you come back to find a puddle spreading across your laundry room floor. When your GE washer won't fill or starts leaking from the back, the dual coil water inlet valve is usually the culprit.
This valve controls both hot and cold water flow into your washer. When it fails, you'll see either no water entering the machine or water leaking from the valve connection points even when the washer is off. The good news? This is a straightforward repair that most homeowners can handle in under an hour.
What You Need Before Starting
Gather these tools before you begin:
- 1/4" nut driver or socket wrench
- Adjustable pliers
- Bucket or towels for water cleanup
- Flashlight (lighting behind washers is usually terrible)
- Work gloves (optional but recommended)
Estimated Time: 45-60 minutes
Difficulty: BEGINNER-FRIENDLY
Safety First
Warning: Always unplug your washer from the electrical outlet before starting any repair. Turn off both the hot and cold water supply valves behind the washer. You'll be dealing with water connections, so expect some residual water to spill when you disconnect the old valve — that bucket will come in handy.
Step 1: Access the Valve
Pull your washer away from the wall so you can work comfortably behind it. Turn off both water supply valves by rotating them clockwise. Unplug the washer from the electrical outlet. Use your adjustable pliers to disconnect the hot and cold water hoses from the back of the washer — water will drip out, so have that bucket ready. The inlet valve is now visible at the top back of the machine where those hoses connected.
Step 2: Remove the Back Panel
Locate the screws securing the back access panel. On most GE models like the GUD24ESSM0WW and GUD27ESSM1WW, you'll find 4-6 screws around the perimeter. Remove them with your 1/4" nut driver and carefully lift the panel away. Now you can see the full inlet valve assembly from the inside, including the electrical connections and the mounting bracket.
Step 3: Disconnect Electrical and Hoses
You'll see one or two wire harness connectors plugged into the valve solenoids. Press the release tab and pull straight out to disconnect them. Next, use your pliers to loosen the hose clamps connecting the internal hoses to the valve outlets. Slide the clamps back and wiggle the hoses free. Some water may still be in these hoses, so keep towels handy.
Step 4: Remove the Old Valve
The inlet valve is held in place by 2-3 mounting screws on the bracket. Remove these screws and carefully pull the valve assembly out through the back opening. Take a moment to compare your old WH13X27314 valve with the new one — the solenoid positions and connection points should match exactly. This valve also replaces older part numbers AP6328292 and WH13X10064, so don't worry if your original has a different number stamped on it.
Step 5: Install the New Valve
Position the new WH13X27314 valve into the mounting bracket, aligning the screw holes. Thread in the mounting screws and tighten them snugly — but don't overtighten or you'll crack the plastic housing. Reconnect the internal hoses to the valve outlets, sliding the hose clamps back into position about 1/4" from the end. Make sure the hoses are pushed on firmly before tightening the clamps. Plug the electrical connectors back onto the solenoids until you hear them click.
Step 6: Reassemble and Test
Replace the back panel and secure all the screws. Reconnect the hot and cold water supply hoses to the back of the washer, hand-tightening them first, then giving them an extra quarter-turn with the pliers. Don't crank them down too hard — you'll strip the threads. Turn on both water supply valves slowly and check for leaks around the connections. Plug the washer back in.
Testing After Installation
Run an empty cycle to test the new valve. Watch for proper water flow — you should see water entering the drum within 10 seconds of starting the cycle. Check behind the washer one more time for any leaks around the valve connections. Listen for the distinctive clicking sound of the solenoids opening and closing as the washer switches between hot and cold water. If everything looks good, push your washer back into place.
Frequently Asked Questions
Why does my washer fill slowly even with a new valve?
The inlet screens inside the valve can get clogged with sediment from your water supply. Before installing the new valve, check the small mesh screens where the water hoses connect. If they're dirty, carefully remove and rinse them. Also verify that your water supply valves are fully open — partially closed valves restrict flow and make fills take forever.
Will this valve work on Kenmore washers too?
Yes, this is a direct replacement for many Kenmore models including 2661532212, 2661532312, and 2661532412. GE manufactured washers for Kenmore, so many parts are interchangeable. Always verify your model number against the compatibility list to be certain.
Can I fix a leaking valve without replacing it?
Not really. When inlet valves leak, it's because the internal diaphragm or solenoid seal has failed. There's no practical way to rebuild them. If you're seeing water dripping from the valve body itself (not just loose hose connections), replacement is your only option. The valve costs $41.99 — way cheaper than water damage to your floors.
Check and clean the inlet screens before installing the new valve to prevent slow fill issues
Need the part for this repair?
WH13X27314 · In Stock · Ships next business day