
How to Replace WH01X27954 Lid Lock Switch on GE Top Load Washer — Step-by-Step
Always unplug the washer before beginning any repair. Never bypass the lid lock switch — it's a critical safety feature that prevents injury from a spinning drum.
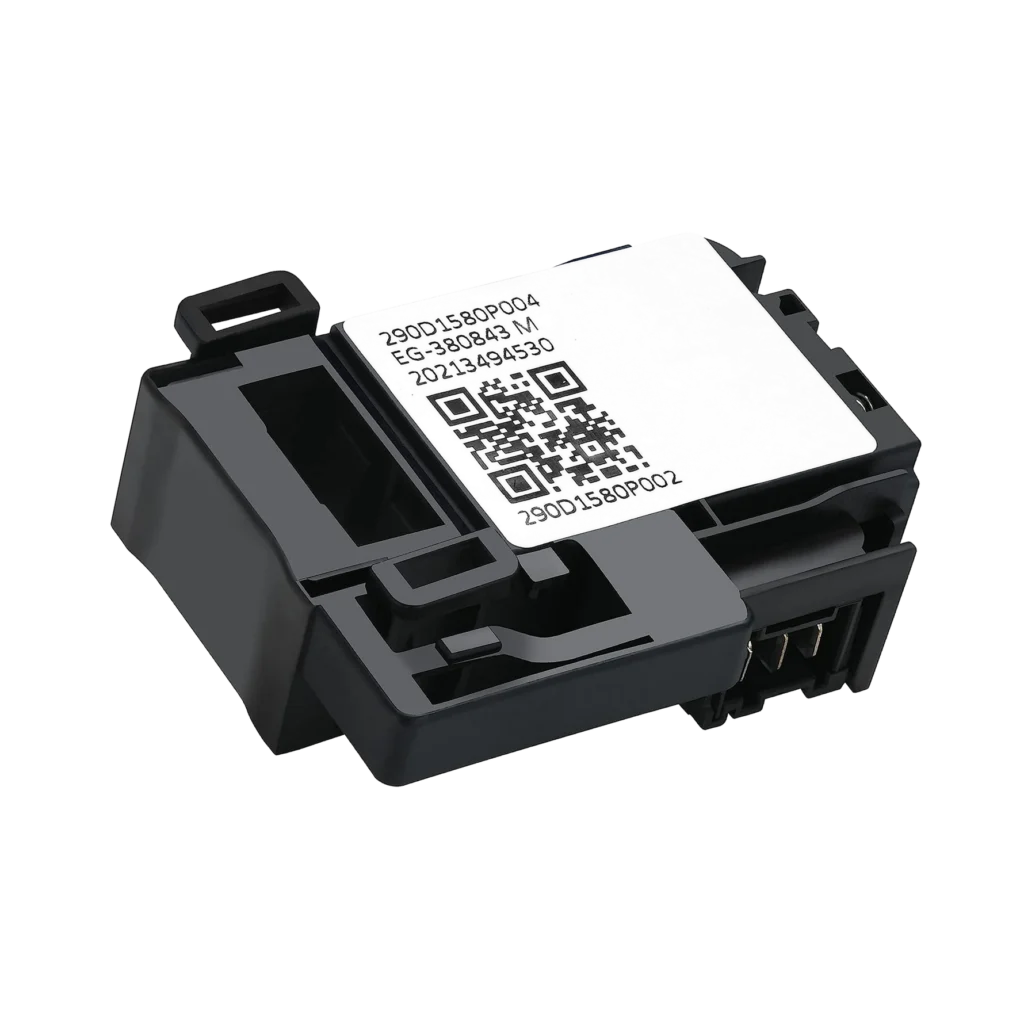
Your GE washer starts filling with water, but the moment you close the lid, nothing happens. No spin, no agitation — just silence. You open and close the lid a few times, maybe press it down harder, but the cycle won't start. That's your lid lock switch failing, and on models like the GTW460ASJ2WW or GTW335ASN2WW, it's one of the most common causes of a washer that won't run.
The WH01X27954 lid lock assembly is the safety mechanism that tells your washer it's okay to spin. When it fails, the control board won't allow the wash cycle to proceed — even if everything else works perfectly. This replacement also covers part numbers WH01X26114, WH01X24114, and AP6331854, so if you've been searching for those, you're in the right place.
What You Need Before Starting
This is a straightforward repair that doesn't require advanced technical skills. Here's what you'll need:
- Flathead screwdriver
- Phillips screwdriver
- Putty knife or trim removal tool
- Work gloves (optional but recommended)
- Replacement WH01X27954 lid lock switch
Estimated repair time: 20-30 minutes
Difficulty level: Easy to Moderate — the hardest part is removing the control panel without breaking the plastic clips.
Safety First
Before you touch anything, unplug the washer from the wall outlet. Don't just turn it off — physically disconnect it. Top load washers store electrical charge in their control boards, and you don't want to be working on live circuits. If your washer is hardwired, flip the breaker. Also, have a towel handy in case there's residual water in the tub.
Step 1: Remove the Control Panel
The lid lock switch sits just under the top panel of your washer, so you'll need to access it from above. Use your putty knife to carefully pry up the control panel — there are plastic clips holding it down on either side. Slide the knife along the seam between the control panel and the washer top, working slowly to avoid snapping the clips. Once the clips release, lift the panel up and prop it against the wall behind the washer. You don't need to disconnect any wires yet.
Step 2: Locate and Disconnect the Old Lid Lock
With the control panel tilted back, you'll see the lid lock assembly mounted to the underside of the washer top, directly where the lid closes. It's a rectangular black or white plastic housing with a wire harness plugged into it. Press the locking tab on the wire connector and pull it straight out. Don't yank — if it's been there for years, the connector might be stiff. Wiggle it gently while pulling.
Step 3: Remove the Mounting Screws
The lid lock is held in place with two Phillips screws. Remove both screws and set them aside — you'll reuse them for the new switch. Once the screws are out, the old lid lock assembly should lift right out. If it's stuck, check for a third screw or a retaining clip you might have missed. On some GTW models, there's a small plastic tab that needs to be depressed before the assembly releases.
Step 4: Install the New WH01X27954 Lid Lock Switch
Position the new WH01X27954 assembly in the same orientation as the old one — the wire connector should face toward the front or side, depending on your model. Line up the screw holes and secure it with the two screws you removed earlier. Don't overtighten — plastic housings crack easily. Snug is good enough. Now plug the wire harness back into the new switch until you hear a click. Give it a gentle tug to make sure it's seated properly.
Step 5: Reassemble and Test
Lower the control panel back into place, pressing down firmly on both sides until the clips snap into position. Plug the washer back in and run a test cycle. Close the lid and listen — you should hear a distinct click or electronic beep as the lid lock engages. If your model has an indicator light on the control panel, it should illuminate when the lid locks. Start a spin cycle to confirm everything's working. The drum should begin spinning within 10-15 seconds of closing the lid.
Testing After Installation
Run a full wash cycle with the washer empty to make sure the lid lock engages and releases properly at each stage. Pay attention during the transition from wash to spin — that's when the lock works hardest. If the washer stops mid-cycle with an error code (common ones are lid lock errors like LF or LE on some models), recheck your wire connection. It's the most common installation mistake.
Frequently Asked Questions
Will this work on my Hotpoint washer?
Yes, the WH01X27954 is compatible with many Hotpoint top load models that share the same platform as GE washers. Check the compatible models list on the product page, but if your current lid lock has the same part number (WH01X26114, WH01X24114, or 290D1580P001), this is your replacement.
My washer still won't start after replacing the lid lock — what else could it be?
If you've installed the new switch correctly and the washer still won't run, the problem might be with the control board or the lid strike (the piece on the lid itself that engages with the lock). Check that the strike isn't broken or misaligned. You can also test the door lock circuit with a multimeter if you're comfortable with that level of diagnostics.
Can I bypass the lid lock temporarily to test if it's the problem?
Technically yes, but don't. Bypassing the lid lock defeats a critical safety feature designed to prevent the washer from spinning with the lid open. That's dangerous — a spinning drum can cause serious injury. If you need to test the lock, use a multimeter to check for continuity across the switch terminals when the lid is closed. No continuity means the switch is bad.
Take a photo of the wire connector orientation before unplugging it. On some models, the connector can be plugged in upside down, which will cause the lock to malfunction even though it's connected.
Need the part for this repair?
WH01X27954 · In Stock · Ships next business day