
How to Replace WE4M181 Cycling Thermostat on GE and Hotpoint Dryers — Step-by-Step
Always unplug the dryer before starting repairs. Let the heating assembly cool for 20+ minutes after use. Gas dryer owners must shut off the gas supply valve before beginning work.
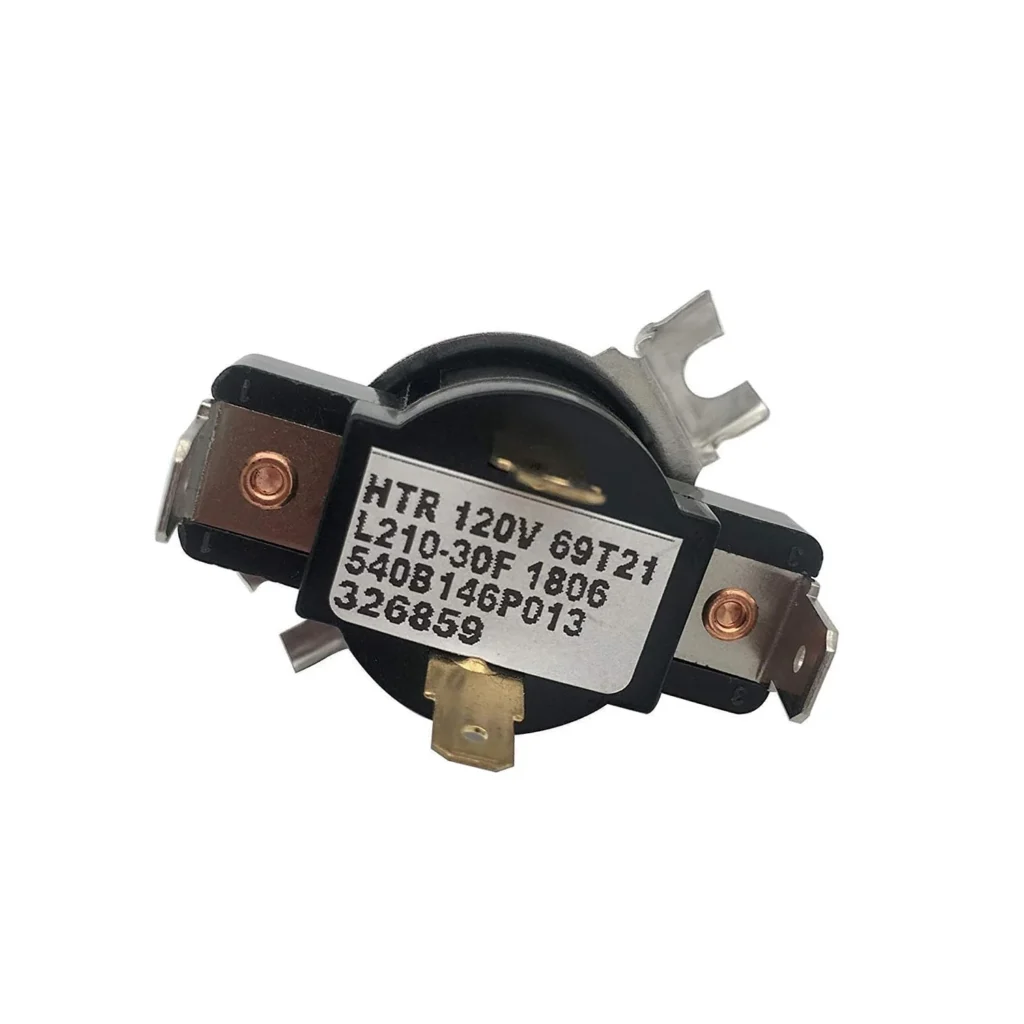
Your GE dryer shuts off mid-cycle, leaving clothes damp. Or worse — it runs scorching hot, practically baking your towels. Nine times out of ten, the cycling thermostat is the culprit. This little 4-wire component (WE4M181) monitors drum temperature and tells your heating element when to cycle on and off. When it fails, temperature regulation goes haywire.
The good news? Replacing this thermostat is straightforward. You don't need specialized tools, and most folks complete the job in under 30 minutes. This guide walks you through the exact process for GE, Hotpoint, RCA, and Kenmore dryers using the WE4M181 (also sold as AP2044414, WE4M245, or PS267926).
What You Need Before Starting
Gather these items before you begin:
- 1/4-inch nut driver or socket set
- Flathead screwdriver
- Needle-nose pliers (optional, helpful for wire terminals)
- Work gloves
- Flashlight or headlamp
Estimated Time: 25-30 minutes
Difficulty: EASY
Safety First
Unplug your dryer from the wall outlet before touching anything. If you have a gas dryer, also shut off the gas supply valve. The cycling thermostat carries electrical current, and you'll be working near the heating assembly — better safe than sorry. Let the dryer cool completely if you've run it recently. The blower housing and thermostat area can stay hot for 20+ minutes after a cycle.
Step 1: Access the Blower Housing
Most GE and Hotpoint models (like the GTX18GSSJ1WW or HTDX100GD4WW) require front panel removal. Pop off the lint screen, then remove the two screws hidden underneath. Next, lift the top panel — it's held by clips at the front corners. Push a putty knife into the seam between the top and front panels, about 3 inches from each corner, and push up gently. The top will release. Support it against the wall behind the dryer.
Now remove the screws securing the front panel (typically four screws along the bottom edge). Disconnect the door switch wire harness, then lift the front panel away. You'll see the drum, blower housing, and heating assembly.
Step 2: Locate the Cycling Thermostat
The WE4M181 thermostat mounts on the blower housing — a large black or silver metal duct on the lower right side of the dryer cabinet. Look for a round or oval disc about 1.5 inches across with four wire terminals attached. It's usually held by two screws or a single mounting bracket.
On models like the DCXR453GV0WW or DBXR463GD0WW, you might need to reach around the heating element assembly to access it. Don't force anything — the thermostat should be clearly visible once you peer into the lower right area.
Step 3: Remove the Old Thermostat
Snap a photo of the wire configuration with your phone before disconnecting anything. The WE4M181 has four terminals, and wire colors vary by model year. Typically you'll see two white wires and two other colors (often blue or brown), but don't rely on color alone — your photo is your roadmap.
Pull each wire terminal straight off. If they're stubborn, wiggle gently side-to-side while pulling — don't yank. Remove the two mounting screws holding the thermostat to the blower housing. The old thermostat should lift right out.
Step 4: Install the New WE4M181 Thermostat
Position your new WE4M181 exactly where the old one sat. The metal disc should make flush contact with the blower housing — this ensures accurate temperature reading. Thread in both mounting screws and tighten snugly, but don't overtighten. You're threading into sheet metal, and it's easy to strip.
Reconnect the four wire terminals in the exact configuration from your photo. Push each terminal firmly onto its post until you hear or feel a click. Give each wire a gentle tug to confirm it's seated. If a terminal feels loose or falls off easily, use needle-nose pliers to squeeze it slightly tighter before reattaching.
Step 5: Reassemble and Test
Reverse your disassembly steps. Reattach the front panel, reconnect the door switch harness, lower the top panel (press down until the clips engage), and replace all screws. Plug the dryer back in. If you have a gas model, turn the gas supply back on.
Run a test cycle on high heat with damp towels. The dryer should heat up within two minutes and maintain consistent warmth throughout the cycle. Feel the top of the dryer — it should be warm but not uncomfortable to touch. If it's scorching hot or stays cold, double-check your wire connections.
Testing After Installation
Let a full cycle complete. Your clothes should come out dry, not damp or overly hot. The cycling thermostat should keep drum temperature between 130-150°F during normal operation. Listen for the heating element clicking on and off periodically — that's the thermostat doing its job. If you still have issues, you might have a faulty high-limit thermostat or thermal fuse (separate components that work alongside the cycling thermostat).
Frequently Asked Questions
Will this thermostat work on my Kenmore dryer?
Yes, if your Kenmore model is actually a rebadged GE or Hotpoint (common for models starting with 110.6 or 110.8). Cross-reference your model number against the compatibility list on the product page. The WE4M181 replaces several OEM numbers including AP2044414 and WE4M245, so it's widely compatible across brands manufactured by GE.
How do I know if my cycling thermostat is bad?
Two telltale signs: your dryer overheats and shuts off with a thermal fuse error, or it runs but never gets warm enough to dry clothes. You can test the thermostat with a multimeter set to continuity mode — it should show continuity (closed circuit) at room temperature and open (no continuity) when heated above its rating. But honestly, if you're already tearing into the dryer, just replace it. At $35.99, it's cheaper than a second service call.
Can I replace just the cycling thermostat without replacing other thermostats?
Absolutely. The cycling thermostat, high-limit thermostat, and thermal fuse are separate components with different jobs. If only your cycling thermostat has failed (symptoms: inconsistent heating, too hot or not hot enough), you only need to replace that one. However, if your dryer has completely stopped heating after a thermal fuse blew, you'll need to address both the fuse and whatever caused it to blow — which might include this thermostat.
Take a clear photo of the wire terminal configuration before disconnecting anything — wire colors vary by production year, and that photo is your best reference for reassembly.
Need the part for this repair?
WE4M181 · In Stock · Ships next business day