
How to Replace WD24X10018 Dishwasher Check Valve Piston & Nut Assembly on GE, Hotpoint & Kenmore — Step-by-Step
Always disconnect power and water supply before working on dishwasher components near the pump assembly
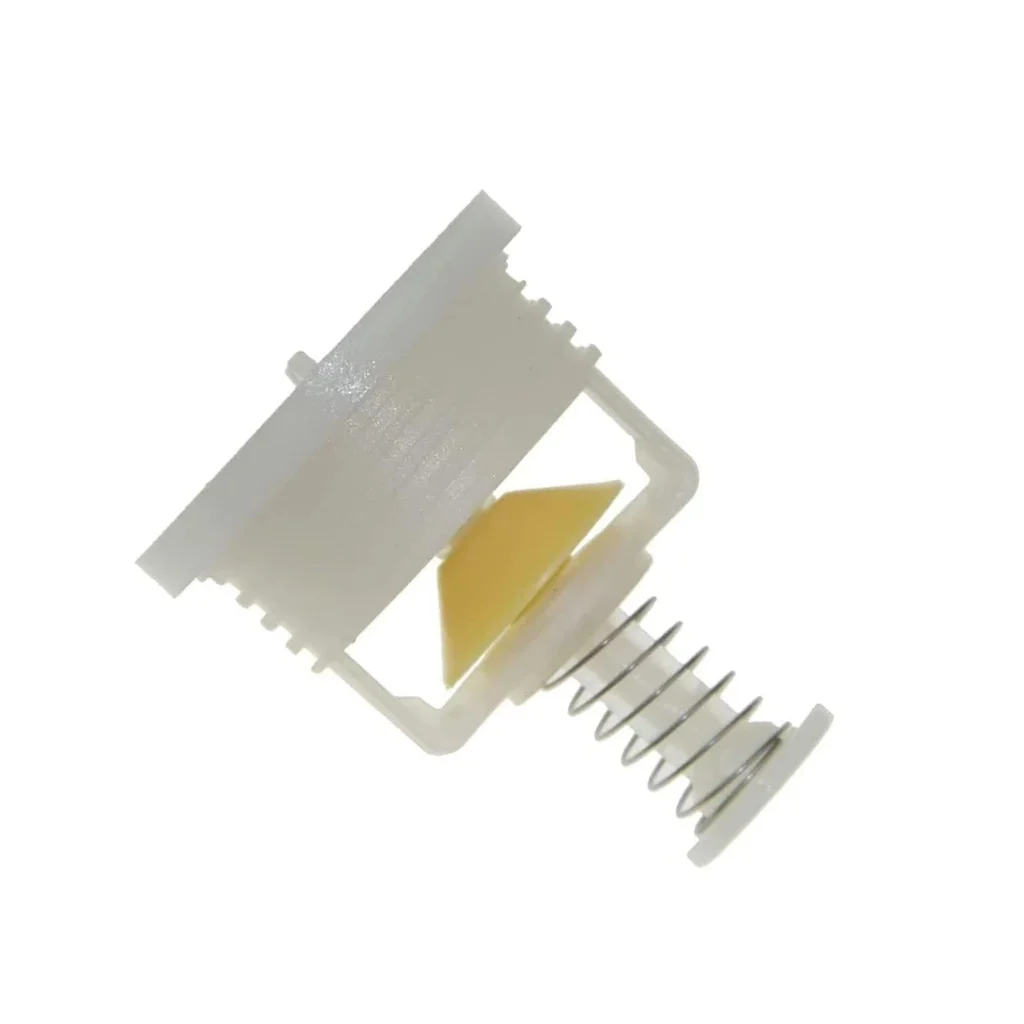
You're hearing that grinding noise again during the fill cycle, or worse—you've got water backing up into your clean dishes. On GE dishwashers like the GSD5860G00SS and GSD4800G00WW, that's usually the check valve piston failing. This little assembly prevents dirty water from flowing backward into the wash tub, and when the rubber seal hardens or the spring weakens, you'll know it immediately.
What You Need Before Starting
This is one of the simpler dishwasher repairs you'll tackle. You're working with basic hand tools and a part that costs under $20.
- Phillips screwdriver
- Flathead screwdriver (for prying clips)
- Needle-nose pliers
- Towel or shallow pan (for water catchment)
- Flashlight
Repair Time: 20-30 minutes
Difficulty: Easy
Safety First
Unplug your dishwasher or flip the breaker. If it's hardwired, you absolutely need to kill power at the panel—don't skip this. You'll be working near the pump housing where electrical connections live, and even small amounts of standing water can conduct electricity. Turn off the water supply valve under your sink as well.
Step 1: Access the Check Valve Housing
Pull out the lower dish rack completely. Remove the spray arm by twisting it counterclockwise—some models have a center cap you'll unscrew first. Lift out the filter assembly and the screen underneath. You'll now see the sump area at the bottom of the tub. The check valve assembly sits inside the pump housing, typically accessed from below or through the sump opening depending on your specific GE model.
Step 2: Remove the Lower Access Panel
Open the dishwasher door and locate the screws securing the lower kickplate panel. On most GSD and GHD series models, there are two screws at the top corners. Remove them and tilt the panel away. You might need to carefully tilt the dishwasher forward to access the pump area—have someone help stabilize it. Place your towel underneath because you'll lose a bit of water when disconnecting things.
Step 3: Locate and Remove the Old Check Valve Piston
The check valve assembly connects to the pump housing, usually held by a large nut. You'll see a cylindrical housing about 2 inches long. Use your needle-nose pliers to unscrew the nut—it's the same nut that comes with your WD24X10018 replacement kit. Once the nut's off, pull out the old piston assembly. Inspect it closely. If the rubber seal looks flattened, cracked, or covered in mineral deposits, that's your culprit. The spring inside should still have tension; if it's stretched out or corroded, water's been flowing the wrong direction.
Step 4: Install the New WD24X10018 Assembly
Clean out the valve housing with a damp cloth—remove any debris or mineral buildup. Slide the new piston assembly into the housing with the spring end facing inward toward the pump. The rubber seal end faces outward. Thread on the new nut and tighten it hand-tight with your pliers. Don't overtighten or you'll crack the plastic housing. Give it about a quarter-turn past snug.
Step 5: Reassemble and Test
Replace the lower access panel and secure it with the screws. Reinstall the filter assembly, screen, spray arm, and lower rack. Turn the water supply back on and restore power. Run a rinse cycle and watch for leaks around the pump area. Listen during the fill cycle—you shouldn't hear any grinding or gurgling sounds. If water drains properly between cycles and you're not getting backflow into the tub, you've fixed it.
Testing After Installation
Run a full wash cycle with dirty dishes to verify everything's working correctly. Check underneath the dishwasher after the first cycle completes—no leaks means you're golden. The check valve should prevent any backward flow during the drain cycle. If you notice water sitting in the bottom of the tub after draining, or if dishes are coming out with residue that wasn't there before, double-check that the piston is seated properly and the spring has correct tension.
Frequently Asked Questions
Will this part fit my older GE dishwasher from 2005?
The WD24X10018 works across a huge range of GE, Hotpoint, and Kenmore models manufactured from the early 2000s through recent years. It replaces older part numbers AP2617344, PS260690, and WD24X220. Check your model number against the compatibility list—models like GSD3200J00CC, GSD4930Z02WW, and GHD5015F01AA all use this exact assembly. If your current valve looks similar in size and has the same nut threading, you're good to go.
How do I know if my check valve is actually the problem?
Three telltale signs: water backing up into the tub after a cycle finishes, grinding or rattling sounds during fill, or dishes coming out dirtier than they went in because dirty drain water is flowing backward. You might also notice the dishwasher taking longer to fill if the valve's stuck partially closed. Pull out the old piston and look at the rubber seal—if it's hardened, cracked, or covered in white mineral deposits, it's toast.
Can I clean the old check valve instead of replacing it?
You can try soaking it in white vinegar to remove mineral buildup, but if the rubber seal's already degraded or the spring's lost tension, cleaning won't bring it back. At $15.99, the WD24X10018 is cheap insurance compared to the hassle of taking everything apart twice. I've seen people waste hours trying to restore old valves when a new one would've solved it in 20 minutes. Replace it.
Clean the valve housing thoroughly before installing the new piston—mineral deposits can prevent proper sealing even with a new part
Need the part for this repair?
WD24X10018 · In Stock · Ships next business day