
How to Replace WB44X5082 Oven Bake Element on GE Range — Step-by-Step
Turn off the circuit breaker before starting — bake element terminals carry 240 volts and can cause serious shock if power is connected
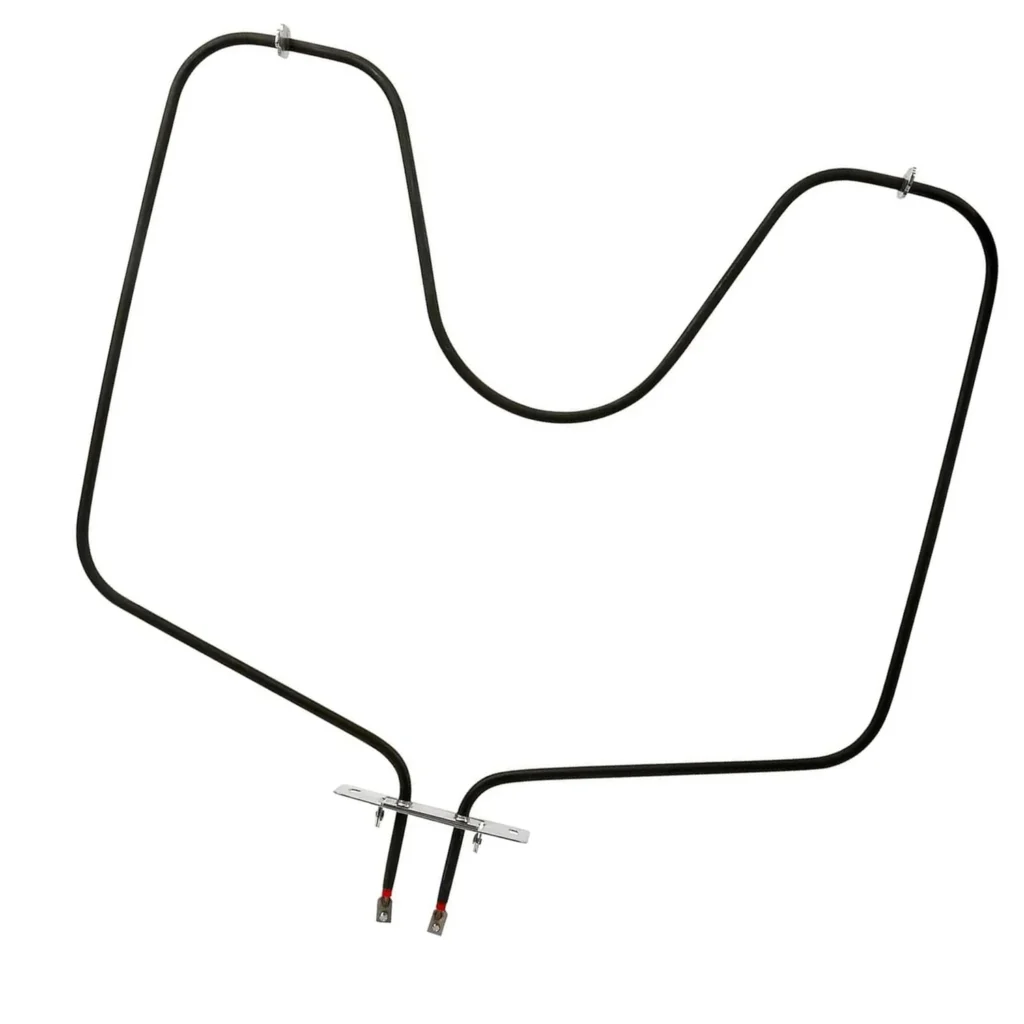
Your cookies aren't browning on the bottom. The oven preheats to 200°F and just sits there. You can see the broiler element glowing bright red up top, but down below? Nothing. The bake element in your GE oven has failed, and it's one of the most common appliance repairs you'll face. The good news: replacing the WB44X5082 bake element takes about 20 minutes and requires just a screwdriver.
What You Need Before Starting
This is a straightforward repair. Here's what you'll need:
- Phillips head screwdriver or 1/4" nut driver
- Work gloves (the element bracket has sharp edges)
- Flashlight or phone light
- Towel or blanket to protect your floor
Estimated Time: 20-25 minutes
Difficulty: ● Easy — Perfect first repair
Safety First
Turn off the circuit breaker to your range. Don't just unplug it — most ranges are hardwired. Flip the dedicated breaker in your electrical panel. If you're not sure which one, turn off breakers until your oven clock goes dark. The element terminals carry 240 volts when powered, and you don't want to find out what that feels like.
Step 1: Remove the Oven Racks
Pull out all the oven racks and set them aside. You need clear access to the back wall of the oven cavity. If you've got a storage drawer below the oven, pull that out too — you might drop a screw and you'll want to find it easily.
Step 2: Disconnect the Old Element
Look at the back wall of your oven. You'll see the bake element — it's the horseshoe-shaped metal coil at the bottom. Two screws hold the mounting bracket to the back wall, usually about an inch from where the element terminals enter the oven. Remove both screws and carefully pull the element forward about 4-5 inches. You'll see two wire terminals connected to the back of the element. Grip the wire connectors (not the wires themselves) and pull straight off. They're friction-fit, no screws.
Step 3: Install the New WB44X5082 Element
Push the wire terminals onto your new element. They only fit one way — the female spade connectors slide onto the male element terminals. Push firmly until they're fully seated. Now guide the element terminals back through the holes in the oven wall. Line up the mounting bracket with the screw holes and thread in both screws. Tighten them snug but don't overtighten — you're screwing into thin sheet metal.
Step 4: Position the Element Properly
Make sure the element sits flat and even across the oven floor. It shouldn't touch the oven walls or the bottom surface. There should be about 1/2 inch clearance all around. If it's twisted or touching anywhere, loosen the mounting screws slightly, adjust the position, and retighten.
Testing After Installation
Replace your oven racks. Turn the circuit breaker back on. Set your oven to 350°F and watch through the door window. Within 2-3 minutes, you should see the element start glowing red from the center outward. It won't glow uniformly — sections will heat at different rates, which is normal. Let it run for 10 minutes. If your kitchen starts smelling like burning oil, don't panic — that's manufacturing residue burning off the new element. Open a window and let it finish.
Frequently Asked Questions
Will this WB44X5082 element fit my specific GE model?
This element fits dozens of GE, Hotpoint, RCA, and Kenmore ranges including JBP21GV2, JBS02R1, JBS03J2, JBP26GV3, JBP46GS2, JBP76GIV1, and JBP90AW1 among many others. Check your model number on the label inside the oven door frame or on the back panel. If it starts with JBP, JBS, or JSP, there's a 95% chance this is your element.
Why did my element fail in the first place?
Bake elements fail from metal fatigue. Every time you preheat, the element expands. When it cools, it contracts. After a few thousand heat cycles, the coil develops a weak spot and burns through. If you see a blister or bubble on the element surface, or a visible break in the coil, it's definitely dead. Average lifespan is 8-10 years with regular use.
Can I test my old element to confirm it's bad?
Set a multimeter to resistance (ohms) and touch the probes to the element terminals. A working element reads 15-30 ohms. Infinite resistance means it's broken internally. But honestly, if your oven won't heat and the element doesn't glow, you don't need a meter — it's toast. For $47.99, just replace it.
Take a photo with your phone before disconnecting the old element — it'll show you exactly how the wires connect and how the element should sit in the oven
Need the part for this repair?
WB44X5082 · In Stock · Ships next business day