
How to Replace WB27X11211 Magnetron on GE Microwave — Step-by-Step Guide
HIGH VOLTAGE HAZARD: The microwave capacitor can hold a lethal charge for weeks after unplugging. Always discharge the capacitor before touching any internal components. This repair can kill you if done incorrectly.
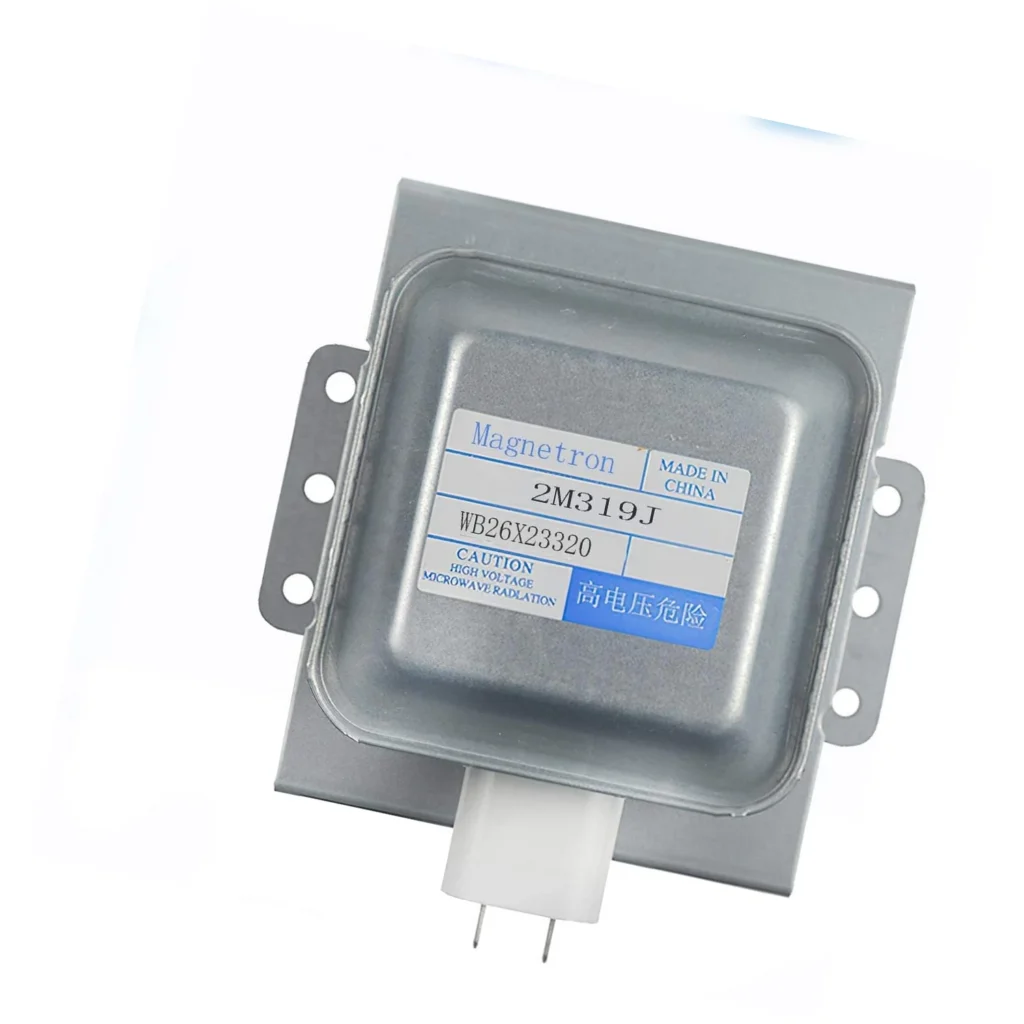
Your GE microwave runs for two minutes, the turntable spins, the light stays on — but your coffee stays ice cold. That's the classic sign of a dead magnetron. The WB27X11211 is the high-voltage tube that generates the microwaves in models like the JVM3160DF1BB, JNM3161DF1WW, and dozens of other GE over-the-range units. When it fails, everything else works perfectly except the actual heating.
This isn't a quick ten-minute job, and it's not for beginners. You'll be working with high-voltage components that can hold a lethal charge even when unplugged. But if you're comfortable with electrical work and follow safety procedures carefully, you can save $300-400 in service calls.
What You Need Before Starting
Required Tools:
- Multimeter capable of reading high voltage
- Insulated screwdrivers (Phillips and flat-head)
- 1/4" and 5/16" nut drivers
- Needle-nose pliers
- Heavy-duty work gloves
- Discharge probe or insulated screwdriver with alligator clip lead
Time Required: 45-90 minutes depending on your microwave model
Difficulty: ADVANCED — High voltage electrical work required
Safety First: The High Voltage Capacitor
Here's what kills people during microwave repairs: the high-voltage capacitor stores enough electricity to stop your heart, and it stays charged for days or even weeks after you unplug the unit. Before you touch anything inside the cabinet, you must discharge this capacitor. I'm not exaggerating when I say this can kill you. If you're not 100% confident about working with high voltage, call a tech.
Unplug the microwave and leave it unplugged for at least 60 seconds. Then use your discharge probe to short the capacitor terminals to the chassis ground. You'll likely see a spark — that's normal. Check twice before proceeding.
Step 1: Remove the Microwave Cabinet
Pop off the top grille if your model has one, then remove the mounting screws along the top of the microwave cabinet. You'll find them hidden under the upper cabinet — typically two or three hex-head screws. Remove the single screw securing the cabinet to the back wall. Have someone help you lift the microwave off its mounting bracket, because these over-the-range units weigh 50-60 pounds.
Set it on a padded work surface. Remove the screws around the perimeter of the outer case — they're usually along the top edges and sides. Slide the cabinet shell backward and lift it off.
Step 2: Discharge and Document Connections
Even though you unplugged it, discharge that capacitor again. Then take photos of every wire connection on the magnetron before you touch anything. The magnetron sits in the center of the chassis, looks like a rectangular metal box with cooling fins, and has two thick wire terminals plus a thermal cutoff.
Use your phone to photograph the connections from multiple angles. You'll thank yourself later when you're staring at a pile of wires wondering where that brown one goes.
Step 3: Disconnect Wiring and Remove Old Magnetron
Disconnect the two primary leads from the magnetron terminals — they're usually spade connectors that pull straight off. Note that one might have a ceramic insulator. Disconnect the thermal cutoff wires (small spade connectors). Remove the grounding strap if your model has one.
The magnetron mounts to the waveguide with four hex screws or nuts, typically 1/4" or 5/16". Remove these screws and carefully wiggle the magnetron free from its rubber gasket. It'll be tight — that gasket creates an RF seal. Don't force it; work it back and forth gently until it releases.
Step 4: Prepare and Install WB27X11211
Check the rubber gasket on the waveguide opening. If it's cracked or compressed flat, order a new one — it's critical for proper operation. Clean any debris or arcing burns from the waveguide opening with a slightly damp cloth.
Position your new WB27X11211 magnetron over the waveguide opening, aligning the mounting holes. The antenna probe (the ceramic-covered rod sticking out) should slide into the waveguide opening. Press firmly to seat it into the gasket, then thread in the four mounting screws. Tighten them in a cross pattern to ensure even pressure — snug but not gorilla-tight.
Step 5: Reconnect Wiring and Test
Using your photos as reference, reconnect the primary leads to the magnetron terminals. Make sure they're fully seated — a loose connection here creates arcing and will fry your new magnetron in seconds. Reconnect the thermal cutoff wires and any grounding straps.
Before you button everything up, do a quick visual inspection. Look for any wires touching the magnetron body or anywhere they shouldn't be. Check that nothing is pinched between the chassis and the outer cabinet.
Testing After Installation
Slide the outer cabinet back on but don't screw it down yet. Plug in the microwave. Put a microwave-safe cup with one cup of water inside and run it on high for 30 seconds. The water should start getting warm — that means your magnetron is generating microwaves.
Let it cool for five minutes, then run a full two-minute test. The water should be significantly hotter. If it's working properly, unplug the unit, secure the cabinet with all screws, and reinstall it above your range.
If the microwave still doesn't heat after replacement, you might have a failed high-voltage diode or capacitor. But 85% of no-heat failures on these GE models are the magnetron itself.
Frequently Asked Questions
Can I test if my magnetron is bad before ordering a new one?
You can check for obvious failures like a cracked ceramic antenna or burn marks on the terminals, but there's no reliable way to test magnetron output without specialized RF equipment. If your microwave runs but doesn't heat, and the high-voltage diode tests good, the magnetron is the culprit 90% of the time.
Why does the WB27X11211 cost $300 when my whole microwave was $400?
Magnetrons are precision high-voltage vacuum tubes manufactured to tight tolerances. They're not mass-produced consumer electronics — they're industrial components. The price reflects the manufacturing complexity and the relatively small production volumes compared to, say, smartphone screens.
Will this work on my JNM3161RF1SS if the model isn't listed?
The WB27X11211 is compatible with over 40 GE and Hotpoint over-the-range models including the JNM3161RF1SS. It replaces the older WB26X23320 part number. If your model starts with JVM31, JNM31, or AVM41, this magnetron will fit. Check the parts diagram for your specific model number on GE's website to verify.
Take detailed photos of all wire connections before disconnecting anything. Magnetron wiring varies slightly between models, and your photos are better than any diagram.
Need the part for this repair?
WB27X11211 · In Stock · Ships next business day