
How to Replace W11688995 Water Inlet Valve on Whirlpool Front Load Washer — Step-by-Step
Always unplug the washer and shut off water supply valves before beginning this repair. Water and electricity create serious shock hazards.
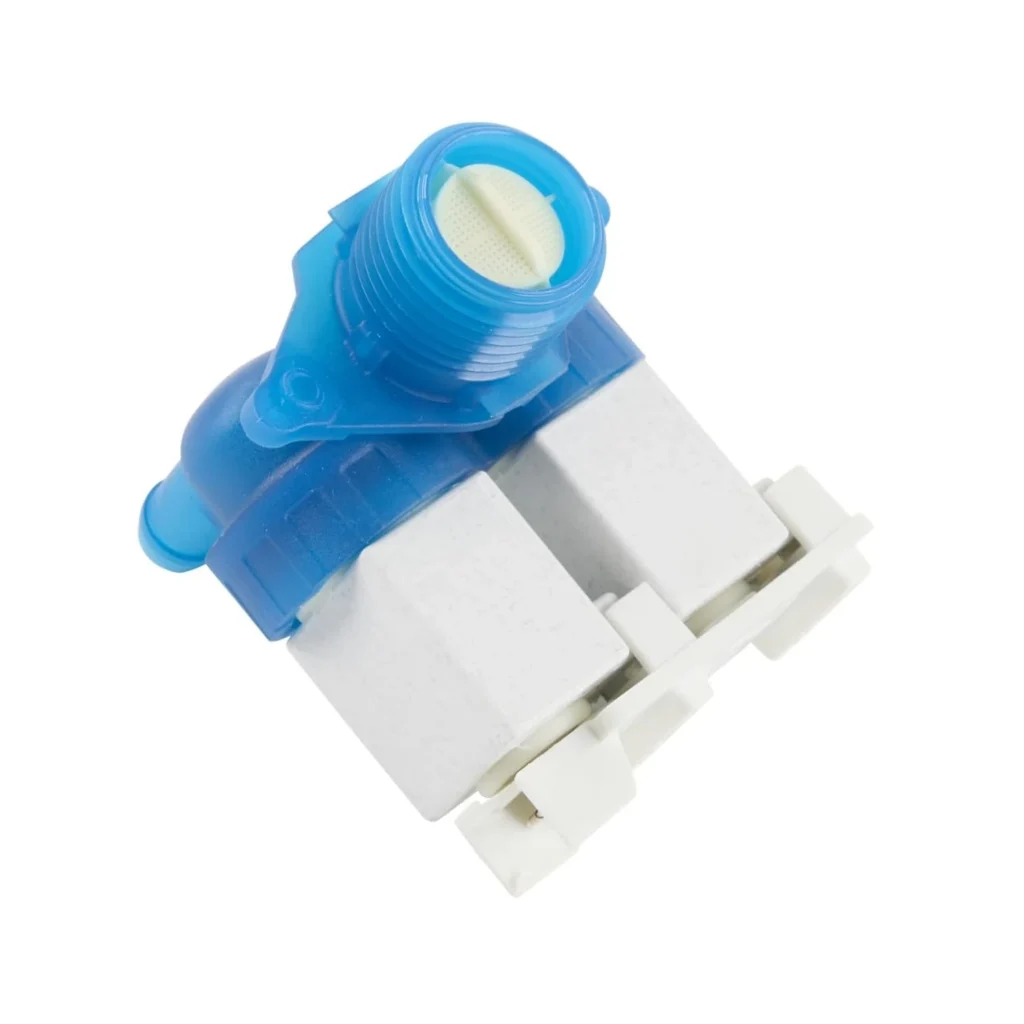
Your Whirlpool WFW8620HC won't fill with water at all, or maybe it's stuck filling and overflowing onto your laundry room floor. Nine times out of ten, that's a failed cold water inlet valve — specifically part W11688995 on most newer Whirlpool, Maytag, and Amana front loaders. This valve controls when cold water enters your washer drum, and when the internal solenoid fails, you're either getting no water or a constant flood.
The good news? This is one of the more straightforward washer repairs. The valve sits right at the back panel where your fill hoses connect, so you don't need to tear apart the entire machine. Most people finish this job in under an hour.
What You Need Before Starting
- Phillips head screwdriver
- 1/4" nut driver or socket wrench
- Needle-nose pliers
- Towels (for water spillage)
- Bucket or shallow pan
- W11688995 replacement valve
Estimated repair time: 30-45 minutes
Difficulty level: MODERATE
Safety First
Unplug your washer completely before starting. Water and electricity don't mix. Also shut off both hot and cold water supply valves behind the machine — you'll be disconnecting hoses that still have water pressure behind them. Keep those towels handy because even after shutting off the supply, residual water will drip from the hoses and the old valve.
Step 1: Access the Back Panel
Pull your washer away from the wall so you've got room to work. You need about two feet of clearance. Disconnect both fill hoses from the back of the machine (not from the wall valves yet). Water will dribble out — that's normal. Set the hoses aside. Now locate the screws holding the back access panel in place. On models like the WFW8620HC and WFW6620HW, there are typically six to eight screws around the perimeter. Remove them and set the panel down carefully.
Step 2: Locate and Disconnect the Old Valve
The water inlet valve is immediately visible once the back panel's off — it's the component where your fill hoses were connected. You'll see wire harness connectors plugged into it (usually two connectors for hot and cold solenoids, though this W11688995 is specifically the cold valve). Press the release tabs and disconnect these wire harnesses. Then look for the internal hose connections — these are usually held with spring clamps or screw clamps. Use your pliers to squeeze and slide spring clamps back, or loosen screw clamps with your nut driver.
Step 3: Remove the Mounting Hardware
The valve itself is mounted to the back panel bracket with two or three screws. Remove these mounting screws and the entire valve assembly should pull free. You might need to wiggle it slightly to clear the hose connections. Have your bucket ready — there's always trapped water in these chambers that'll spill when you pull it out.
Step 4: Install the W11688995 Replacement
Position your new W11688995 valve exactly where the old one sat. Line up the mounting holes and secure it with the screws you removed earlier. Don't overtighten — these threads strip easily. Reconnect the internal hoses, making sure the clamps are positioned securely. A loose connection here means leaks during the first fill cycle. Then plug the wire harnesses back in until you hear them click. Double-check that the cold water ports on the valve align with where your external hoses will connect.
Step 5: Reassemble and Test
Bolt the back panel back on. Reconnect your fill hoses to the new valve (not just hand-tight — use a wrench for the final quarter turn). Turn the water supply valves back on slowly and check for leaks around the connections. Plug the washer back in. Run a rinse cycle with no clothes inside. Watch the valve during the first fill — you should hear the solenoid click and see water flowing into the drum within ten seconds of the cycle starting.
Testing After Installation
Run a complete normal wash cycle. Check behind the washer after the first fill and again after the rinse fill. Any water dripping from the valve area means you need to tighten a connection. Also verify the washer stops filling at the correct level — if it keeps running, you might have a wire harness connected incorrectly or a separate pressure switch issue (though that's rare when only replacing the valve).
Frequently Asked Questions
Will this valve work on Maytag and Amana washers too?
Yes, W11688995 is used across Whirlpool Corporation brands. It's the direct replacement for older part numbers like W11316256 and W11036930. It fits Maytag MHW series and Amana NFW models that use the same valve configuration. Check your model number against the compatibility list on the product page to confirm.
Why does my washer make a loud buzzing noise but not fill?
That buzzing is the solenoid trying to open but failing mechanically. It's the most common symptom of inlet valve failure. The electrical coil still gets power (hence the buzz), but the valve gate is stuck or corroded and won't open to let water through. Replacing the valve fixes this immediately.
Can I replace just the cold valve, or do I need to replace hot too?
If only your cold water fill is acting up, you only need to replace the cold valve (this W11688995 part). The hot and cold valves are separate components on these Whirlpool front loaders. That said, if your washer is more than seven years old and one valve failed, the other isn't far behind. Some people replace both at once to avoid repeating this job in six months.
Apply a small amount of plumber's grease to the hose threads before reconnecting — it prevents cross-threading and makes future removal easier.
Need the part for this repair?
W11688995 · In Stock · Ships next business day