
How to Replace W11412300 Dishwasher Detergent & Rinse Aid Dispenser on Whirlpool — Step-by-Step
Disconnect power before removing door panel. Inner panel weighs approximately 15 pounds and can slip during removal.
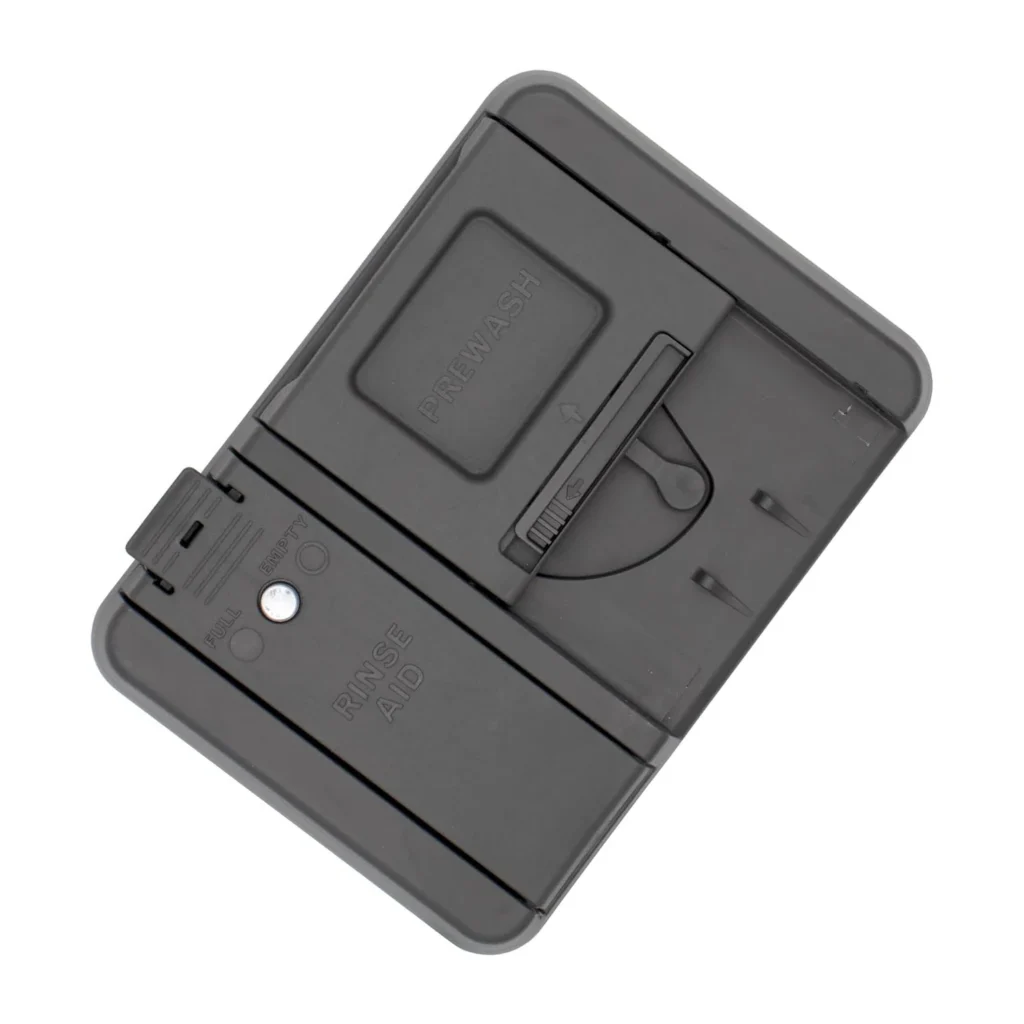
Your Whirlpool dishwasher's detergent door won't open mid-cycle, and you're finding undissolved detergent pods sitting in the closed dispenser when the wash finishes. The latch mechanism inside the W11412300 dispenser assembly has failed — a common issue on WDT750SAKZ0, WDTA50SAKZ1, and MDB4949SKZ3 models after 3-4 years of daily use.
This repair takes about 30 minutes and doesn't require disconnecting water lines or pulling the dishwasher out. You're working inside the door, which means you'll need to remove the inner door panel to access the dispenser mounting bracket.
What You Need Before Starting
- T20 Torx screwdriver
- Phillips #2 screwdriver
- Flathead screwdriver (for prying clips)
- Towel (to protect the door during work)
- Small container (for screws)
Repair Time: 25-35 minutes
Difficulty: MODERATE
Safety First
Unplug the dishwasher or shut off the breaker before starting. Even though you won't be working near the pump or heating element, the control board remains powered during door panel removal. The inner door panel is heavy — around 15 pounds — and awkward to handle. Have someone nearby if you're working alone, because the panel can slip when you're removing the last screws.
Step 1: Access the Door Panel
Open the dishwasher door completely and lay a towel on the floor beneath it. You'll see 6-8 Torx screws around the perimeter of the inner door panel. These secure the stainless or plastic inner panel to the door frame. Remove all visible screws and place them in your container — they're easy to lose.
Step 2: Separate the Inner Door Panel
Carefully lift the inner door panel upward and toward you. It's held by clips at the bottom, so you'll need to tilt it slightly to disengage them. Once free, set the panel aside face-down on the towel. You'll now see the insulation layer and the dispenser assembly mounted on the inside of the outer door.
Step 3: Disconnect the Dispenser Wiring
Locate the wiring harness connected to the dispenser. It's a white or gray connector with a release tab on top. Press the tab and pull straight out — don't yank the wires themselves. The W11412300 dispenser has two wire connections: one for the detergent door actuator and one for the rinse aid sensor. Label them with tape if you're worried about mixing them up during reinstallation.
Step 4: Remove the Old Dispenser
The dispenser is held by three Phillips screws through the front of the outer door panel. Remove these screws and pull the entire dispenser assembly straight back. Check the mounting area for detergent buildup or corrosion — clean it with a damp cloth before installing the new part. Buildup here can prevent the new dispenser from seating properly.
Step 5: Install the W11412300 Replacement
Position the new W11412300 dispenser in the mounting bracket. The rinse aid reservoir should be on the left side when you're looking at it from inside the door. Push it firmly into place, then secure it with the three Phillips screws — snug them down but don't overtighten. Reconnect both wiring harnesses until you hear the clips snap.
Step 6: Reassemble the Door Panel
Align the inner door panel with the outer door, engaging the bottom clips first. Lower it into position and replace all Torx screws around the perimeter. Tighten them in a star pattern to ensure even pressure. Close the door and restore power to test.
Testing After Installation
Run a rinse cycle without dishes to test the dispenser. You should hear a soft click about 3-5 minutes into the cycle when the detergent door opens. Open the door mid-cycle to verify — the dispenser flap should be open and laying flat. Fill the rinse aid compartment and check for leaks around the seal.
Frequently Asked Questions
Will this W11412300 dispenser fit my Maytag MDB4949SKZ dishwasher?
Yes. This dispenser works across Whirlpool, Maytag, KitchenAid, and Jenn-Air models that originally used W11092649 or AP6981330. It's confirmed compatible with MDB4949SKZ0 and MDB4949SKZ3 models. Check your dishwasher's model number plate inside the door frame to verify.
Do I need to remove the dishwasher from the counter?
No. This repair is done entirely through the door. You don't need to disconnect water lines, pull the unit out, or access anything from underneath. Just unplug it and remove the inner door panel.
What causes the dispenser to fail on these models?
The wax motor actuator inside the dispenser degrades over time, especially if you're using high-temperature wash cycles frequently. The heat weakens the internal mechanism. Hard water deposits can also gum up the rinse aid sensor float, causing false readings that prevent the detergent door from opening on schedule.
Clean detergent buildup from mounting area before installing new dispenser to ensure proper seating and prevent premature failure.
Need the part for this repair?
W11412300 · In Stock · Ships next business day