
How to Replace W11101594 Evaporator Fan Motor Assembly on Whirlpool Refrigerator — Step-by-Step
Unplug refrigerator completely before starting repair. Wear work gloves when handling sheet metal panels — edges are extremely sharp and can cause deep cuts.
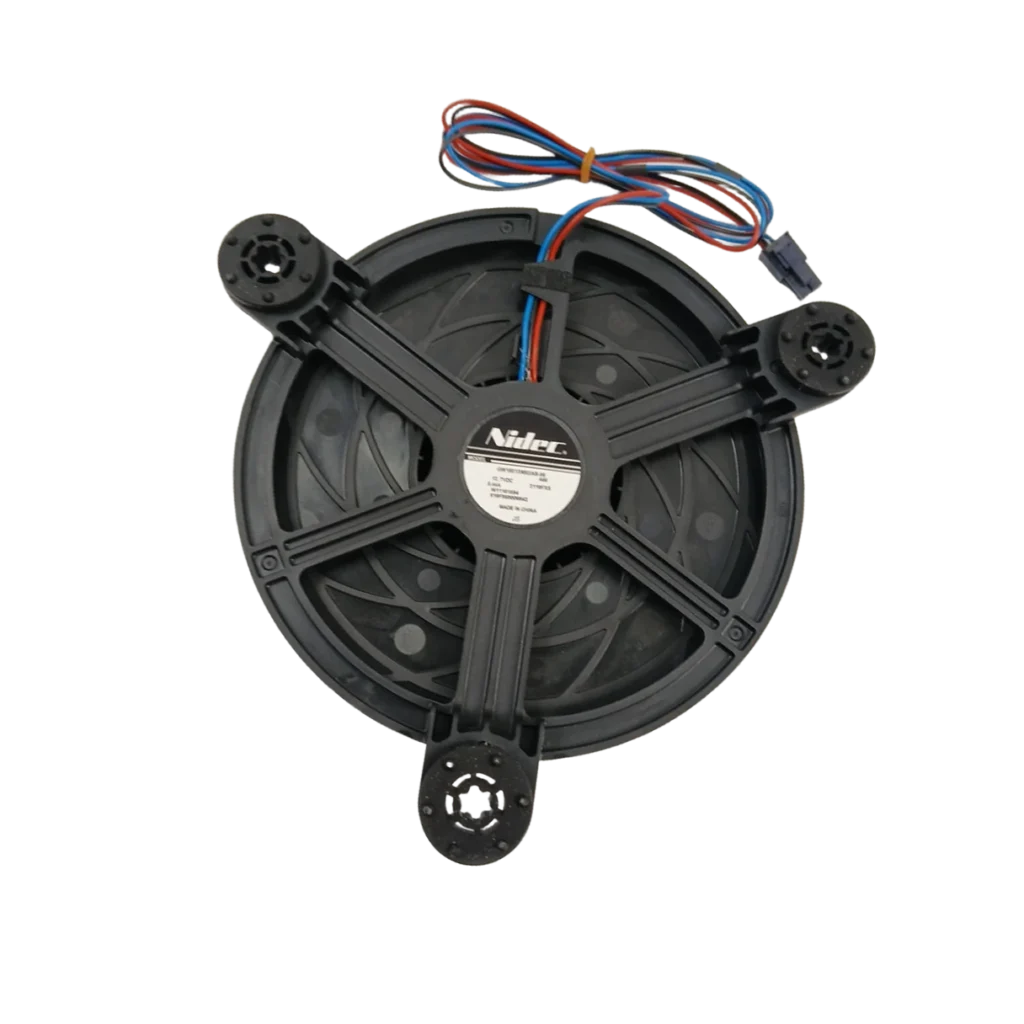
Your Whirlpool fridge is running, but the freezer compartment's sitting at 15°F instead of zero, and your ice cream looks like soup. Meanwhile, the fridge section feels fine. That temperature imbalance? Nine times out of ten, it's your evaporator fan motor giving up. The W11101594 assembly stops circulating cold air from the evaporator coils through your freezer, leaving you with a freezer that barely freezes and a fridge that works overtime trying to compensate.
This complete assembly replacement takes about 45 minutes once you've got the freezer emptied. You'll need to access the back panel inside your freezer compartment, which means temporarily relocating your frozen goods to a cooler. The W11101594 replaces several part numbers including W11455373, AP6989182, and PS16218013, so if you're cross-referencing old service records, they're all the same upgraded assembly.
What You Need Before Starting
- 1/4-inch nut driver or socket wrench
- Phillips head screwdriver
- Flathead screwdriver (for wire harness clips)
- Cooler with ice packs (for frozen food)
- Towels (for condensation cleanup)
- Work gloves (metal edges are sharp)
Repair Time: 45-60 minutes
Difficulty: Moderate — Requires freezer disassembly but straightforward electrical connections
Safety First
Unplug your refrigerator completely before starting this repair. Don't just rely on the temperature control being off — you'll be working with electrical connections and motor assemblies that can short out if power's still flowing. Give the freezer about 10 minutes after unplugging to let any residual charge dissipate. Wear work gloves when handling the evaporator cover panel — those sheet metal edges can slice your hands open faster than you'd think.
Step 1: Empty the Freezer and Remove Shelving
Transfer everything from your freezer to a cooler with ice packs. Remove all shelving, drawers, and the ice bucket if you've got an in-door system. You need complete access to the back wall of the freezer compartment. On models like the WRQA59CNKZ, there's also a small light cover near the top — pop that off with a flathead screwdriver if it's blocking your access to the top screws.
Step 2: Remove the Evaporator Cover Panel
Locate the screws holding the back panel in place — typically four to six Phillips head screws around the perimeter. On some Whirlpool and KitchenAid models like the KRQC506MPS00, there's also a center bracket screw. Remove all screws and carefully pull the panel forward from the bottom first, then lift up to unhook the top tabs. You'll see frost buildup on the evaporator coils behind this panel — that's normal. Set the panel aside where you won't trip over it.
Step 3: Disconnect and Remove the Failed Motor Assembly
The evaporator fan motor sits in a bracket mounted to the evaporator housing. First, disconnect the wire harness — there's a locking tab you'll need to press while pulling the connector apart. Don't yank on the wires themselves. Next, remove the mounting screws holding the fan motor bracket to the housing (usually two or three 1/4-inch screws). The entire assembly lifts straight out. Note how the fan blade is oriented before removal — it should push air downward across the coils.
Step 4: Install the W11101594 Replacement Assembly
Your new W11101594 comes as a complete assembly — motor, bracket, and fan blade already attached. Position it into the mounting location with the fan blade facing the same direction as the old one. Secure the bracket with the mounting screws you removed earlier, tightening them snugly but not overtightened (you're threading into plastic housing). Reconnect the wire harness — you'll hear a distinct click when it's properly seated. Give the fan blade a manual spin to verify it rotates freely without rubbing against anything.
Step 5: Reassemble and Test
Reinstall the evaporator cover panel, making sure the top tabs hook in first, then secure all perimeter screws. Replace any shelving and drawers. Plug the refrigerator back in and listen — you should hear the evaporator fan start running within 30 seconds. The sound should be a smooth hum, not grinding or clicking. Set your freezer back to its normal temperature setting (typically 0°F) and give it 4-6 hours to pull down to temperature before reloading your frozen food.
Testing After Installation
After the fridge runs for about an hour, open the freezer and hold your hand near the vents along the back wall. You should feel cold air blowing out — that's your new fan circulating air properly. Check the temperature after 6 hours with a freezer thermometer. It should read 0°F or below. If your freezer's still not cooling correctly, you might have a compressor or sealed system issue, but a failed evaporator fan is the most common culprit for uneven cooling between compartments.
Frequently Asked Questions
How do I know if my evaporator fan motor is bad versus a compressor problem?
The easiest test: open your freezer door and manually press the light switch (usually near the top frame). If you don't hear a fan running in the back, your evaporator fan motor is likely dead. The compressor you can feel — put your hand on the lower back panel outside the fridge. If it's warm and you hear humming, the compressor's working. No evaporator fan noise with a running compressor means it's time for the W11101594 replacement.
Will this W11101594 work if my old part number is different?
Yes — this assembly supersedes W11455373, AP6989182, PS16218013, and 4977860. Whirlpool consolidated several variations into this single replacement part. As long as your model number matches the compatibility list (check models like WRQA59CNKZ for Whirlpool or KRQC506MPS00 for KitchenAid), you're good to go. The mounting points and electrical connections are identical.
Why is there so much frost buildup on my evaporator coils?
When the evaporator fan stops working, airflow across the coils stops, causing excessive frost and ice buildup. After you replace the W11101594 motor assembly and the fan starts circulating air again, that frost will gradually melt during normal defrost cycles. If frost keeps building up even with the new fan running, you've got a separate defrost system problem — likely a bad defrost heater or defrost thermostat.
Take a photo of the wire harness connection before disconnecting — it helps ensure you reconnect it properly, especially if you get interrupted mid-repair.
Need the part for this repair?
W11101594 · In Stock · Ships next business day