
How to Replace W10817888 Washer Clutch Band & Lining on Whirlpool/Maytag Washers — Step-by-Step
Unplug washer completely and shut off water supply before starting. Get help tipping heavy machines—injury risk.
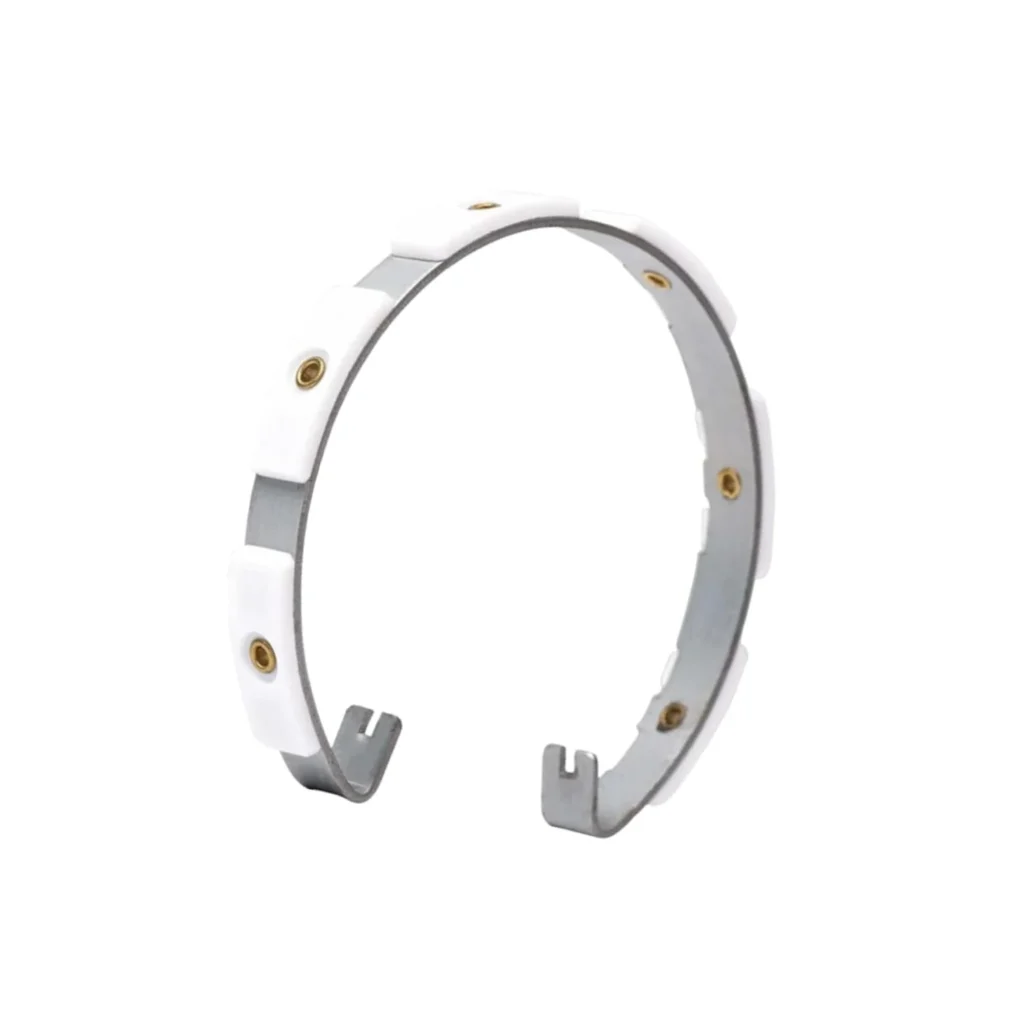
Your Maytag MVWC400VW1 just finished filling with water, but when it's supposed to start agitating, nothing happens. The motor's running—you can hear it humming—but the basket sits completely still. That's your clutch band failing, and the W10817888 clutch band and lining assembly is what connects your motor's power to the spin basket. When this part wears out, you get noise without motion.
What You Need Before Starting
This repair requires getting underneath your washer and working with the drive system. Here's what to grab:
- 7/16" socket wrench
- 1/2" socket wrench
- Flathead screwdriver
- Needle-nose pliers
- Work gloves (the clutch area gets greasy)
- Drop cloth or cardboard
- Spanner wrench or strap wrench (for spin basket)
Estimated Time: 45-60 minutes
Difficulty: Intermediate
Safety First
Unplug your washer completely before starting. You'll be working near the motor and drive system—there's no safe way to do this repair with power connected. Also, shut off the water supply valves and have towels ready when you disconnect fill hoses. The clutch assembly sits below the tub, so you'll need to tip the washer back or lay it on its front panel. Get help if your machine is heavy—some Maytag models weigh over 180 pounds.
Step 1: Access the Clutch Assembly
Unplug the washer and pull it away from the wall. Remove the three cabinet screws at the back (usually 1/4" hex head), then slide the entire cabinet forward and off. You'll see the tub and drive system. For models like the MAT14CSAWW0 or MVWC450WW0, you'll need to carefully tip the washer backward against a wall so it rests at about a 45-degree angle. This gives you access to the bottom where the clutch mounts.
Step 2: Remove the Spin Basket and Agitator
The clutch sits directly under the spin basket, so it's got to come out first. Remove the fabric softener dispenser cap from the agitator. You'll see a bolt in the center—this holds the agitator down. Remove it with a 7/16" socket, then pull the agitator straight up (it might take some wiggling). Next, the basket nut: it's reverse-threaded, so turn clockwise to loosen. Use a spanner wrench designed for washers, or carefully use a strap wrench around the basket nut. Once loose, lift the entire spin basket out of the tub.
Step 3: Remove the Old Clutch Band
Now you can see the clutch assembly underneath. The W10817888 consists of a metal band with friction lining that wraps around the drive hub. You'll see it's held by a spring clip. Use needle-nose pliers to compress and remove the spring clip—be careful, it can snap off under tension. Once the clip is off, unwrap the old clutch band from around the hub. Check the drive hub surface for grease buildup or metal shavings—clean it with a rag if necessary. Worn clutch linings leave black residue everywhere.
Step 4: Install the New W10817888 Clutch Band
Take your new clutch band and wrap it around the drive hub with the friction lining facing inward against the metal surface. The band should fit snugly but shouldn't be forced. Align the holes in the band ends, then reinstall the spring clip using your needle-nose pliers. Make sure the clip seats fully—if it's not secure, the clutch will slip immediately when you test the washer. Give the band a gentle tug to confirm it's locked in place.
Step 5: Reassemble the Washer
Lower the spin basket back onto the drive shaft, making sure it seats fully. Thread the basket nut back on (remember: reverse thread, so turn counterclockwise to tighten). Tighten it firmly with your spanner wrench. Reinstall the agitator by pressing it down onto the shaft, then replace the center bolt and fabric softener cap. Carefully return the washer to its upright position, slide the cabinet back on, and replace the rear screws. Reconnect water hoses and plug it back in.
Testing After Installation
Run a small load cycle without clothes first. Listen during the agitation cycle—you should hear smooth operation without grinding or squealing. The basket should spin freely during the spin cycle and reach full speed within 20-30 seconds. If you hear clicking or the basket hesitates, your clutch spring clip might not be fully seated. Also check for any water leaks around the tub area—sometimes tipping the washer can shift drain connections.
Frequently Asked Questions
How do I know if my clutch band needs replacing or if it's a different problem?
A failing clutch band has specific symptoms: the motor runs but the basket doesn't agitate or won't reach full spin speed. You might hear a grinding or squealing noise from underneath during the spin cycle. If your washer won't drain, fills incorrectly, or the motor doesn't run at all, that's probably not the clutch—check the pump, water inlet valve, or motor coupler instead.
Will this W10817888 work on my Kenmore washer?
Yes, if your Kenmore uses a Whirlpool-manufactured direct drive system. The W10817888 replaces older part numbers 3951993, 4283279, and W10817173, which were used across Whirlpool, Maytag, and Kenmore brands. Check your model number against the compatibility list—models like 110.xxxxx series Kenmores built after 2010 typically use this clutch design.
Can I reuse the old spring clip or do I need a new one?
The W10817888 kit includes a new spring clip, and you should absolutely use it. The old clip has been under constant tension for years and loses its spring strength. A weak clip won't hold the clutch band tight enough, causing immediate slippage and the same symptoms you just fixed. Don't risk it—install the new clip that comes with the part.
Clean the drive hub surface thoroughly before installing the new clutch band. Old grease and friction material buildup can cause the new part to slip.
Need the part for this repair?
W10817888 · In Stock · Ships next business day