
How to Replace W10712395 Dishwasher Upper Rack Adjuster Kit on Whirlpool Dishwashers — Step-by-Step
Metal rails can be hot after a wash cycle — let the dishwasher cool before starting work
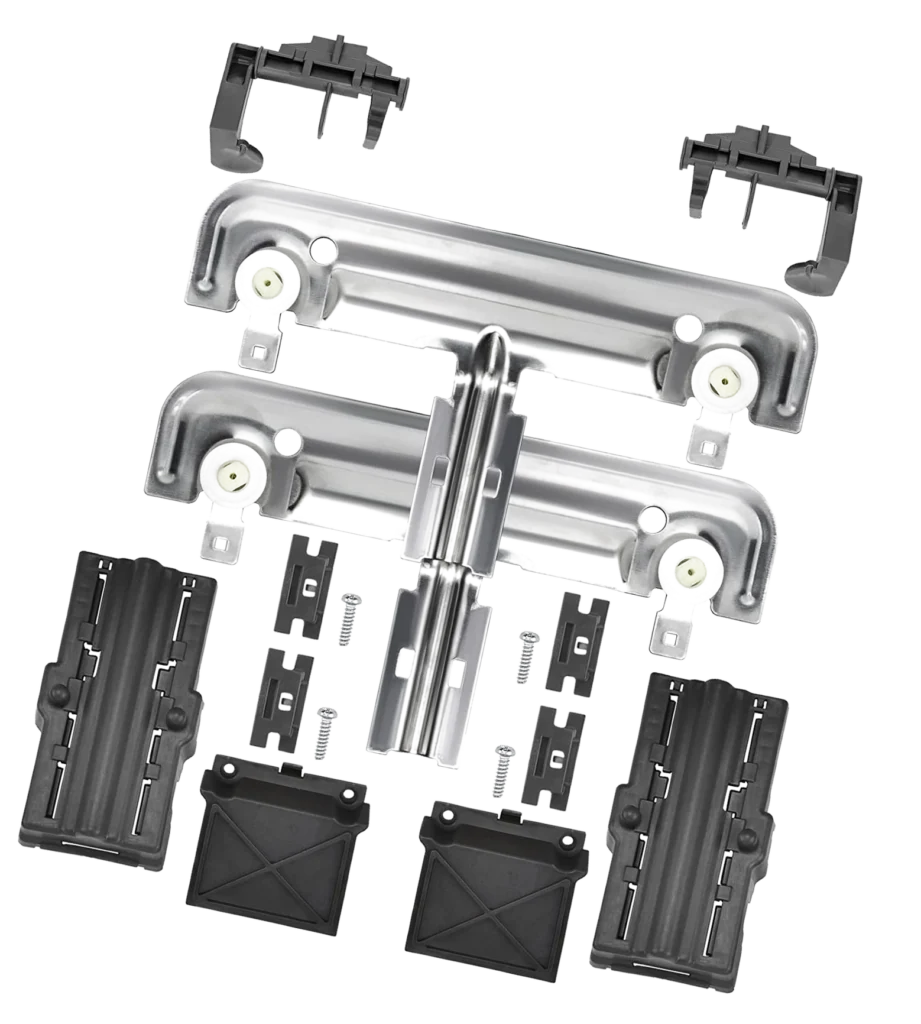
Your Whirlpool dishwasher's upper rack won't stay in place anymore. You lower it to load tall pots on the bottom, but when you try to slide it back up, it drops right back down with a clunk. Or maybe it's stuck in the up position and refuses to budge. The W10712395 upper rack adjuster kit fixes both problems, and you can install it yourself in about 20 minutes without calling a tech.
This kit works across dozens of Whirlpool, KitchenAid, and Kenmore dishwasher models including the WDT750SAHZ0, WDT780SAEM series, WDT970SAHB0, and WDTA50SAHZ0. The adjusters are located on both sides of the upper rack rail system and control the rack's vertical position.
What You Need Before Starting
Gather these items before you begin:
- Flathead screwdriver
- Phillips head screwdriver
- Flashlight (for seeing inside the rail system)
- Towel (to catch any water drips)
Repair Time: 15-20 minutes
Difficulty: Easy
Safety First
You don't need to disconnect power for this repair since you're working on mechanical components, not electrical ones. However, pull out the lower rack to give yourself room to work, and make sure the dishwasher hasn't just finished a cycle — those metal rails get hot. Wipe up any standing water in the tub so you're not working in a puddle.
Step 1: Pull Out the Upper Rack Completely
Remove the upper rack by pulling it all the way out until it stops. Lift the front edge slightly while pulling forward — it should slide right off the rail system. Set it aside on your counter. With the rack out, you'll see the metal rail assemblies mounted on both sides of the dishwasher tub.
Step 2: Locate the Failed Adjuster Mechanism
Shine your flashlight along the side rails. The adjuster is the white or gray plastic component attached to the rail track — it looks like a small housing with a lever or clip mechanism. You'll see one on each side. The W10712395 kit includes both left and right adjusters, so you're replacing the complete set. If one side failed, the other isn't far behind.
Step 3: Remove the Old Adjuster Assembly
Most Whirlpool models use either a clip system or small screws to secure the adjuster. Look for release tabs on the adjuster housing — press these tabs while sliding the adjuster forward off the rail. If you see small Phillips screws instead, remove them and keep them in a safe spot. Gently wiggle the adjuster as you pull to work it free from the rail track. Repeat on the opposite side.
Step 4: Install the New W10712395 Adjusters
Take the new adjuster from the kit and identify left versus right — they're mirror images of each other. Slide the new adjuster onto the rail track, making sure the adjustment mechanism faces toward the inside of the tub. Push firmly until you hear or feel it click into place. If your model uses screws, thread them in and tighten snugly but don't overtighten the plastic. Install the second adjuster on the opposite side using the same method.
Step 5: Reinstall and Test the Upper Rack
Slide the upper rack back onto the rail system by lining up the wheels with the tracks. Push it all the way to the back. Now test the adjustment mechanism — press the release lever (usually on the front of the rail) and try raising or lowering the rack. It should move smoothly and lock securely at each height position. Load a few dishes in the upper rack and make sure it holds steady without sagging.
Testing After Installation
Run a quick rinse cycle to verify everything's working correctly. The rack should stay in position throughout the wash cycle without dropping or shifting. Open the door mid-cycle to check — if the rack is stable and the spray arms are spinning freely without hitting anything, you're good to go. The new adjusters should feel firm and responsive when you change rack height positions.
Frequently Asked Questions
Do I need to replace both sides even if only one adjuster broke?
Yes, and here's why: the adjusters wear at roughly the same rate since they support equal weight. If one side failed, the other is under extra stress and will likely break soon. The W10712395 kit includes both sides, so replace them together to avoid doing this job again in a month.
Will this kit work on my KitchenAid dishwasher model KDTM354DSS?
The W10712395 kit is compatible with many KitchenAid and Kenmore models that share the same rail system as Whirlpool. Check your dishwasher's model number against the parts compatibility list or measure your existing adjuster — if it's roughly 3 inches long with a similar clip or lever design, this kit should fit. When in doubt, take a photo of your current adjuster and compare it to the product images.
My upper rack still sags after replacing the adjusters. What's wrong?
If the new adjusters didn't solve the problem, check the actual rail tracks for cracks or bends. Also inspect the rack wheels — worn or broken wheels can cause sagging that looks like an adjuster problem. The rail tracks themselves can warp over time from heat and heavy dish loads. Feel along the rails for any bent sections, and spin each rack wheel to make sure they rotate freely.
Replace both adjusters even if only one failed to prevent having to repeat this repair in a few weeks
Need the part for this repair?
W10712395 · In Stock · Ships next business day