
How to Replace W10619951 P-Trap Drain Tube Kit on Whirlpool Refrigerator — Step-by-Step
Unplug refrigerator before starting work near evaporator assembly and electrical components
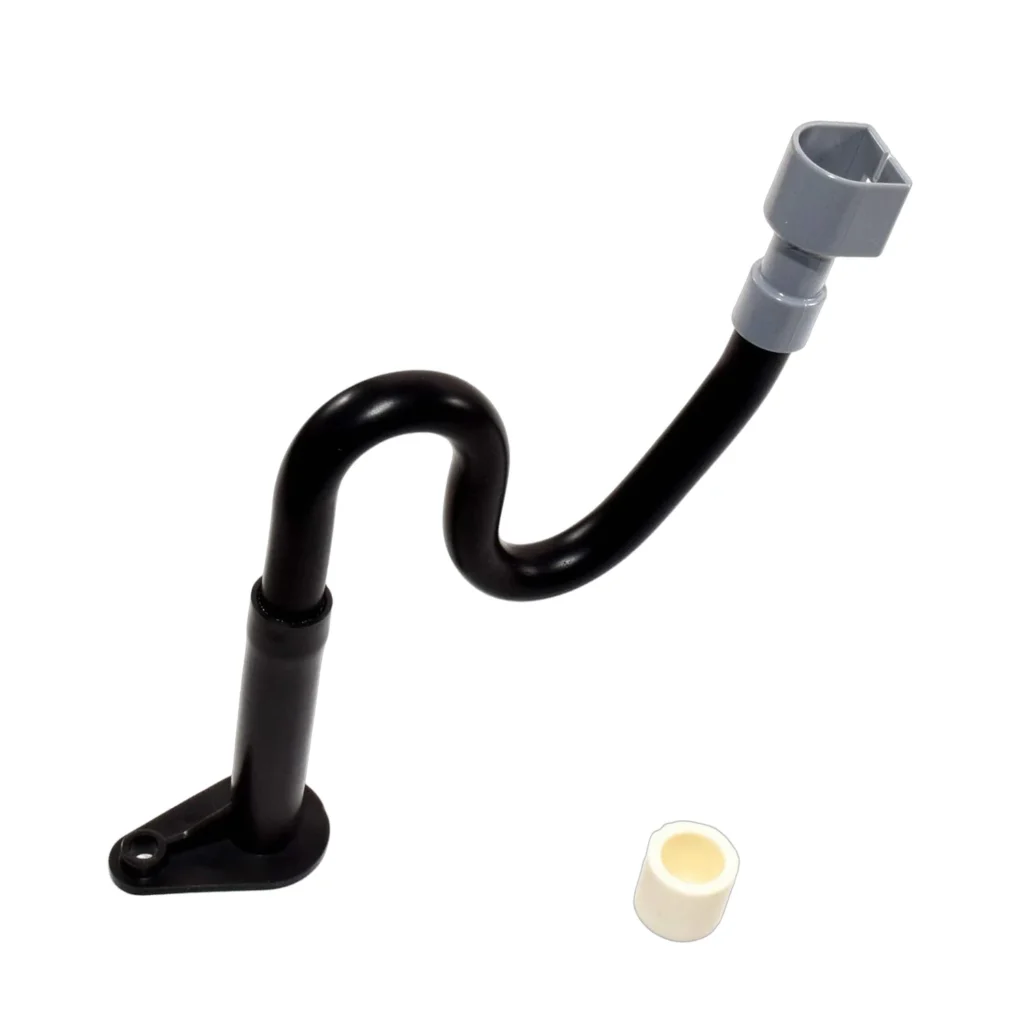
Water pooling under your crisper drawers? That's usually your first clue the drain tube's clogged or cracked. I've seen countless Whirlpool refrigerators — models like the GB2FHDXWQ04, KBFS20EVMS1, and GZ25FSRXYY2 — where frost builds up in the freezer and water leaks inside because the old drain system failed. The W10619951 replaces the original straight-tube design with a P-trap configuration that actually prevents clogs better.
What You Need Before Starting
This is one of the easier refrigerator repairs you'll tackle. Here's what to grab:
- Nutdriver set (1/4" is most common)
- Phillips and flathead screwdrivers
- Towels (for water cleanup)
- Shallow pan or cup
Repair time: 15-30 minutes | Difficulty: Easy
Safety First
Unplug your refrigerator completely before you start. You'll be working near the evaporator assembly and potentially the defrost heater, and you don't want any electrical surprises. Also, the drain pan might have standing water — it's not dangerous, just gross. Have those towels ready.
Step 1: Access the Drain Tube Assembly
Empty your freezer and remove the bottom basket or drawer. You'll see screws holding the freezer floor panel in place — usually along the back edge. Use your nutdriver to remove them, then lift the panel out carefully. The evaporator cover is behind this, and that's where your drain tube lives. On models like the 7GI5FSAXVY1, you might need to remove an additional metal plate.
Step 2: Locate and Remove the Old Drain Tube
The drain tube runs from the evaporator tray down through the bottom of the freezer compartment. Look for a small rubber grommet where it passes through — that's your target. As one technician noted: "Removed the defective drain part and installed the new p-trap design drain tube kit." The old tube either pulls out or has a clip holding it. If it's clogged solid with ice, you might need to let it thaw first or carefully use warm water.
Step 3: Clean the Drain Path
Before installing the new P-trap kit, flush the drain opening with warm water. Use a turkey baster or small funnel. This clears any remaining debris that caused the original clog. I've pulled everything from food particles to mold colonies out of these drains. The new P-trap design in the W10619951 helps prevent this buildup, but start with a clean slate.
Step 4: Install the New P-Trap Drain Tube Kit
The W10619951 kit includes the P-trap assembly, mounting hardware, and a new grommet. Feed the tube through the freezer floor opening, making sure the P-trap sits properly oriented — the trap needs to face down to work correctly. Secure it with the provided clips or screws. The P-trap design means water sits in the curve, creating a seal that prevents warm air from entering the freezer compartment. That's why this replacement actually solves problems the old straight tube couldn't.
Step 5: Reassemble and Test
Put the evaporator cover and floor panel back in reverse order. Tighten all screws snugly but don't overtighten plastic components. Plug the refrigerator back in and let it run for 24 hours. Check under the crisper drawers and around the drain area for any moisture. Pour a cup of water down the defrost drain from inside the freezer — it should flow cleanly into the drain pan underneath the fridge.
Testing After Installation
After a full defrost cycle (usually 24-48 hours), open your freezer and check for frost buildup around the evaporator area. It should be minimal. Look in the fresh food section for water pooling — there shouldn't be any. The real test comes after a week: if you're not seeing frost, leaks, or warm temperatures, you nailed it. This part fits dozens of Whirlpool, Maytag, KitchenAid, and Kenmore models including the ABB1921BRB02 and 6GX0FHDXXY0.
Frequently Asked Questions
Why does the P-trap design work better than the old straight tube?
The P-trap holds a small amount of water in the curve, creating an air seal. This prevents humid air from the fresh food section from entering the freezer and causing frost buildup. The old straight tubes let air flow both ways, which made clogging and frost problems worse over time.
My drain was completely frozen solid — what caused that?
Usually a combination of a clogged tube and a defrost system that's not heating enough to melt the ice. Replace the drain tube first since you're already there, but if frost comes back quickly, you might have a defrost heater or timer issue. Check those components next.
Do I need to replace the entire kit or just the tube portion?
Replace the entire W10619951 kit. The P-trap assembly is engineered as a complete system with specific angles and measurements. Trying to retrofit just the tube won't give you the clog-preventing benefits of the full P-trap design. At $40.99, it's worth doing it right the first time.
Flush drain opening with warm water before installing new P-trap to ensure clean starting point
Need the part for this repair?
W10619951 · In Stock · Ships next business day