
How to Replace W10366605 Adaptive Defrost Control Board on Whirlpool Refrigerators — Step-by-Step
Unplug refrigerator completely before starting. Work in a well-lit area and avoid touching electrical connections with wet hands.
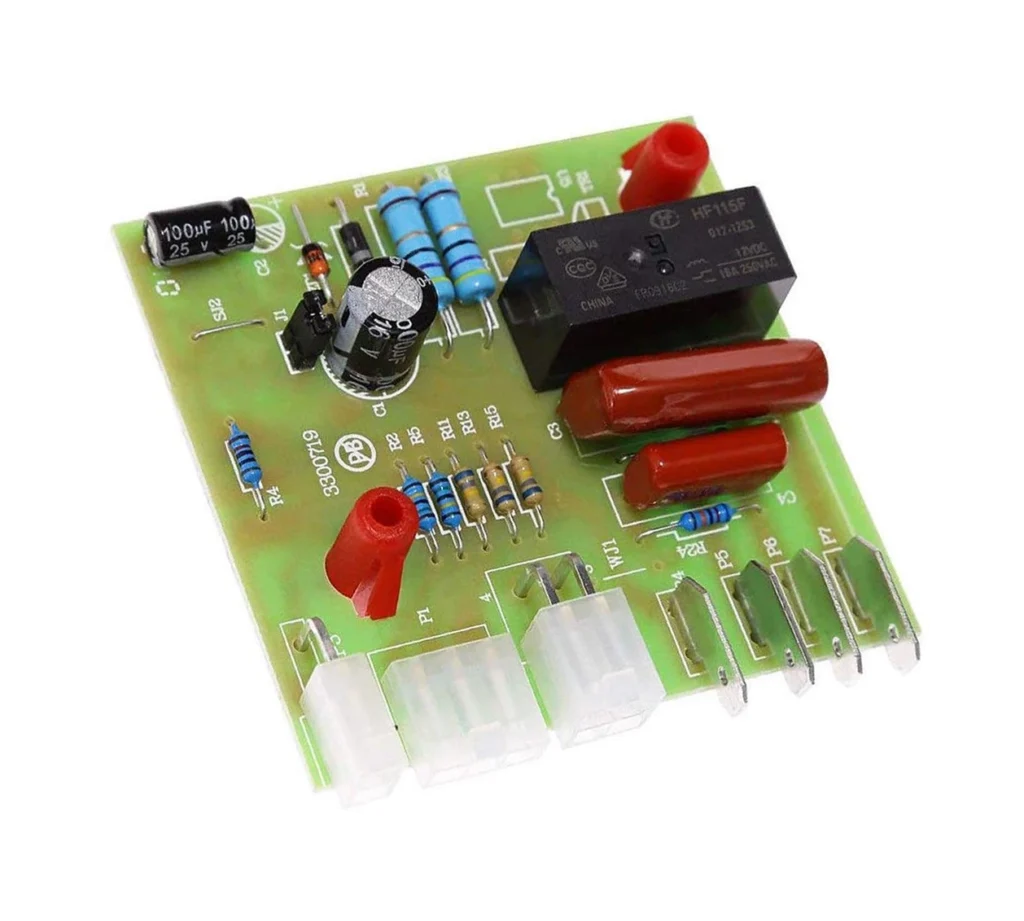
Your Whirlpool refrigerator's freezer stopped defrosting, and now there's a half-inch sheet of ice on the back wall. You've probably noticed your freezer section running warmer than usual, or maybe the fridge compartment isn't cooling properly either. Nine times out of ten, that's your W10366605 adaptive defrost control board failing to tell the defrost heater when to kick on.
This control board is the brain behind your fridge's defrost cycle. When it fails, ice builds up on the evaporator coils, blocking airflow and preventing proper cooling. The good news? Replacing it is straightforward if you're comfortable working with electrical connections.
What You Need Before Starting
Tools required:
- ¼" nut driver or socket wrench
- Phillips screwdriver
- Flathead screwdriver (for wire harness clips)
- Work gloves
- Flashlight or headlamp
- Camera or phone (to document wire connections)
Estimated repair time: 35-45 minutes
Difficulty level: Moderate — Requires accessing freezer compartment and working with electrical connectors
Safety First
Warning: Unplug your refrigerator completely before starting this repair. The defrost control board carries electrical current, and you'll be working in the freezer compartment where water and ice create additional shock hazards. If you can't reach the plug, shut off the circuit breaker for your fridge. Wait 5 minutes after unplugging to let capacitors discharge.
Step 1: Empty the Freezer and Remove Interior Panels
Pull out all your frozen food and store it in coolers. Remove the freezer shelves, bins, and any ice maker buckets. You'll see screws along the back wall holding the rear panel — typically 4-6 Phillips head screws. Remove these screws and carefully pull the panel forward. It might be frozen in place, so gently work it loose without forcing it.
Step 2: Locate the Defrost Control Board
Behind that rear panel, you'll find the evaporator coils (the cold metal fins). The W10366605 defrost control board is usually mounted on the upper left or right side of this compartment, inside a small plastic housing. It's about 3x4 inches with multiple wire harnesses plugged into it. Before disconnecting anything, take several photos of how the wires connect — you'll thank yourself later.
Step 3: Disconnect the Wire Harnesses
The control board has 2-3 wire harness connectors. Each has a locking tab you need to press or lift before pulling. Don't yank on the wires themselves — grip the plastic connector housing. The connectors can be stiff, especially if they've been there for years. Use a flathead screwdriver to gently pry the locking tabs if needed.
Step 4: Remove the Old Control Board
The board is held in place by 2-3 mounting screws or clips. Remove these fasteners and slide the old board out of its housing. Check the mounting bracket for any ice buildup or corrosion — wipe it clean with a dry cloth before installing the new board.
Step 5: Install the New W10366605 Board
Slide your new control board into the mounting bracket and secure it with the original screws. Make sure it sits flush and doesn't rock. Now reconnect each wire harness, matching them to your photos. You should hear each connector click into place. Give each one a gentle tug to confirm it's locked — loose connections are the number one reason for "failed" repairs that actually weren't installed correctly.
Step 6: Reassemble and Test
Replace the rear freezer panel and tighten all screws. Put your shelves and bins back in place. Plug the refrigerator back in or flip the circuit breaker. You should hear the compressor start within a few minutes. The defrost cycle won't run immediately — it's on a timer that typically activates every 8-12 hours. Check back in 24 hours to confirm the freezer is maintaining proper temperature (0-5°F) and no new ice is building up on the back wall.
Testing After Installation
Within the first hour, verify the freezer is getting cold again. If you have a thermometer, it should drop to below 10°F within 2-3 hours. After 24-48 hours, open the freezer and check the back wall behind the panel (you don't need to remove it, just look through the vents). There shouldn't be excessive frost buildup. If the fridge compartment was running warm before, it should be back to 35-38°F within 4-6 hours.
Your defrost cycle will run automatically now. You'll occasionally hear a hissing sound as the heater activates — that's normal. If ice continues building up after 3-4 days, you may have a secondary issue with the defrost heater or thermostat, but that's rare when replacing the control board fixes the problem.
Frequently Asked Questions
Will this board work if my model number isn't exactly WRS325FDAM?
The W10366605 is compatible with dozens of Whirlpool, Maytag, KitchenAid, Kenmore, and Amana models. It replaces older part numbers WPW10366605, AP6020483, W10366604, and 2304069. Check your refrigerator's model tag (usually inside the fridge on the left or right wall) and cross-reference it with the compatibility list on the product page. Most side-by-side and French door models from 2008-2018 use this board.
How do I know if it's the control board and not the defrost heater?
If your freezer isn't defrosting, the control board is the more common failure. Test it by unplugging the fridge, waiting 30 seconds, and plugging it back in while listening near the freezer. If you don't hear the defrost heater activate within 2-3 minutes after a hard reset, and ice buildup is severe, the control board isn't sending the signal. The defrost heater itself rarely fails unless you see visible damage to the heating element.
Do I need to defrost the freezer completely before replacing the board?
Not necessarily, but it makes the job easier and safer. If there's significant ice buildup on the back panel, you'll have trouble removing it and accessing the control board. At minimum, let the freezer sit unplugged with the door open for 30-45 minutes to soften the ice. Some techs use a hair dryer on low heat to speed this up, but never use sharp objects to chip away ice — you'll puncture the refrigerant lines.
Take multiple photos of wire connections before disconnecting anything — the connectors look similar and wrong connections can damage the new board.
Need the part for this repair?
W10366605 · In Stock · Ships next business day