
How to Replace W10256028 Surface Burner Head on KitchenAid & Whirlpool Gas Ranges — Step-by-Step
Ensure range is completely cool before handling any burner components. Do not force parts — they should seat easily when properly aligned.
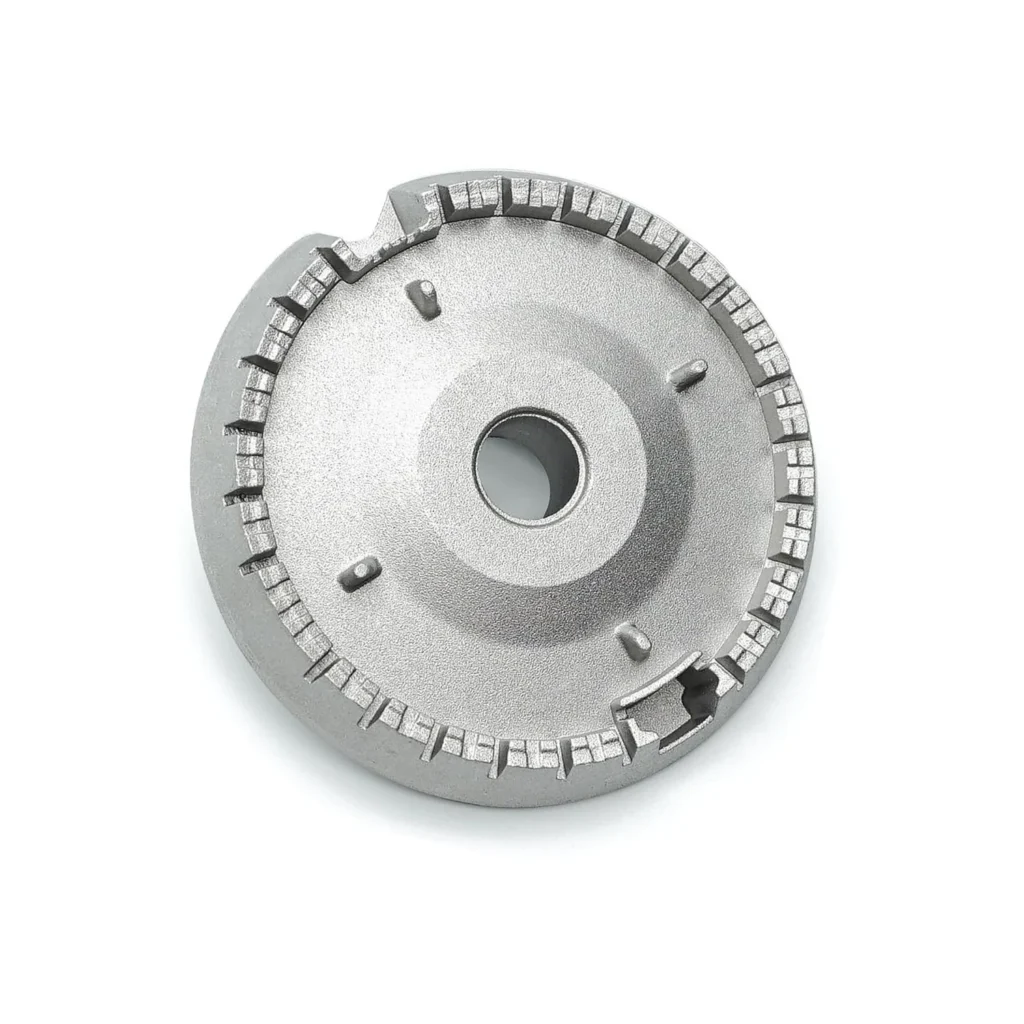
Your front burner ignites but won't hold a flame, or maybe it's producing a weak yellow flame instead of that crisp blue ring you're used to. Nine times out of ten, that's your surface burner head telling you it's had enough. The good news? Replacing the W10256028 burner head on your KitchenAid or Whirlpool gas range takes about ten minutes and requires zero tools.
What You Need Before Starting
This is one of the easiest appliance repairs you'll ever do. Here's your checklist:
- Replacement W10256028 surface burner head
- Your hands (seriously, no tools required)
- Mild dish soap and water for cleaning
- Soft cloth or paper towel
Repair time: 10-15 minutes
Difficulty: Easy
Safety First
Before touching anything, make absolutely sure your range is off and cool to the touch. If you've been cooking recently, wait at least 30 minutes. You don't need to shut off the gas supply for this repair — we're not touching any gas connections — but if it makes you feel better, go ahead and turn the valve behind the range to the off position.
Step 1: Remove the Old Burner Head
Lift off the burner grate — it just sits there, nothing holding it down. Now you'll see the burner cap sitting on top of the burner head. The cap is the round piece with holes in it. Lift it straight up and set it aside. Underneath is your burner head, which is the actual W10256028 part we're replacing.
Step 2: Lift Out the Failed Burner Head
The burner head sits in a recessed base and has a small positioning tab that keeps it aligned. Grab the burner head and lift straight up. It'll come right out — there are no screws, clips, or fasteners. If it feels stuck, it's probably just caked with cooking residue. Wiggle it gently side to side while lifting.
Step 3: Clean the Burner Base
With the old head out, you'll see the igniter electrode (the white ceramic piece) and the burner base. This is your chance to clean up all that grease and food debris that's been building up. Use a damp cloth with a drop of dish soap to wipe down the base. Make sure you don't bend or damage the igniter — it's fragile. Let everything dry completely before moving on.
Step 4: Install Your New W10256028 Burner Head
Look at your new burner head. You'll see a small notch or tab on one side — this needs to line up with the corresponding slot in the burner base. Position the head so the tab aligns, then press down gently until it seats flush. It should sit level with the cooktop surface. If it's crooked or raised on one side, lift it back out and try again.
Step 5: Reinstall Cap and Grate
Place the burner cap back on top of the burner head. The cap also has alignment features — it should sit flat and centered. If it wobbles or sits at an angle, your burner head isn't seated properly. Remove the cap, reseat the head, and try again. Once the cap sits flat, put your grate back in position.
Testing After Installation
Turn on the burner you just repaired. You should hear the igniter clicking and see the flame light within 2-3 seconds. The flame should be blue with maybe a tiny yellow tip, and it should form a complete ring around the burner. If you're getting all yellow flames or the flame pattern is uneven, turn it off and check that both the burner head and cap are seated correctly with their alignment tabs in the right spots.
Frequently Asked Questions
Will W10256028 fit my KitchenAid KSGG700ESS0 range?
Yes, this burner head is a direct fit for the KSGG700ESS0, KSGG700ESS1, KSGG700EBL0, KSGG700EWH0, and dozens of other KitchenAid, Whirlpool, and Maytag gas range models. It replaces the original part numbers WPW10256028, AP6017962, PS11751263, and 1873529. Check your model number against the compatibility list to confirm.
Why won't my burner light after replacing the head?
First, check that the burner head and cap are both properly aligned and seated. If the cap is even slightly off-center, it'll block the igniter spark. Second, make sure the burner head is completely dry — water in the ports will prevent ignition. If it still won't light, your igniter electrode might need cleaning or replacement.
Can I clean my old burner head instead of replacing it?
You can try, but if the ports are corroded or the metal is warped from heat, cleaning won't fix it. Blocked ports cause uneven flames and carbon buildup that creates more problems. If your burner head has visible corrosion, pitting, or won't produce an even flame after thorough cleaning, replacement is your best bet. At this price point, it's worth having a spare on hand anyway.
Take a photo of your burner layout before disassembly so you remember which cap goes with which head if you're replacing multiple burners.
Need the part for this repair?
W10256028 · In Stock · Ships next business day