
How to Replace URCO410 3-in-1 Hard Start Kit on Refrigerators & Freezers — Step-by-Step
Always unplug the refrigerator before working on electrical components. Capacitors can hold a dangerous charge even after power is disconnected.
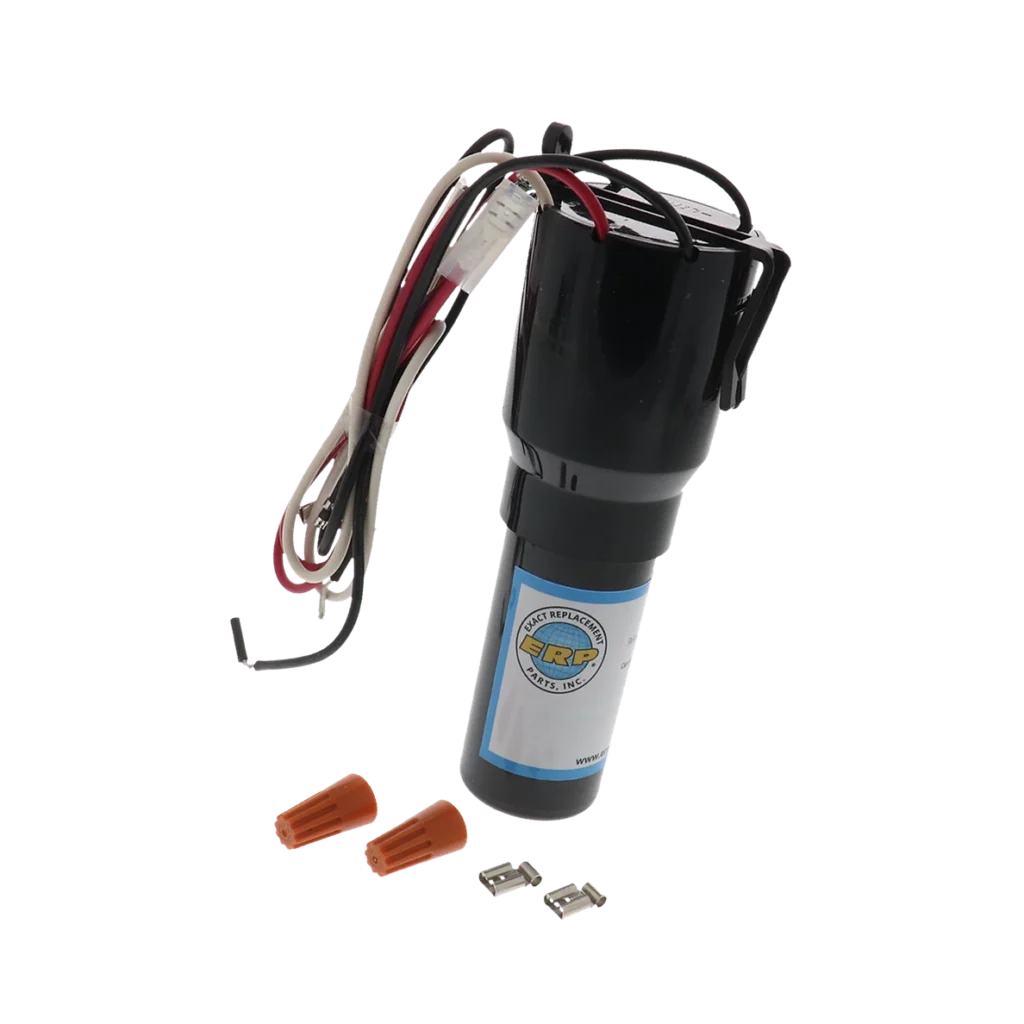
Your Whirlpool WRS325SDHZ clicks three or four times, the lights flicker, but the compressor won't start. That clicking sound? It's your compressor trying to fire up without enough electrical push. The URCO410 3-in-1 hard start kit gives that compressor the boost it needs to overcome startup resistance, especially when the refrigerant pressure is high after a recent cycle.
This universal kit works across multiple brands — I've installed it on everything from Kenmore 253.44312400 units to Haier ZHB88-125P4 models. It's one of those parts that punches way above its $15.99 price point.
What You Need Before Starting
- 1/4-inch nut driver
- Wire strippers
- Electrical tape
- Phillips screwdriver
- Multimeter (for testing connections)
- Needle-nose pliers
Repair time: 30-45 minutes
Difficulty: Intermediate — You'll be working with live electrical components
Safety First
Unplug the refrigerator completely before you start. Don't just flip the breaker — physically disconnect it from the wall outlet. Hard start kits connect directly to the compressor, which means you're dealing with high-voltage capacitors that can hold a charge even after power is disconnected. If you see a bulging or leaking capacitor on your existing setup, don't touch it. That's a sign of internal failure and those things can discharge violently.
Step 1: Access the Compressor Compartment
Pull the fridge away from the wall — you need at least three feet of clearance to work comfortably. The compressor is that black cylindrical component at the bottom rear of the unit. On most models like the Amana ART318FFDS or GE TBX18JABRRWW, you'll remove a cardboard or metal panel held by 2-4 screws. Some Whirlpool units have snap-in panels that pop off with gentle pressure at the bottom edge.
Step 2: Identify the Compressor Terminals
The compressor has three terminals sticking out the side, usually covered by a plastic terminal box. Remove that box — it's typically held by a single screw or clips. You'll see three terminals labeled C (common), S (start), and R (run). These labels might be molded into the plastic or stamped on the metal. If they're not visible, use your multimeter to identify them: the two terminals with the highest resistance reading are Start and Run.
Step 3: Remove the Old Start Components (If Present)
Some refrigerators come with a basic overload protector or start relay already attached. That's fine — the URCO410 replaces both. Carefully pull the old relay straight off the terminals. Don't wiggle it side to side, just pull firmly. If there's an external capacitor wired to the terminals, disconnect those wires and note which terminal each wire was connected to. Take a photo with your phone before removing anything.
Step 4: Install the URCO410 Hard Start Kit
The URCO410 combines three components: a start capacitor, potential relay, and overload protector. It comes pre-wired, which is why it's so popular. Connect the kit's three terminals to match the compressor: the wire labeled "C" goes to Common, "S" to Start, and "R" to Run. Push each terminal connector firmly onto the compressor pins until you feel them seat completely. Give each connection a gentle tug — if it pulls off easily, it's not seated properly.
The capacitor portion (the cylindrical component) should be mounted upright or at a slight angle. Use the included zip tie or mounting bracket to secure it to the compressor housing or nearby frame. Don't let it dangle freely — vibration from the compressor will eventually shake loose connections.
Step 5: Secure and Test
Replace the terminal box cover over the new hard start kit. Some covers won't fit perfectly with the added bulk of the URCO410 — that's normal. You can leave the cover slightly loose or trim a corner with wire cutters to accommodate the capacitor. Just make sure no bare metal terminals are exposed.
Before you push the fridge back into place, plug it in and listen. The compressor should start within 5-10 seconds with a smooth hum instead of that repetitive clicking. Let it run for 2-3 minutes, then check that the compressor is running steadily and the cabinet isn't vibrating excessively. Unplug it, replace the rear panel, and you're done.
Testing After Installation
After 15 minutes of runtime, feel the compressor body — it should be warm but not painfully hot to touch. Check the evaporator fan inside the freezer compartment to confirm it's running. Within 30-45 minutes, you should notice the freezer temperature dropping. On digital models like the Whirlpool WRT311FZDW, the display should show temperature actively decreasing. If the compressor cycles off and on normally (running for 20-30 minutes, then off for 10-15), your installation is successful.
Frequently Asked Questions
Will the URCO410 work on my specific refrigerator model if it's not listed?
This is a universal hard start kit designed for compressors between 1/8 HP and 1/3 HP, which covers about 95% of residential refrigerators and freezers. If your model isn't explicitly listed but matches that horsepower range, it'll work. Check the compressor nameplate for the HP rating — it's usually stamped right on the compressor body near the terminals.
Why does my compressor still click after installing the hard start kit?
If clicking persists, you've got a deeper problem — either the compressor itself is mechanically seized, or your terminal connections aren't fully seated. Remove the kit and check each terminal for corrosion or looseness. Also verify you've matched C-S-R correctly. If connections are solid and clicking continues, the compressor windings may be shorted internally, which means compressor replacement, not just a start kit.
Can I install this on a freezer as well as a refrigerator?
Absolutely. The URCO410 works on standalone freezers, combo units, and even some small commercial coolers. I've installed these on chest freezers that wouldn't start in hot garages where ambient temperature made startup harder. The part doesn't care whether it's cooling food or frozen peas — it just helps the compressor overcome initial starting resistance.
Take a photo of the original wiring configuration before removing the old start relay — it's your insurance policy if you need to reference the original setup.
Need the part for this repair?
URCO410 · In Stock · Ships next business day