
How to Replace SV9501M2528 SmartValve Gas Valve Assembly on Honeywell Resideo Furnaces — Step-by-Step
Turn off gas supply and electrical power before starting. Work in a well-ventilated area. Never bypass safety switches. If you smell gas, evacuate immediately and call your gas company.
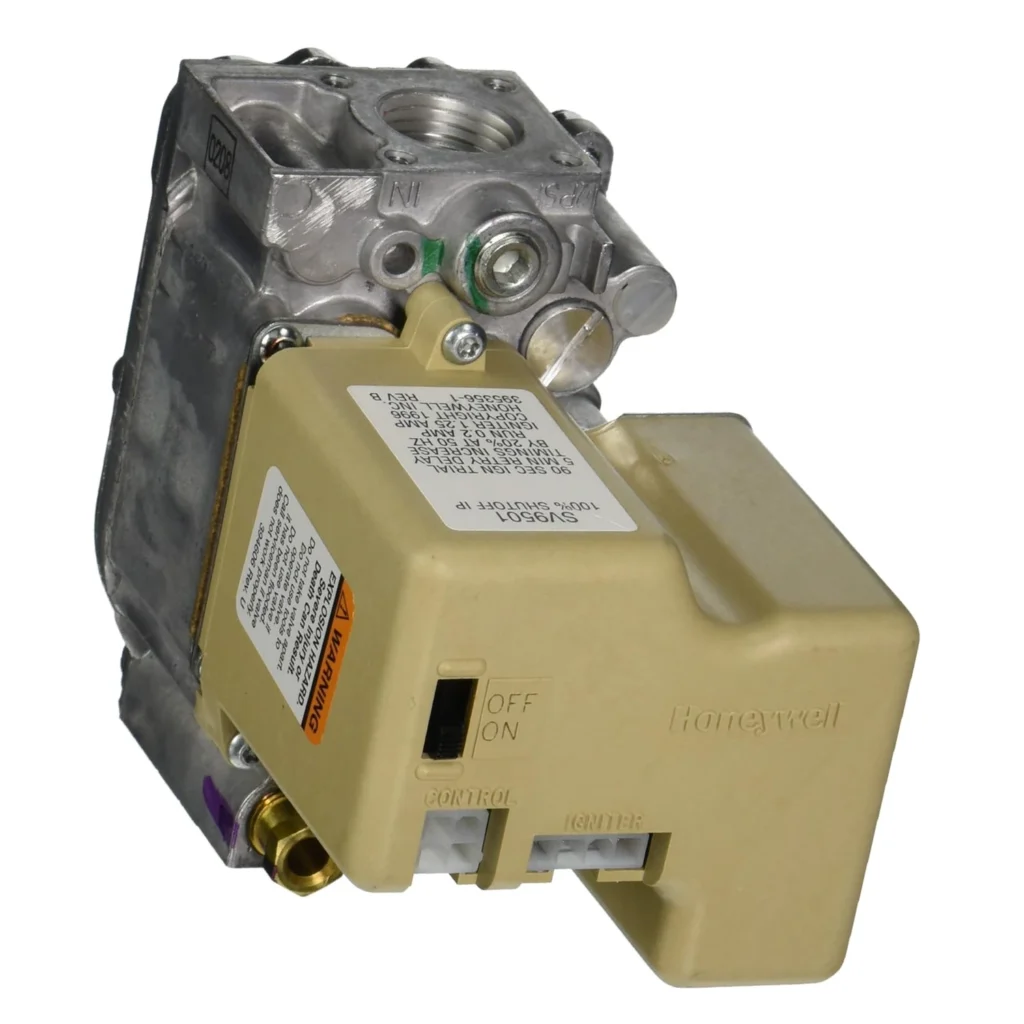
Your furnace clicks, the igniter glows orange, but nothing happens. No flame. No heat. Just that frustrating click-and-nothing cycle that tells you the gas valve isn't opening. If you've got a Honeywell Resideo furnace with a failed SmartValve assembly, you're looking at either a $500+ service call or a DIY repair that'll take you about an hour.
The SV9501M2528 SmartValve is the brain and gatekeeper for your furnace's gas supply. It controls ignition timing, flame sensing, and gas flow. When it fails, your furnace is dead in the water — no amount of thermostat adjusting will help.
What You Need Before Starting
This isn't a beginner repair, but if you're comfortable working with gas appliances and understand basic HVAC safety, it's definitely doable. Here's what you'll need:
- 1/4" and 5/16" nut drivers
- Phillips and flathead screwdrivers
- 7/16" and 1/2" wrenches (for gas line connections)
- Pipe thread sealant rated for natural gas or propane
- Multimeter (for testing electrical connections)
- Flashlight or work light
- Soap and water solution (for leak testing)
Estimated Time: 60-90 minutes
Difficulty: Intermediate-Advanced
Safety First — This Is Critical
You're working with natural gas or propane. One mistake can create a dangerous situation. Before you touch anything: turn off the gas supply to the furnace at the manual shutoff valve. Turn off power at the circuit breaker, not just the furnace switch. If you smell gas at any point during this repair, stop immediately, open windows, evacuate, and call your gas company. Don't mess around with gas leaks.
The SV9501M2528 replaces older models like SV9501M2726, SV9501M2718, and SV9500M2674, so verify your model number before ordering. This valve works with York models like 1SS04701, 1SP0452, and 1LD0470, plus Honeywell models including D1NA024N03606C through D1NH036N07206C series.
Step 1: Power Down and Access the Valve
Kill power at the breaker, then flip the furnace disconnect switch. Close the gas shutoff valve — it's usually a yellow or red handle on the gas line leading to the furnace. Remove the furnace access panel (usually 2-4 screws). The gas valve is typically mounted on the lower right side of the burner assembly, impossible to miss with its distinctive rectangular shape and multiple wire connections.
Step 2: Document and Disconnect Wiring
Take a photo of every wire connection before you touch anything. The SmartValve has multiple terminals: 24V power, ground, thermostat input, flame sensor return, and pilot connections. Label each wire with tape if your photo isn't crystal clear. Gently pull the wire connectors straight off — don't yank on the wires themselves. The pressure switch and rollout switch wires also connect to this valve.
Step 3: Disconnect Gas Lines
Here's where it gets real. You've got an inlet line (coming from the gas supply) and an outlet manifold (feeding the burners). Use your wrenches to loosen these connections. Hold the valve body steady with one wrench while loosening the fitting with another to avoid twisting the pipe. Some gas will bleed out — this is normal. Once disconnected, inspect the pipe threads. If they're damaged or corroded, stop and call a pro.
Step 4: Remove Mounting Hardware and Old Valve
The valve is held in place by a mounting bracket — usually two to four screws or bolts. Support the valve as you remove the last fastener so it doesn't drop and damage the burner assembly below. Lift the old valve out carefully. The manifold pipe might still be attached to the burner assembly, which is fine.
Step 5: Install the New SV9501M2528 Valve
Position the new valve in the mounting bracket. Thread in the mounting screws hand-tight first, then snug them down evenly. Don't overtighten — you're threading into sheet metal. Now for the gas connections: apply pipe thread sealant to the male threads only (never inside the valve or on female threads). Thread connections hand-tight first, then use wrenches to tighten an additional 1.5 turns. You want it snug but not gorilla-tight.
Step 6: Reconnect Wiring
Match your wire connections to your photo. Each terminal should have a firm connection — wiggle test them gently. The 24V common typically goes to the white wire, hot to red, but verify against your documentation. Pressure switch connections are usually purple wires. If any spade connectors are loose or corroded, replace them now.
Testing After Installation
Before you restore gas, double-check every connection. Now open the gas valve slowly and brush soapy water on every connection you touched. Watch for bubbles — any bubbles mean a leak. Fix it before proceeding. Once leak-free, restore power at the breaker. Set your thermostat to call for heat. You should hear the inducer motor start, then see the igniter glow, then hear the satisfying whoosh of gas igniting. Watch through a complete heating cycle.
Check for proper flame characteristics: blue flames with orange tips, no yellow or lifting flames. If the burners light but the valve shuts down after 5-7 seconds, you've got a flame sensing issue — check your ground wire connection.
Frequently Asked Questions
Will the SV9501M2528 work with my older SV9500 series furnace?
Yes, it's a direct replacement for SV9501M2726, SV9501M2718, and SV9500M2674 models. The mounting pattern and electrical connections are identical. Just verify your model number matches the compatibility list — York 1SS04701, 1SP0452, 1LD0470 and Honeywell D1NA series are all confirmed compatible.
Can I test if my gas valve is bad before replacing it?
Partially. With power on and a call for heat, you should measure 24VAC across the valve terminals. If voltage is present but the valve doesn't open (no gas flow, no flame), the valve is likely failed. However, intermittent failures are common — the valve might work during testing but fail under load. If your furnace igniter glows but no gas flows, and you've verified gas supply is on, the valve is the prime suspect.
Do I need to recalibrate or program the new SmartValve?
No. The SV9501M2528 is pre-configured for your furnace's specifications. It's plug-and-play once installed. The valve automatically manages ignition timing, gas pressure regulation, and safety shutoff. Just install it, connect everything properly, and it'll operate exactly like your original valve. No programming tools or software required.
Take clear photos of all wire connections before disconnecting anything. Apply pipe sealant only to male threads, never inside valve ports. Test all connections with soapy water before restoring power.
Need the part for this repair?
SV9501M2528 · In Stock · Ships next business day