
How to Replace EBR82230401 Main PCB Control Board on LG Refrigerator — Step-by-Step
Unplug refrigerator completely and wait 5 minutes before starting. Control board operates at high voltage and capacitors may retain charge.
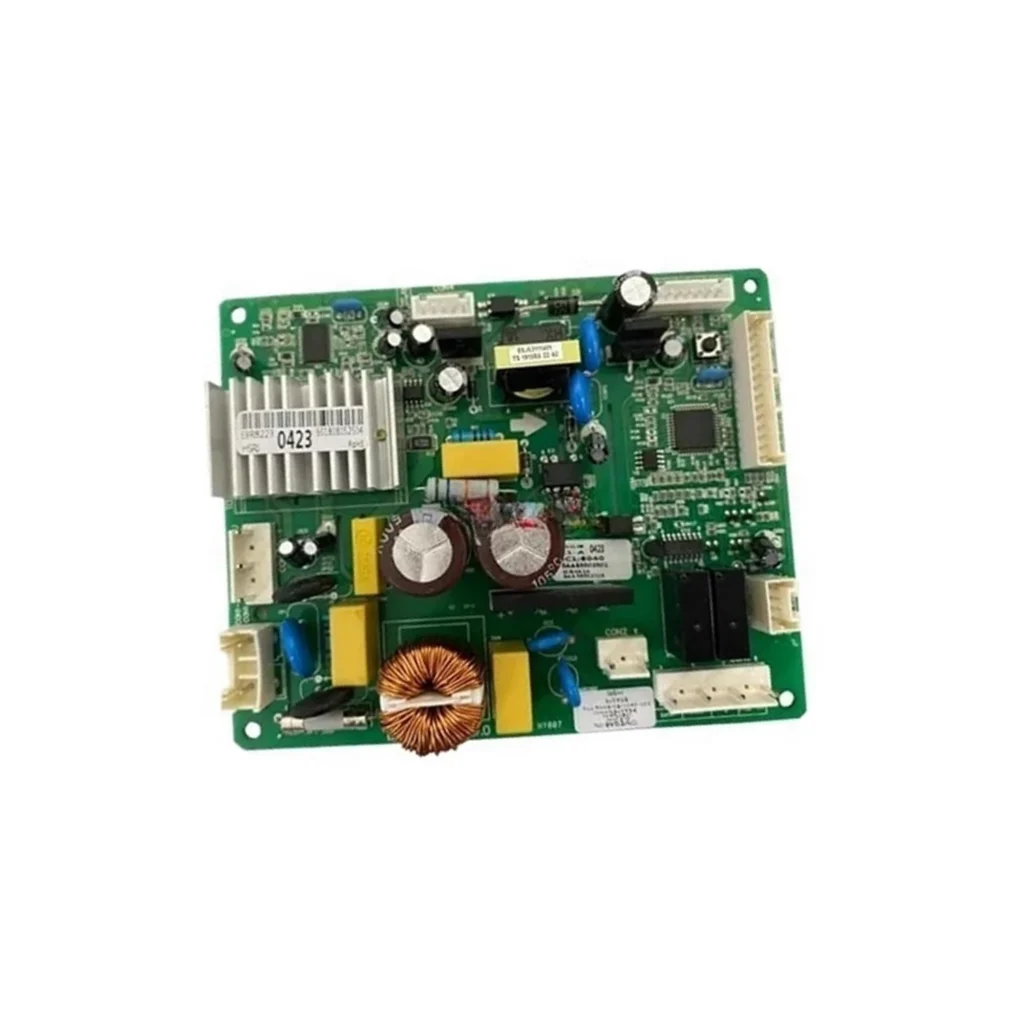
Your LG LRMVS3006S stopped cooling overnight, and the display's completely dark. Before you call for a $300+ service visit, the main control board might be the culprit — and it's something you can replace yourself in under an hour.
The EBR82230401 is the inverter motherboard that controls compressor operation, temperature regulation, and display functions on LG French door models like the LRMVS3006S, LRFVS3006S, and LRMDS3006S. When it fails, you'll typically see a blank display, intermittent cooling, or error codes that won't clear.
What You Need Before Starting
This repair requires basic tools and takes about 45-60 minutes. Here's what you'll need:
- Phillips screwdriver (#2)
- 1/4" nut driver
- Needle-nose pliers
- Work gloves (metal edges are sharp)
- Camera or phone (to document wire connections)
Difficulty Level: Moderate — You'll be working behind the refrigerator and dealing with multiple wire harnesses, but the connections are clearly labeled.
Estimated Time: 45-60 minutes
Safety First
Unplug your refrigerator completely before starting. Don't just rely on the circuit breaker — physically disconnect it from the wall outlet. The control board operates at high voltage, and you'll be working near the compressor area where electrical connections can retain charge even when powered off. Wait at least 5 minutes after unplugging to allow capacitors to discharge.
Step 1: Access the Control Board Compartment
Pull your refrigerator away from the wall to access the back panel. You'll find the control board housed in a metal compartment on the lower back section, typically on the right side near the compressor. Remove the 4-6 screws securing the metal cover using your Phillips screwdriver. The cover should slide off once the screws are removed — don't force it if it catches, check for hidden clips at the top edge.
Step 2: Document and Disconnect Wire Harnesses
This is critical: before touching anything, take clear photos of every wire harness connection. The EBR82230401 has 6-8 multi-pin connectors, and they're not always different sizes. Label each connector with tape if needed. Press the locking tab on each harness and pull straight out — never yank on the wires themselves. The larger connector on the left typically goes to the compressor, while the smaller ones handle temperature sensors and display functions.
Step 3: Remove the Faulty Control Board
The board is secured to the metal housing with 3-4 screws around the perimeter. Remove these with your nut driver — they're usually 1/4" hex head screws. Gently slide the board out of its mounting bracket. You might need to tilt it slightly to clear the wire routing clips. Handle the old board by its edges only; the circuit traces on the back can be sharp.
Step 4: Install the New EBR82230401 Board
Position your new board into the mounting bracket, aligning the screw holes. Don't force it — if it's not sliding in smoothly, check that no wires are caught behind it. Secure with the mounting screws, but don't overtighten. You want them snug, not stripped. Now reconnect each wire harness, using your photos as reference. You should hear a distinct click as each connector locks into place. Give each one a gentle tug to confirm it's seated properly.
Step 5: Reassemble and Power Test
Replace the metal cover and secure all screws. Double-check that no wires are pinched between the cover and housing. Push the refrigerator back into position, leaving enough clearance for air circulation (2-3 inches from the wall). Plug it back in and watch the display — it should light up within 3-5 seconds. You'll likely hear the compressor kick on within a minute or two.
Testing After Installation
Let the refrigerator run for 30 minutes, then check that the display shows the correct temperature readings. The fresh food section should be heading toward 37°F, and the freezer toward 0°F. Listen for normal compressor cycling — it should run for 15-20 minutes, then shut off. If you hear clicking or buzzing without the compressor starting, recheck your wire connections. Run the self-diagnostic test by pressing the fridge and express freeze buttons simultaneously for 8 seconds — on the LRMVS3006S and similar models, this cycles through system checks.
Frequently Asked Questions
Will replacing the control board reset my refrigerator settings?
Yes, the new board will boot with factory defaults. You'll need to reset your preferred temperature settings, turn off any features you don't use like express freeze, and potentially reset the water filter reminder if your model has one. This is normal — let it run for 24 hours before adjusting temperatures so it can stabilize.
Can I use EBR82230401 on my LRFDS3016S model?
Absolutely. The EBR82230401 is compatible with the entire LRMVS3006, LRFVS3006, and LRFDS3016 series. The board controls the same inverter compressor system across these French door models. Just verify your original board has the same part number to ensure connector compatibility.
What if my refrigerator still doesn't work after replacing the board?
First, verify all wire harnesses clicked into place — a partially connected harness is the most common issue. If connections are solid but you're still getting error codes, the problem might be the compressor itself or a failed temperature sensor. The control board manages these components but can't fix them if they're mechanically failed. Check for error codes on the display — they'll point you toward which component needs attention next.
Take clear photos of every wire harness connection before disconnecting anything. The connectors look similar and mixing them up will prevent proper operation.
Need the part for this repair?
EBR82230401 · In Stock · Ships next business day