
How to Replace 8537982 Washer Dryer Pedestal Pad Spacer on Whirlpool & Maytag — Step-by-Step
Never attempt to lift or separate stacked washer-dryer units alone. These appliances are extremely heavy and improper handling can cause serious injury or damage. Always unplug the dryer and turn off water supply before working.
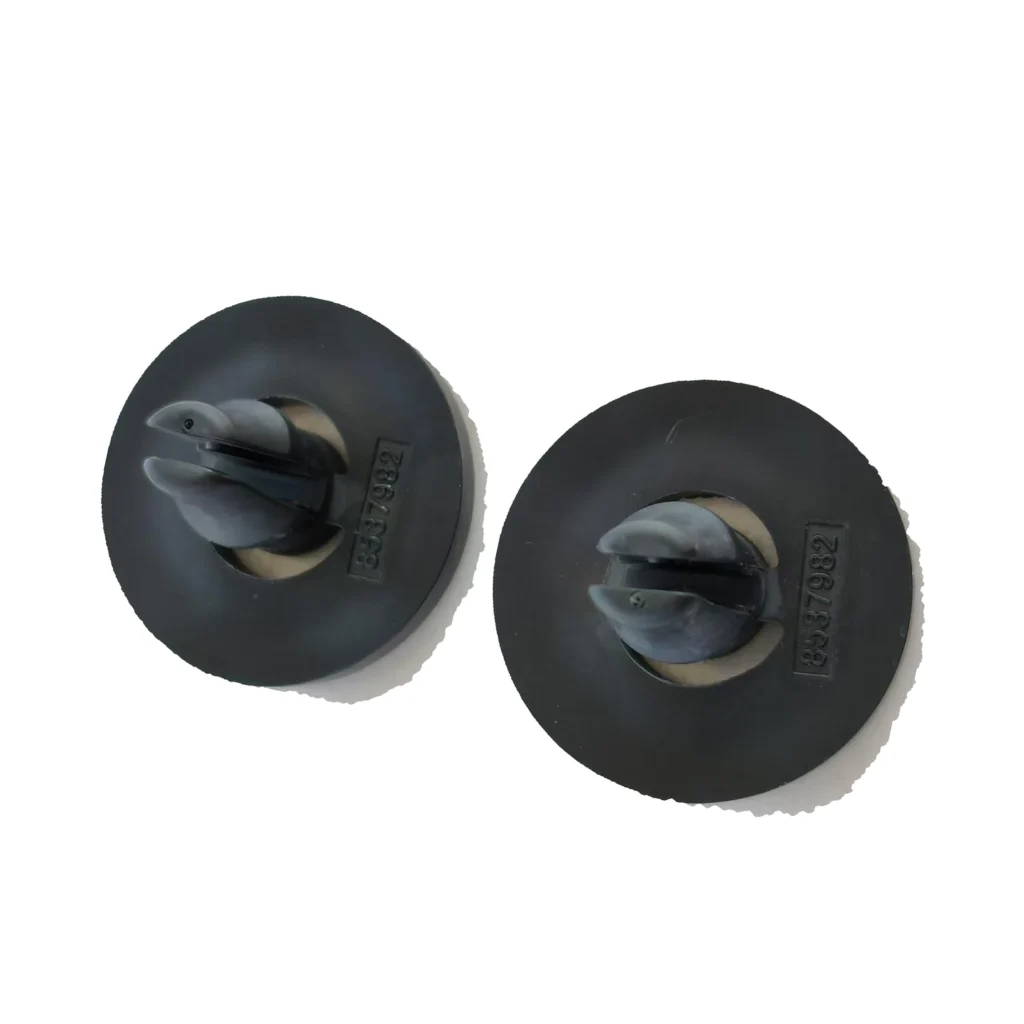
Your washer-dryer pedestal feels wobbly, or you've noticed the top unit isn't sitting level anymore. That little rubber pad spacer between your appliances might seem insignificant, but when it compresses or falls out, you'll hear rattling during spin cycles and potentially damage both units. The 8537982 pedestal pad spacer keeps proper spacing and cushioning between stacked Whirlpool, Maytag, and KitchenAid units — and replacing it takes about 10 minutes.
What You Need Before Starting
This is one of the simplest appliance repairs you'll ever do. You'll need:
- Replacement 8537982 spacer pad (also replaces WP8537982, AP6012995, PS11746216, PS988850)
- Helper (recommended for safety when separating units)
- Cleaning cloth
- Rubbing alcohol (optional, for cleaning surfaces)
Repair Time: 10-15 minutes
Difficulty: Easy
Safety First
You'll need to partially lift or separate your stacked washer and dryer. Don't attempt this alone — these units are heavy, and improper lifting can cause back injury or damage to the appliances. Unplug the dryer from the electrical outlet before starting. If your washer is mid-cycle, let it finish and drain completely. Turn off the water supply valves if you're concerned about stress on the hoses.
Step 1: Empty Both Appliances and Clear the Area
Remove all laundry and detergent from both units. You need clear access to all sides of your stacked setup. If your pedestal has a storage drawer, empty it completely — you may need to remove the drawer to access the spacer pads properly. Unplug the dryer and push any hoses aside to give yourself working room.
Step 2: Locate the Worn Spacer Pads
The spacer pads sit between the washer top and dryer bottom, typically at the four corners. On models like the WHP1000SQ1 or MHP1000SQ0, you'll find them near the mounting points where the dryer rests on the washer. If one pad has compressed or fallen out, check all four corners — they usually wear at similar rates. You might see indentations in the washer's top panel where the pads used to provide cushioning.
Step 3: Separate the Units (With Help)
With your helper, carefully lift the dryer straight up about 2-3 inches. You don't need to completely remove it — just enough clearance to access the spacer pads. Some stacked units have brackets that need unscrewing first; check your specific model. For Whirlpool WFP2715HW0 and similar models, the dryer simply rests on the washer with these pads in between. Have your helper support the dryer weight while you work quickly.
Step 4: Remove Old Pads and Clean Surfaces
Pull out the old spacer pads. They might be compressed flat or stuck to either surface. If there's adhesive residue, use rubbing alcohol on a cloth to clean both the washer top and dryer bottom where the pads sit. Any dirt or residue will prevent the new pads from seating properly. Let the surfaces dry for a minute before proceeding.
Step 5: Install New 8537982 Spacer Pads
Position the new spacer pads in the same locations where the old ones sat. They're designed to fit specific recesses or mounting points on your appliance combination. Press each pad firmly into place. If your pads have adhesive backing, peel the protective film and press down for 10 seconds to ensure good contact. For models like 3XWHP1505SH0 or 3XXHP1550VW0, the pads should align with the dryer's support feet.
Step 6: Lower and Test the Stack
With your helper, carefully lower the dryer back onto the washer. Make sure it settles evenly on all four spacer pads. Rock the dryer gently side-to-side — it should feel stable with no wobbling. Reconnect the dryer power cord, turn the water supply back on, and run a test cycle on both appliances. Listen for any rattling or unusual vibration during the washer's spin cycle.
Testing After Installation
Run your washer through a full cycle with a normal load. During the high-speed spin, stand nearby and listen for any metal-on-metal contact sounds. If you hear rattling, one of the spacer pads may not be seated correctly. Check that all four pads are still in position and the dryer is resting evenly. The stack should feel solid when you push on it gently from the side.
Frequently Asked Questions
How often should I replace these pedestal spacer pads?
Most spacer pads last 5-8 years under normal use. Replace them when you notice excessive vibration, wobbling between units, or visible compression of the pads. Heavy use or frequent overloading can wear them faster. If you stack a new dryer on an older washer (or vice versa), inspect the pads and replace them preventively.
Will these pads work if I'm stacking on a pedestal drawer base?
Yes, the 8537982 spacer works with both direct-stack configurations and pedestal bases. The pads go between the washer top and dryer bottom regardless of whether there's a pedestal underneath. Just make sure you're getting the correct part for your specific model combination — check your model number against the compatibility list.
Can I use generic rubber pads instead of the OEM part?
Not recommended. Generic pads won't have the correct thickness, density, or shape for your specific Whirlpool, Maytag, or KitchenAid model. The 8537982 is engineered for exact spacing and vibration dampening. Using incorrect spacers can cause the dryer to shift during operation, potentially damaging both appliances or voiding warranties. At under $10 for the OEM part, it's not worth the risk.
Check all four spacer pads even if only one appears damaged — they typically wear at similar rates and replacing all four prevents future wobbling issues.
Need the part for this repair?
8537982 · In Stock · Ships next business day