
How to Replace 8268383 Dishwasher Food Chopper Assembly on Whirlpool, KitchenAid & Kenmore — Step-by-Step
Turn off power at the circuit breaker and shut off the water supply valve before beginning this repair. Residual water will be present in the pump area.
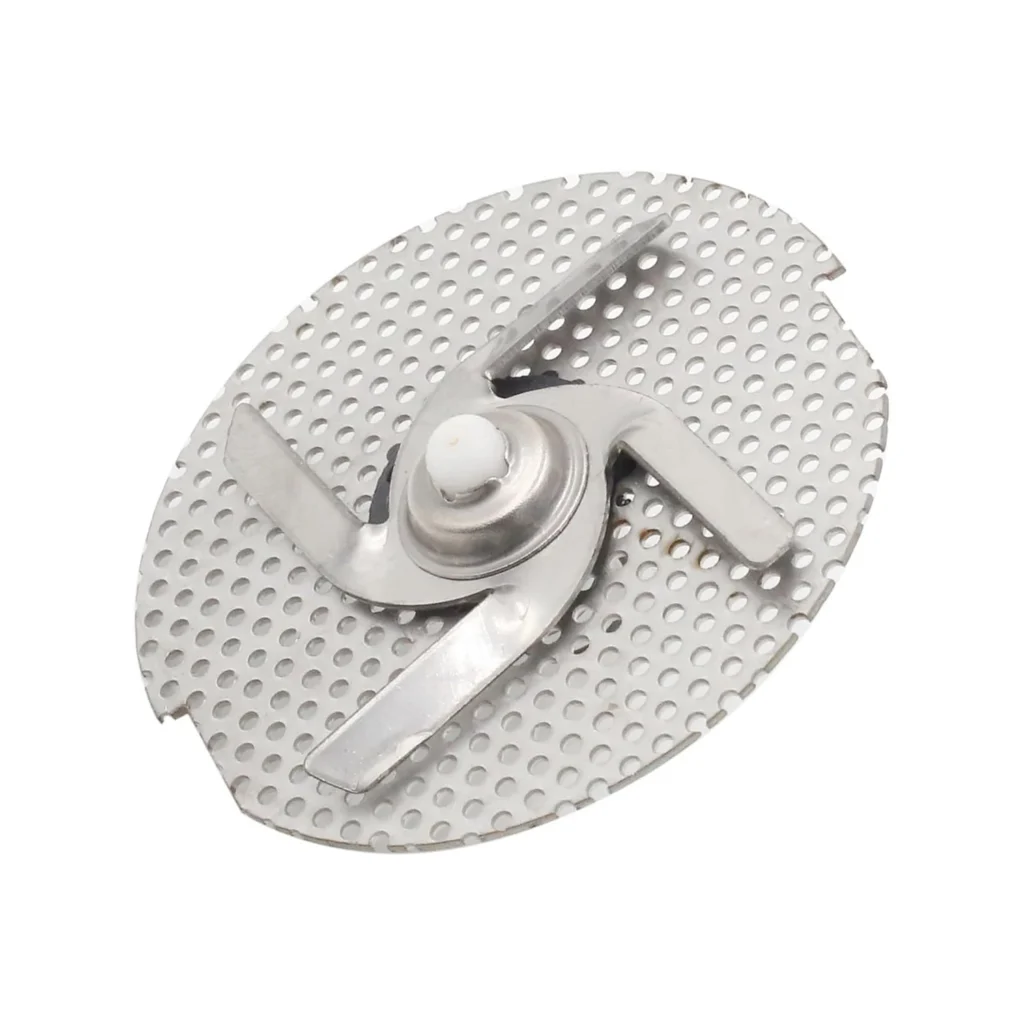
Your dishwasher's leaving gunk on the dishes again. You've run it twice, and there's still food residue stuck to your plates. Before you call a repair tech, check the food chopper assembly—it's the culprit in about 70% of these cases. When this part wears out or gets clogged, food particles bypass the chopper and recirculate onto your dishes instead of getting ground up and drained away.
The 8268383 food chopper assembly (also sold as WP8268383, AP6012235, or PS11745442) fits dozens of Whirlpool, KitchenAid, Kenmore, and Maytag dishwashers. If your model number starts with 7DU1100, 7GU2300, 7GU2455, KUDS01D, or KUDS01F, this guide applies to you.
What You Need Before Starting
Tools required:
- Flathead screwdriver
- Phillips screwdriver
- 1/2 inch wrench (critical for installation)
- Towel or small bucket for residual water
Repair time: 15-30 minutes
Difficulty: Easy
You don't need to be a pro for this one. The hardest part is remembering where all the screws go.
Safety First
Turn off power to your dishwasher at the circuit breaker before you start. Water and electricity don't mix, and you'll be working near the pump motor. Also, shut off the water supply valve under your sink—it's usually a small valve on the line feeding the dishwasher. Even after draining, expect some residual water in the pump area, so keep that towel handy.
Step 1: Access the Dishwasher Pump Area
Pull out the bottom dish rack completely. Remove the lower spray arm by twisting it counterclockwise or lifting the center cap (depends on your model). Next, unscrew the spray arm support—usually two or three screws holding the round plastic housing. Lift out the filter assembly and set it aside. You'll now see the sump area where the chopper assembly sits.
Step 2: Remove the Old Food Chopper Assembly
The chopper assembly is held in place by a spring-loaded mechanism. Grip the top of the chopper blade housing and pull straight up with steady pressure. It might resist initially—that's the spring tension. Once you overcome the spring force, it'll pop out. Inspect the old chopper for wear. You'll probably see chipped blades, accumulated debris, or a cracked housing. That's why your dishes weren't getting clean.
Step 3: Prepare the New Chopper for Installation
Here's where most DIYers mess up: they try to just push the new chopper in and wonder why it won't seat properly. The spring underneath needs to be compressed first. Take your 1/2 inch wrench and insert it into the front opening of the sump area, pushing down on the spring mechanism to compress it slightly. This creates the clearance you need.
Step 4: Install the New 8268383 Chopper Assembly
With the wrench holding the spring compressed, position the new chopper assembly above the opening. The alignment tabs need to match the slots in the sump. Lower it straight down—when it's positioned correctly, it'll drop right into place. Remove the wrench, and the spring tension will lock the chopper securely. Give it a gentle tug upward to confirm it's seated. One user put it perfectly: "The trick to inserting the new chopper is to use a 1/2 inch wrench in the front so the spring is compressed and then it just drops in. Wrench is removed and the chopper is locked in."
Step 5: Reassemble and Test
Reinstall the filter assembly, spray arm support (with screws), and lower spray arm. Replace the bottom rack. Turn the water supply and circuit breaker back on. Run a rinse cycle without dishes to verify the chopper is operating correctly. Listen for the normal grinding sound when the pump runs—it should be smooth, not rattling or squealing. After the cycle, check for leaks around the sump area.
Testing After Installation
Run a full wash cycle with a load of dirty dishes. Pay attention during the wash phase—you should hear the chopper processing food particles. After the cycle completes, inspect your dishes. They should be spotless. Check the filter for proper drainage—no standing water in the sump means the chopper is doing its job. As one satisfied customer reported: "Re assembled the other parts and dishwasher cleans like new."
Frequently Asked Questions
Why won't my new chopper assembly stay in place?
You're fighting against the spring tension. Use the 1/2 inch wrench technique described in Step 4 to compress the spring first. The chopper will only lock in when the alignment tabs match the sump slots perfectly—rotate it slightly if needed.
Can a clogged food chopper cause my dishwasher not to drain?
Absolutely. When the chopper gets clogged with debris, it prevents proper water flow through the pump system. This backs up the drain cycle and can even trigger error codes on some models. Food particles that should be chopped and drained get stuck, creating a blockage that affects the entire drain system.
How often should I replace the food chopper assembly?
Most choppers last 5-8 years with normal use. Replace it sooner if you notice poor cleaning performance, unusual grinding noises, or visible damage to the chopper blades. If you regularly wash heavily soiled dishes without pre-rinsing, you might need replacement every 3-4 years due to accelerated wear.
Use a 1/2 inch wrench to compress the spring mechanism before installing the new chopper—it drops right in when the spring is compressed properly.
Need the part for this repair?
8268383 · In Stock · Ships next business day